This guide provides the steps required to configure Provisioning for TELUS Business Connect and includes the following sections:
The following provisioning features are supported:
Push New Users
New users created through OKTA will also be created in the third party application.
Push User Deactivation
Deactivating the user or disabling the user's access to the application through OKTA will deactivate the user in the third party application.
Push Profile Updates
Updates made to the user's profile through OKTA will be pushed to the third party application.
Import New Users
New users created in the third party application will be downloaded and turned in to new AppUser objects, for matching against existing OKTA users.
Import Profile Updates
Updates made to a users profile in the third party application will be downloaded and applied to the profile fields stored locally in Okta.
Reactivate Users
User accounts can be reactivated in the application.
Profile Master
App can be configured as profile master
Import User Schema
Before you configure provisioning for TELUS Business Connect, check the following requirements:
To enable Provisioning Features, you need to have a valid TELUS Business Connect Admin account.
In order to user the Profile Master functionality, you need to have the following feature flags enabled. Contact Okta Support to have these enabled for your org:
ALLOW_BOTH_PROFILE_MASTERING_AND_PUSH
ATTRIBUTE_LEVEL_MASTERING
Contact TELUS Business Connect to enable Directory Integration for your corresponding account.
If you'd like to test using the TELUS Business Connect UAT environment, you can do so using the TELUS Business Connect UAT application available only in Okta Preview. If you do not have an organization in Okta Preview, contact Okta.
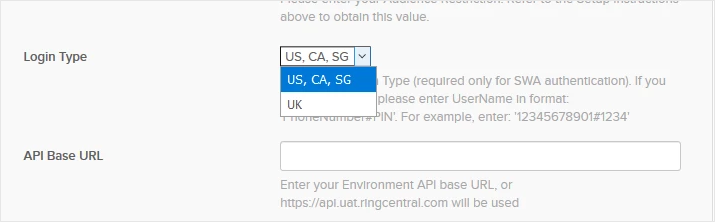
Make sure you have selected your Login Type under the General Settings tab in Okta:
You can now configure your Provisioning settings for TELUS Business Connect as follows:
Check the Enable API Integration box.
TELUS Business Connect uses Oauth to integrate with its API, the integration uses the credentials of the TELUS Business Connect admin during setup to authorize Okta to perform actions on the TELUS Business Connect Admin's behalf.

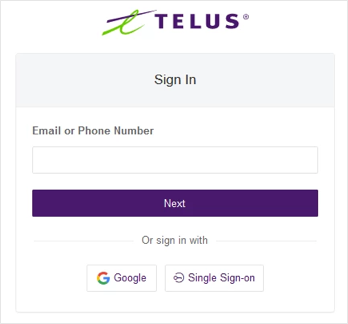
Click Authenticate with TELUS. This opens a new window, where the TELUS Business Connect admin can enter their credentials:
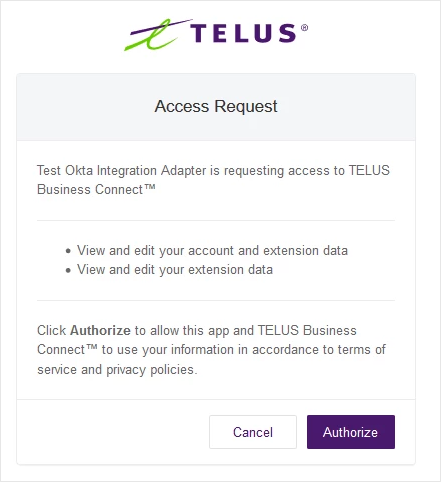
Now click Authorize to grant access to TELUS Business Connect to complete the authorization process:
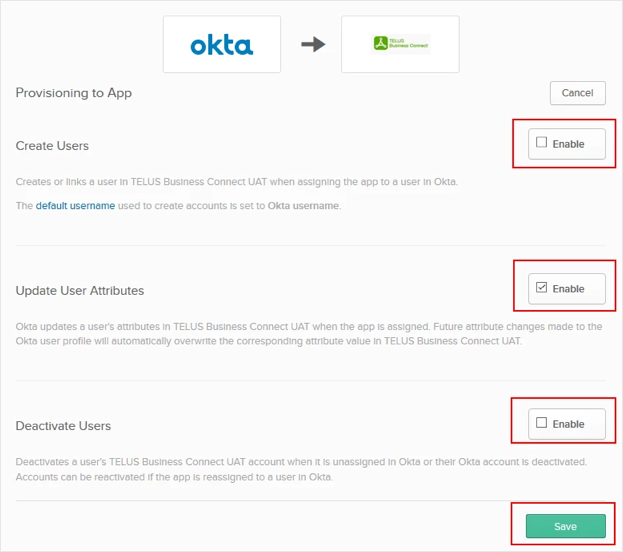
Select To App in the left panel, then select the Provisioning Features you want to enable, then click Save:
Note: The authenticated session is valid for one month since last usage of provisioning features. If you will not use provisioning for more that one month, you'll have to re-authenticate the app.
Refer to the Schema Discovery section for information about adding extra user attributes.
While either Okta or Active Directory are the sources of truth for most attributes in a user profile, in the case of a TELUS Business Connect deployment, the Direct Number and Extension information comes from TELUS Business Connect. To support this, you need to setup bi-directional sync for these attributes so that values can flow back to Okta or Active Directory.
To achieve this, do the following:
Contact Okta Support to enable the ALLOW_BOTH_PROFILE_MASTERING_AND_PUSH feature flag.
Add the Direct Number and Extension Number attributes via Schema Discovery to the AppUser profile by navigating to Profile Editor > TELUS Business Connect > Add Attributes.
Set mappings via the Profile Editor in the TELUS Business Connect to Okta section:
You should have the following configured:
appuser.userName > login
appuser.firstName > firstName
appuser.lastName > lastName
appuser.userName > email
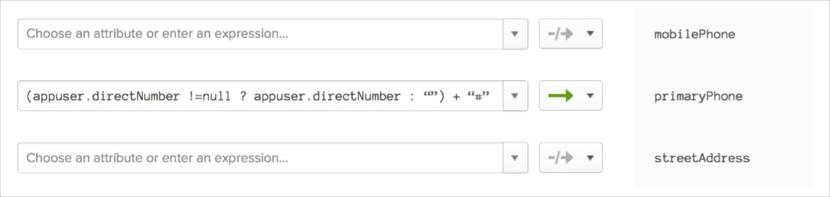
Configure the mapping for directNumber and extensionNumber:
For example, map a combined value to the primaryPhone attribute in the Okta profile – the format is [directNumber]#[extensionNumber]:
(appuser.directNumber != null ? appuser.directNumber : "") + "#" + appuser.extensionNumber
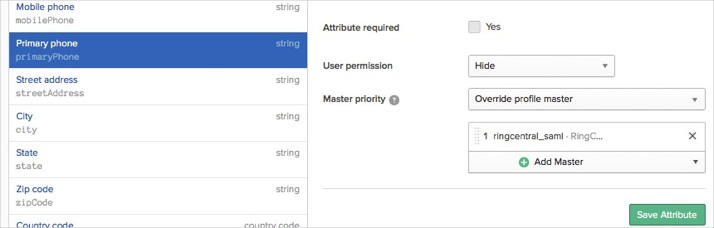
For the primaryPhone attribute, you need to set the TELUS Business Connect as the Master:
Click on the Primary phone attribute in the Profile Editor.
Under Master priority, select Override profile master.
Add TELUS Business Connect as the master as shown below.
Click Save Attribute.
Enable the Profile Master provisioning feature for the application.
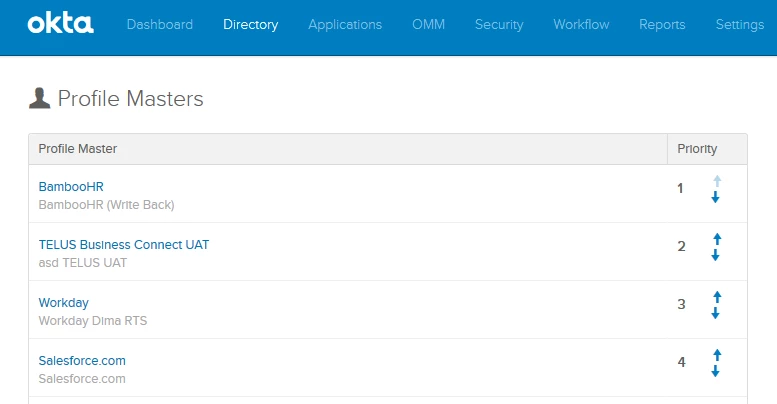
Note: Make sure you have the right master priority set if there are other Profile Master apps. You can do so by going to Directory > Profile Masters.
TELUS Business Connect supports User's Schema Discovery, so you can add extra attributes to User's Profile. To do that in Okta:
Navigate to Directory > Profile Editor.
Select APPS section and find your app in the list.
Check the list of the attributes and if you don't find what you need, click Add Attribute and you'll see the list of extended attributes.
Check the attributes you want to add, then click Save.
You are now able to import and push these User's attributes values from/to TELUS Business Connect
The following list is the minimum set of attributes needed from Okta into TELUS Business Connect:
| OKTA | TO > TELUS Business Connect |
|---|---|
user.firstName |
firstName |
user.lastName |
lastName |
| user.email | |
| user.mobilePhone | mobilePhone |
| user.streetAddress | street |
| user.city | city |
user.state Note: Make sure State in AD/Okta is in proper ISO format |
state |
| user.zipCode | zip |
| user.countryCode | country |
| user.department | department |
All pushed users will have the status of Not Activated
Groups are not scanned during import from TELUS Business Connect
You may have a limited number of Phone Extensions in TELUS Business Connect, so you won't be able to create new users if all Phone Extensions are busy.
TELUS Business Connect may have more than one user record for one email. Since Okta uses email address as the unique identifier per user, you need to ensure that TELUS Business Connect does not have duplicate users with the same email address.
Okta can only import one directNumber value, so if a user has several numbers set in [AppName], only the first one will be imported.
| ERROR MESSAGE | EXPLANATION |
|---|---|
The [${parameterName}] is invalid. Please correct the parameter in Active Directory. |
Values coming from Active Directory are not right. Please correct the values. Make sure all the values are right. |
Resource for parameter [${parameterName}] is not found. |
Value is missing in Active Directory. Please correct it. |
| JSON can not be parsed. Please check your data AD and correct it. | JSON can not be parsed. Please check your data AD and correct it. |
| Service Temporarily Unavailable. Please check back later. | Please check back again in sometime. Issues on Okta. |
| Extension already in use. Please go to RingCentral's web portal and see what extensions are available. | Extension already in use. Please check in service web if extension is available or not. |
| user.city | city |
| Extension number is duplicate. Please correct in Active Directory if you have an extension field. Otherwise edit it in the RingCentral Service web portal | To bulk edit extensions in the TELUS Business Connect web portal. Please go to User Management > edit extensions and follow the instructions to edit. |
| More than one record found for Email: [email] | TELUS Business Connect has more than one user record for the given [email]. Since Okta uses email address as the unique identifier per user, you need to ensure that does not have duplicate users with the same email address. |
| user.countryCode | country |
| user.department | department |