The Okta/miniOrange SAML integration currently supports the following features:
Login to your Wordpress account as an administrator.
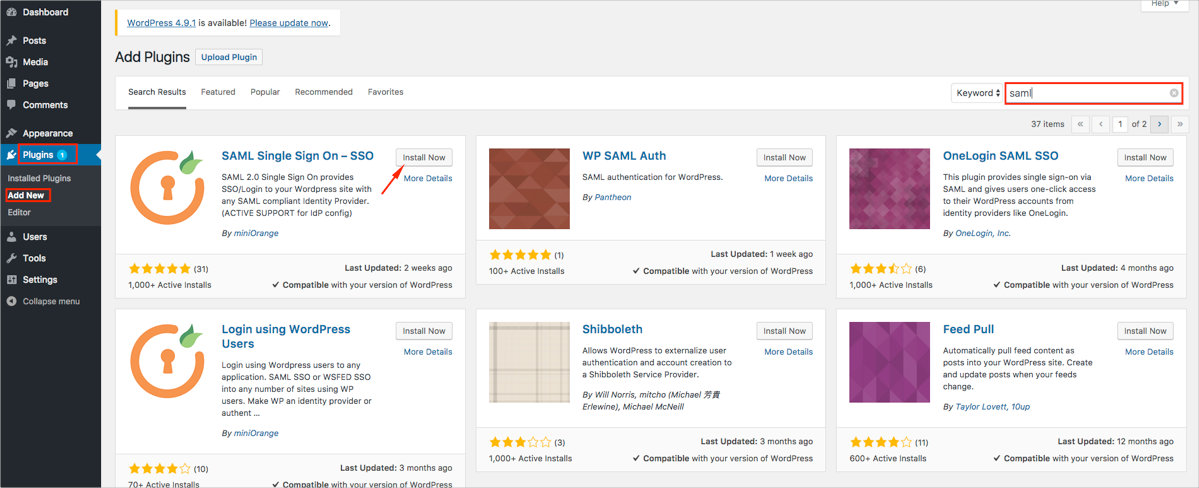
Navigate to Plugins, select Add New, search for the SAML Single Sign On -- SSO plugin by miniOrange, and then install it:
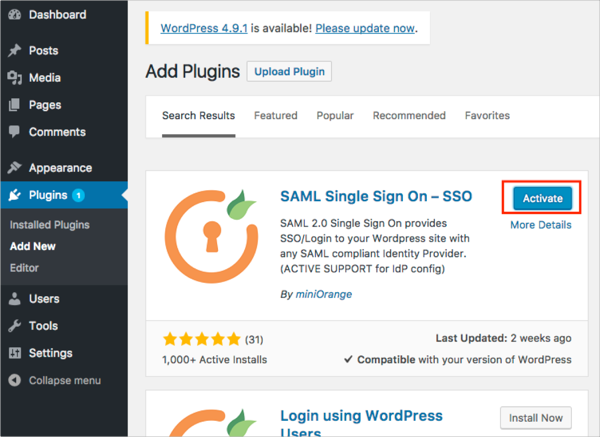
Click Active to enable the plugin:
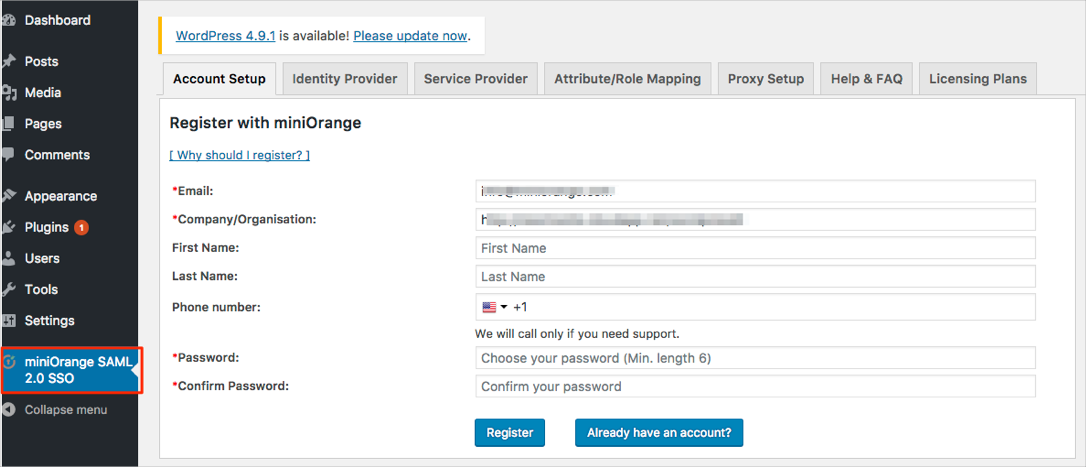
Navigate to the miniOrange SAML 2.0 SSO plugin and register a new account for miniOrange or log in with the existing one:
If you use a premium plugin version, proceed to step 11.
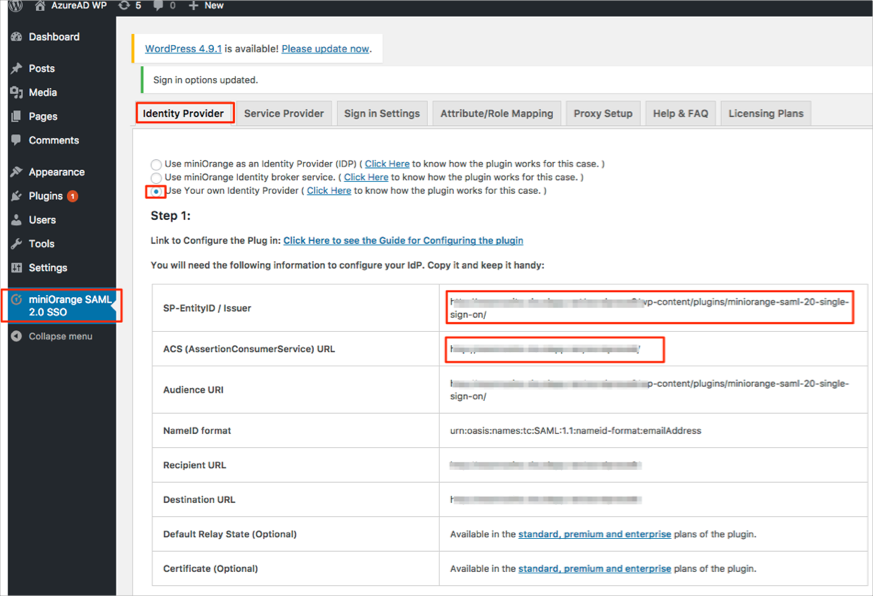
Select the Identity Provider tab, then follow the steps below (see screen shot at end of steps for reference):
Select User Your own Identity Provider.
SP-EntityID / Issuer: Copy/save this value.
ACS (AssertionConsumerService) URL: Copy/save this value.
Select the Service Provider tab and click Upload IDP Metadata:
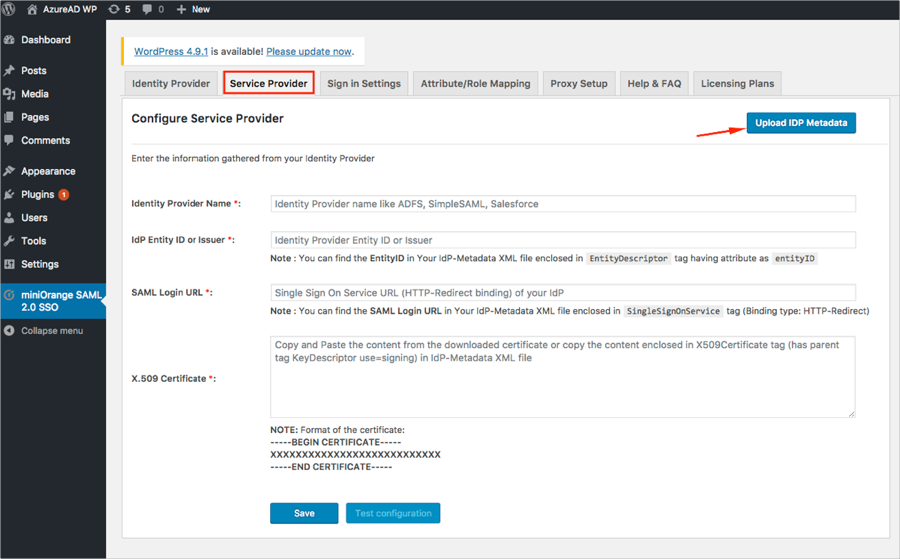
Follow the steps below (see screen shot at end of steps for reference):
Identity Provider Name: Enter Okta.
Enter metadata URL: Copy and paste the following:
Sign into the Okta Admin dashboard to generate this value.
Important: Make a note of this URL, you will need it again in step 13.
Click Fetch Metadata.

Click Save:
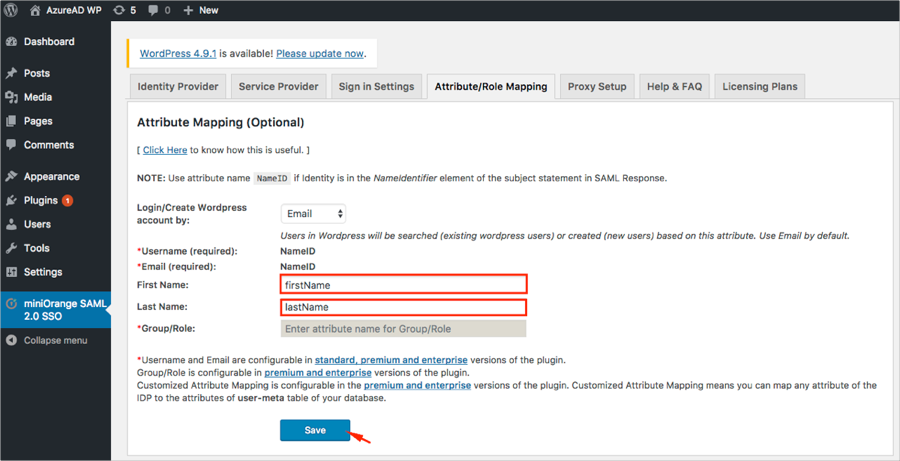
Select the Attribute/Role Mapping and follow the steps below (see screen shot at end of steps for reference):
First Name: Enter firstName.
Last Name: Enter lastName.
Click Save.
Proceed to step 17.
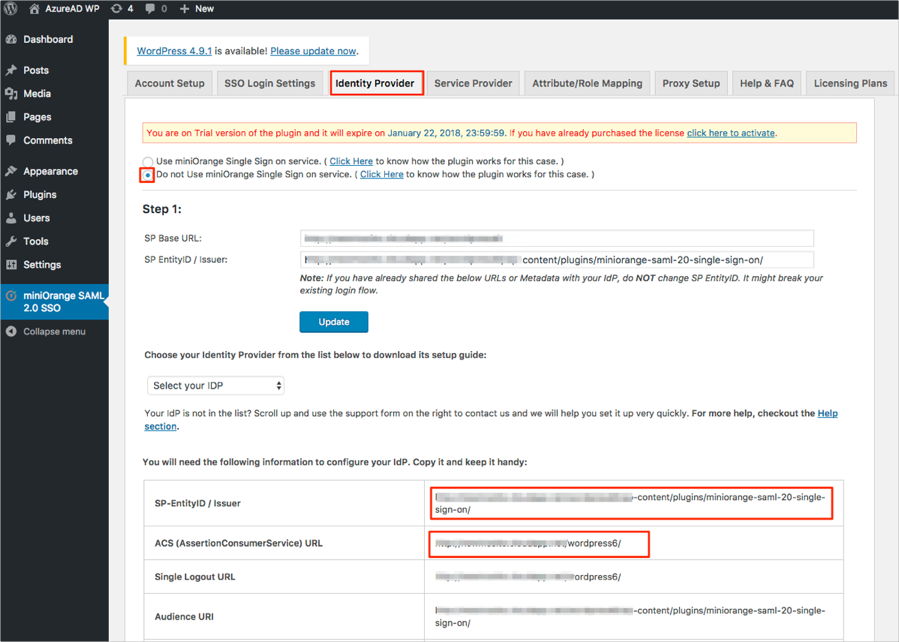
Select the Identity Provider tab, then follow the steps below (see screen shot at end of steps for reference):
Select Do not Use miniOrange Single Sign on service.
ACS (AssertionConsumerService) URL: Copy/save this value.
SP-EntityID / Issuer: Copy/save this value.
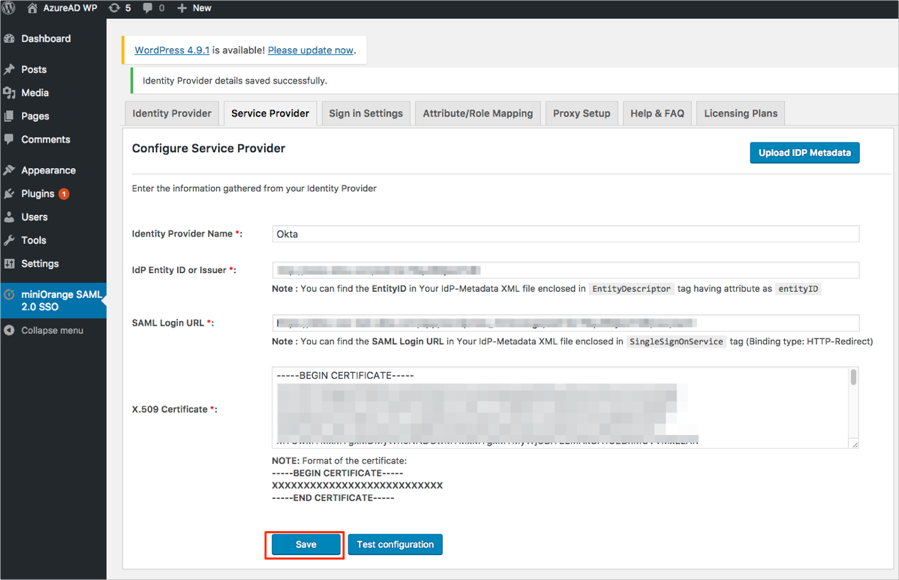
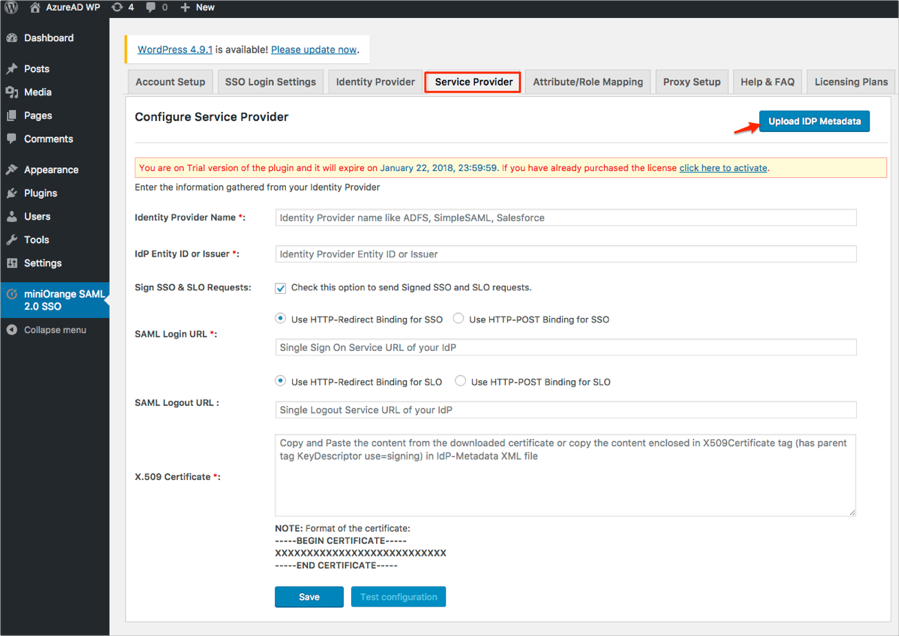
Select the Service Provider tab, then click Upload IDP Metadata:
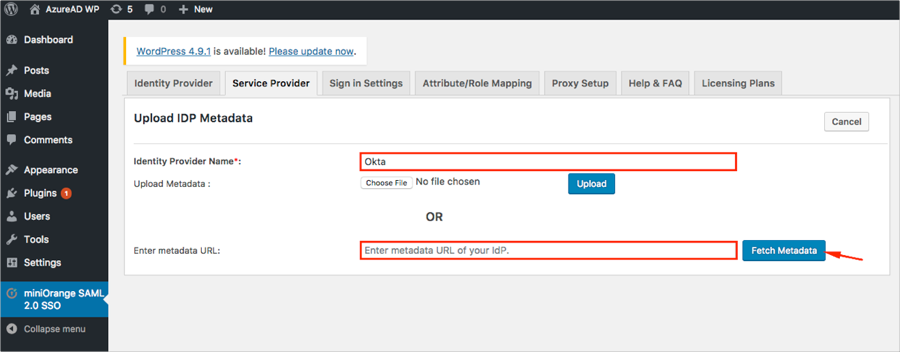
Follow the steps below (see screen shot at end of steps for reference):
Identity Provider Name: Enter Okta.
Enter metadata URL: Enter the Metadata URL you made a copy of back in step 7.
Click Fetch Metadata.
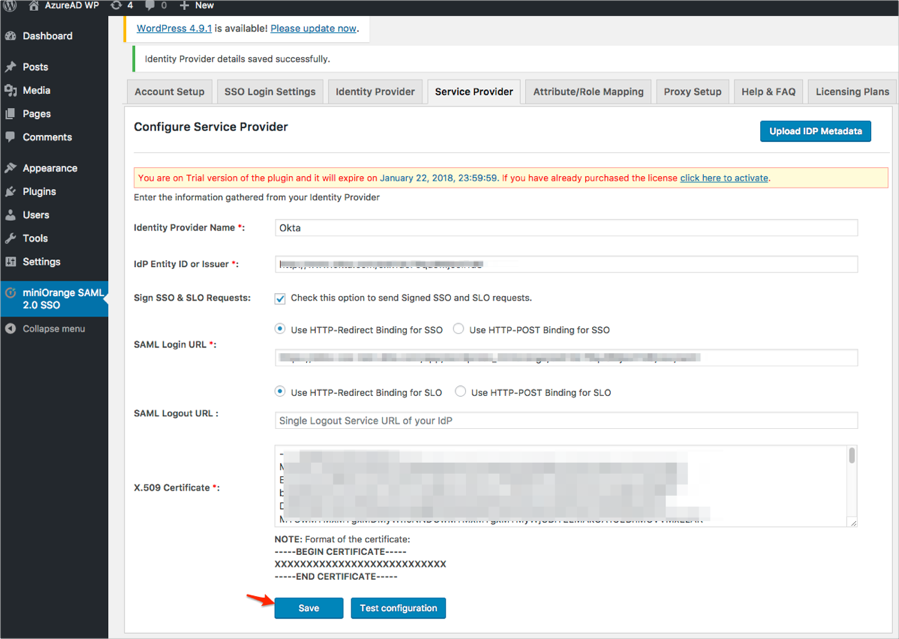
Click Save:
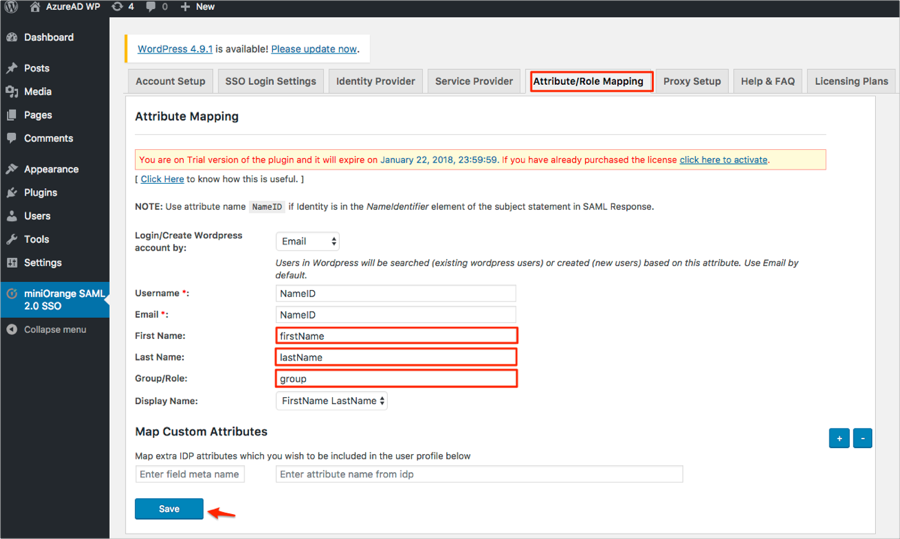
Select the Attribute/Role Mapping and follow the steps below (see screen shot at end of steps for reference):
First Name: Enter firstName.
Last Name: Enter lastName.
Group/Role: Enter group.
Display Name: Select the appropriate value.
Click Save.
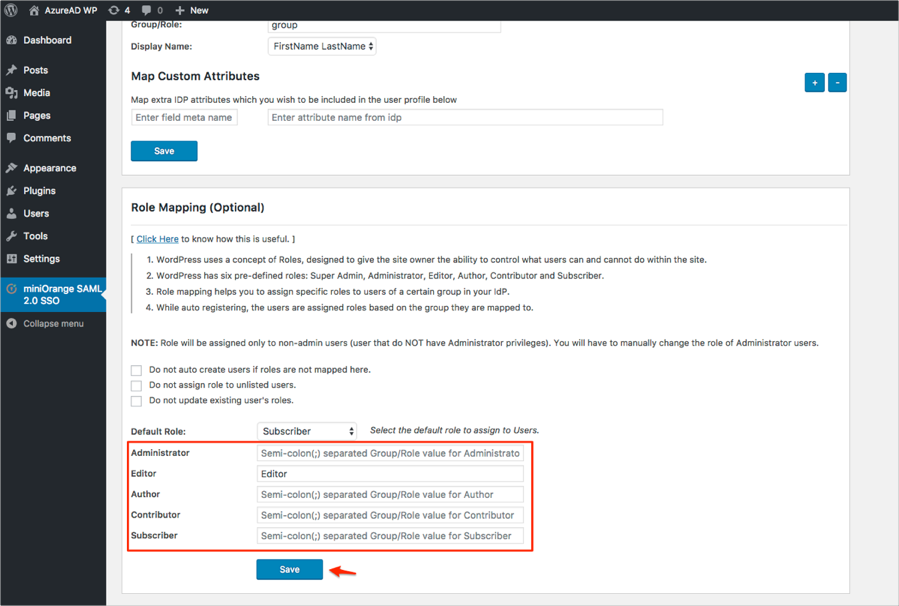
Still on the Attribute/Role Mapping tab, scroll down to Role Mapping (Optional) section and map the Wordpress roles to a certain groups in Okta, then click Save:
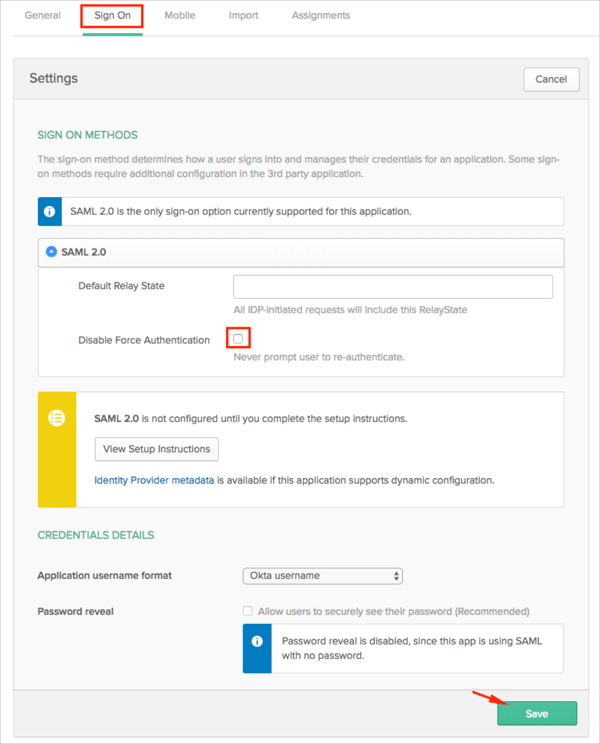
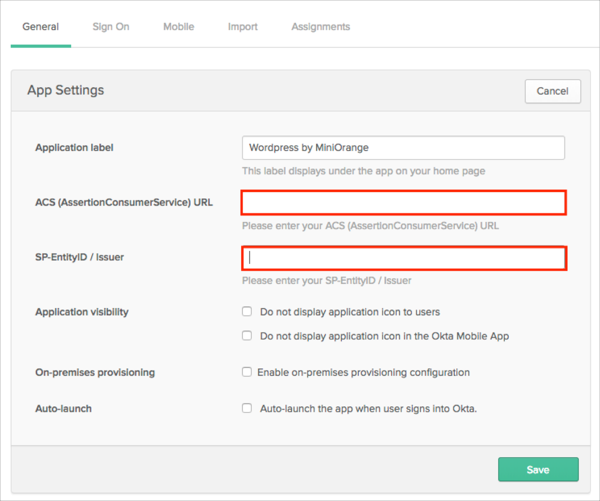
In Okta, select the General tab for the Wordpress by miniOrange SAML app, then click Edit.
Paste the ACS (AssertionConsumerService) URL value you saved earlier (step 5 for the free plugin, step 11 for the premium plugin) into the corresponding field.
Paste the SP-EntityID / Issuer value you saved earlier (step 5 for the free plugin, step 11 for the premium plugin) into the corresponding field.
Click Save.
OPTIONAL: Group Attribute steps (only for premium plugin version):
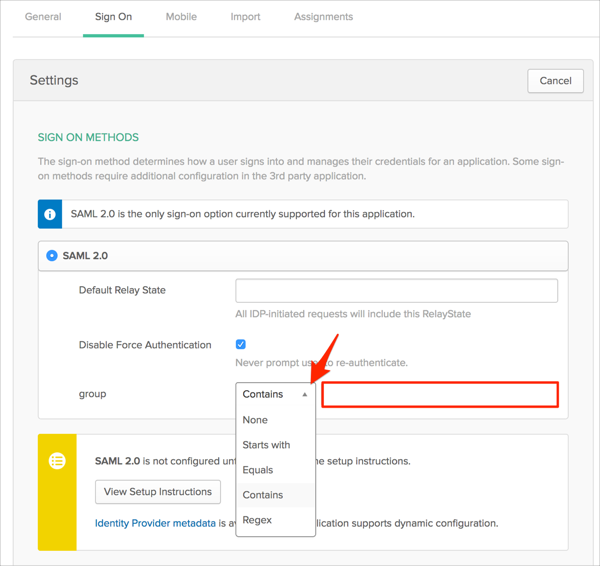
To send groups as a part of SAML assertion, in Okta select the Sign On tab for the Wordpress by miniOrange SAML app, then click Edit.
Select the appropriate filter from the group drop-down menu, then type the preferred value into the field.
Click Save.
Done!
The following SAML attributes are supported:
| Name | Value |
|---|---|
| firstName | user.firstName |
| lastName | user.lastName |
| group | This will be configured in the app UI; see Group attribute instructions (step 17) above. |
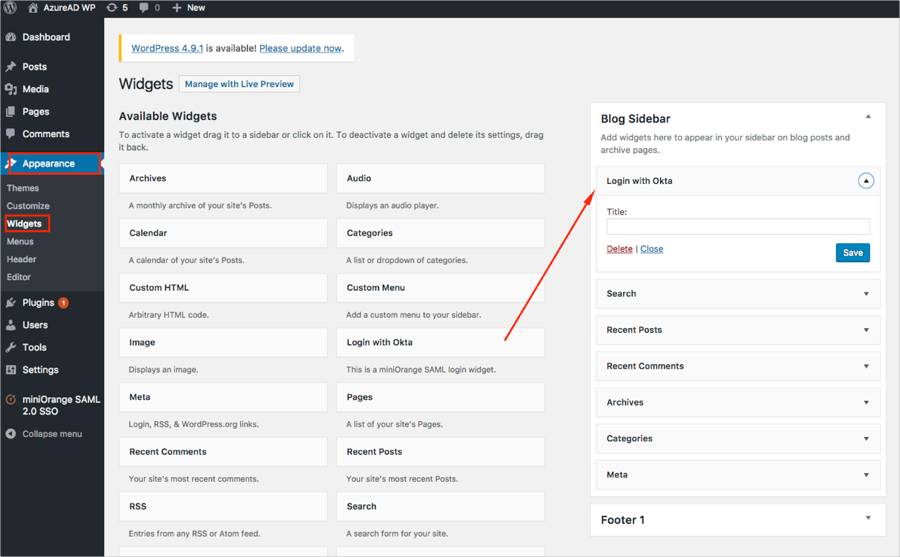
In Wordpress, navigate to Appearance and select Widgets, then drag and drop Login with Okta to your favorite location and save.
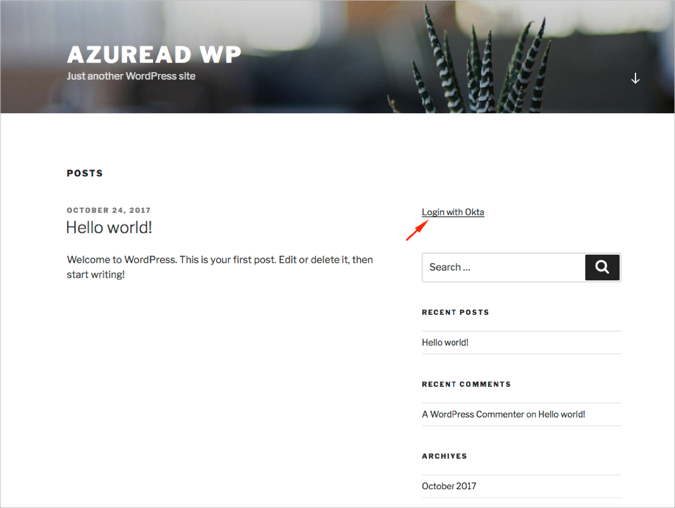
Go to your ACS URL you made a copy of in step 5 and click Login with Okta:
Note: This will force user to provide credentials on Okta on each login attempt even if the user is already logged in to Okta.
In miniOrange SAML 2.0 SSO plugin click Sign in Settings and check Force authentication with your IdP on each login attempt.

In Okta, select the Sign On tab for the Wordpress by MiniOrange SAML app, click Edit, uncheck Disable Force Authentication, then click Save: