The Okta/eFront SAML integration currently supports the following features:
For more information on the listed features, visit the Okta Glossary.
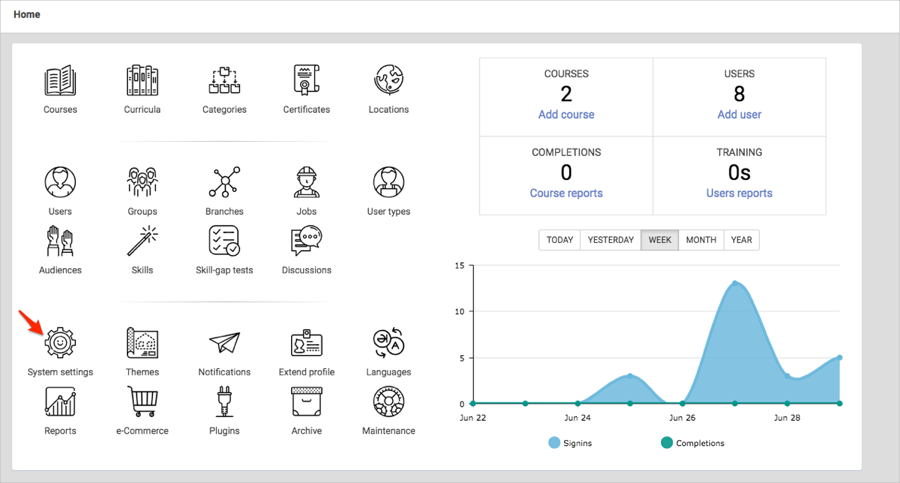
Login to your eFront account.
Select System Settings:
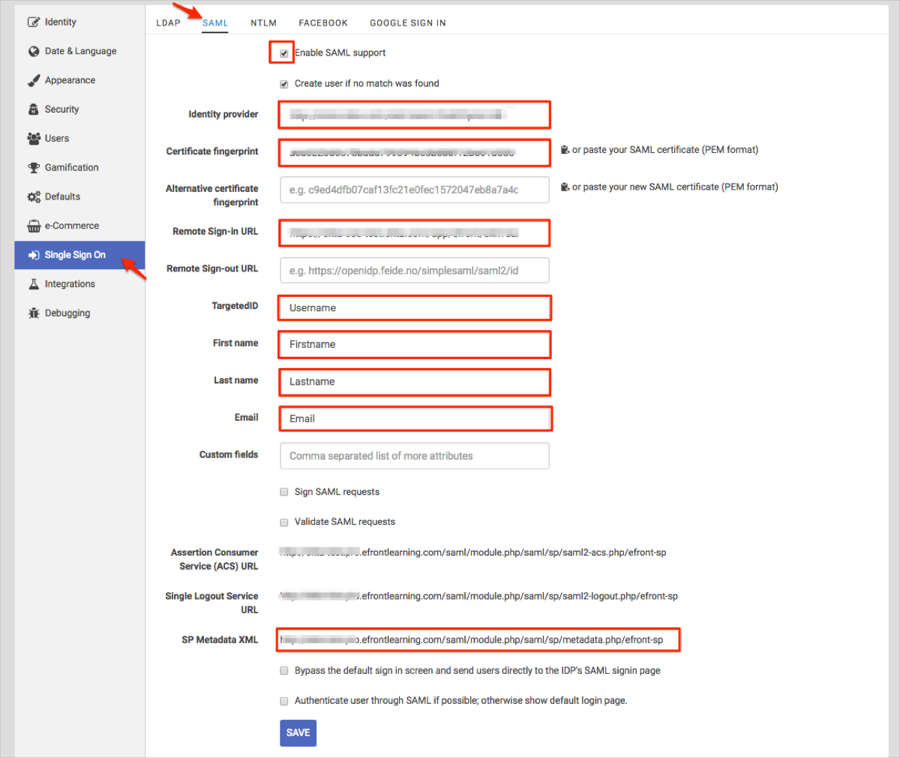
Navigate to Single Sign On > SAML, then follow the steps below:
Check Enable SAML support.
OPTIONAL: Check Create user if no match was found to enable JIT (Just In Time) Provisioning.
Identity Provider: Copy and paste the following:
Sign into the Okta Admin Dashboard to generate this variable.
Certificate fingerprint: Copy and paste the following:
Sign into the Okta Admin Dashboard to generate this variable.
Remote Sign-in URL: Copy and paste the following:
Sign into the Okta Admin Dashboard to generate this variable.
TargetedID: Enter Username.
First Name: Enter Firstname.
Last Name: Enter Lastname.
Email: Enter Email.
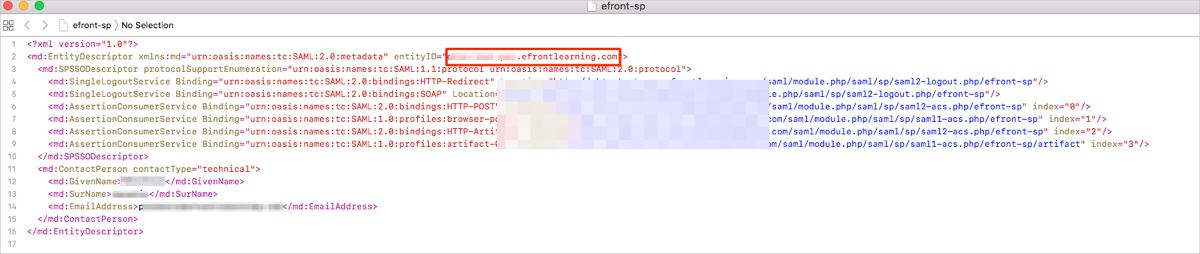
SP Metadata XML: Download and then open the xml file. Make a copy of the entityID, shown in red, below. This is your Audience URI.
Click Save.
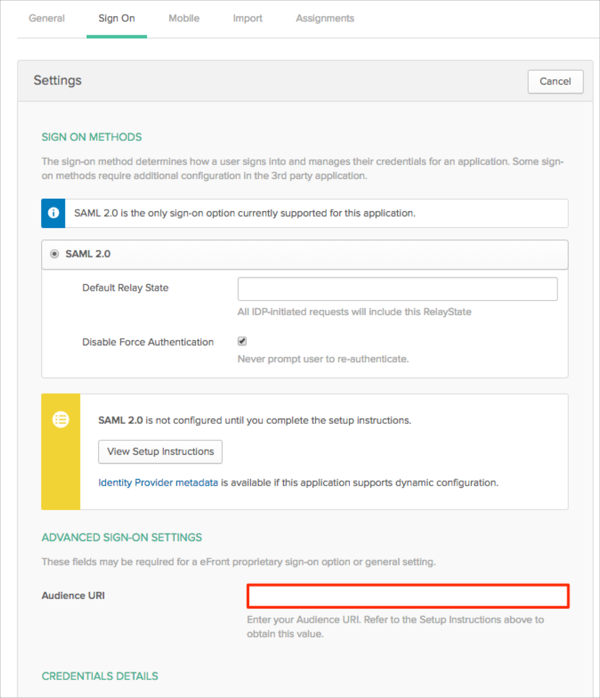
In Okta, select the Sign On tab for the eFront SAML app, then click Edit.
Enter the Audience URI value you made a copy of in step 3 into the corresponding field.
Click Save.
Done!
Make sure that you entered the correct value in the Domain field under the General tab in Okta. Using the wrong value will prevent you from authenticating via SAML to eFront.
The following SAML attributes are supported:
| Name | Value |
|---|---|
| TargetedID | user.userName |
| First name | user.firstName |
| Last name | user.lastName |
| user.email |
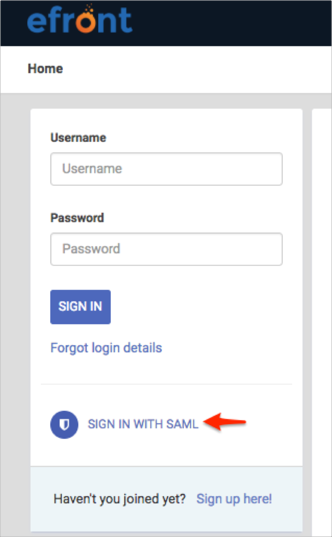
Go to: [your-eFront-domain]/ URL.
Click SIGN IN WITH SAML: