Important
This Zscaler Private Access 1.0 application is meant for existing customers who have previously configured SSO.
For new Zscaler Private Access customers, use the Zscaler Private Access 2.0 application that is now available in the Okta Integration Network.
Zscaler Private Access OIN application supports two configuration types:
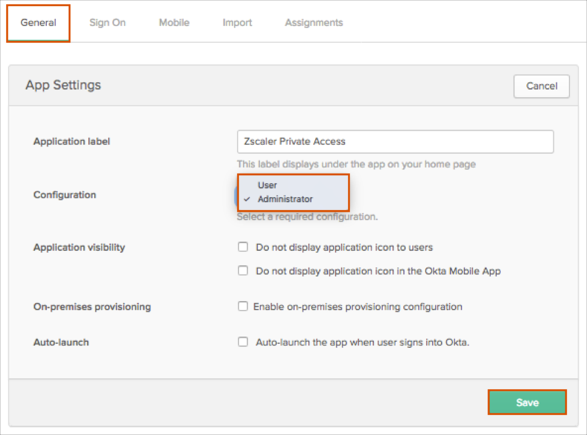
In order to add administrator/user configurations, you need to add a separate Zscaler Private Access application instance in Okta and create a separate IDP Configuration in Zscaler. The configuration type needs to be specified on the General application tab in Okta. Select a required configuration type from the Configuration drop-down selection:
The Okta metadata file is different for each application instance in Okta, so it will be different for both configurations. Save the following metadata file and add a required prefix (admin or user), so the file name will be: metadata_admins.xml (for administrator configuration) or metadata_users.xml (for user configuration):
The Okta/Zscaler Private Access SAML integration currently supports the following features:
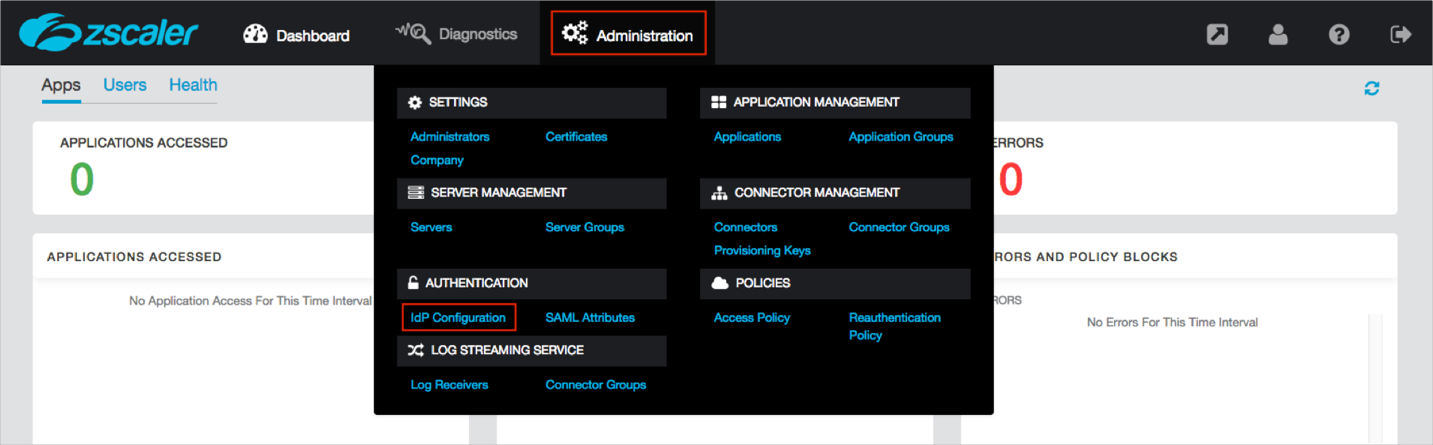
Go to https://admin.private.zscaler.com/ and login as an Administrator.
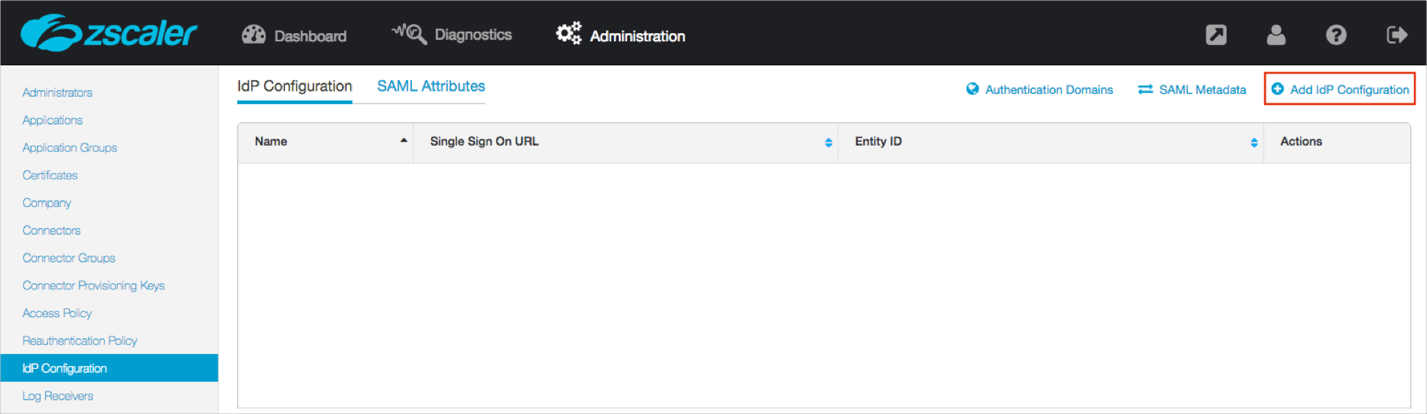
Navigate to Administration > IdP Configuration:
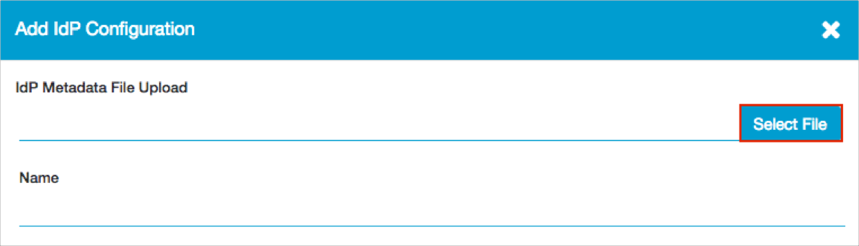
Click + Add IdP Configuration:
Click Select File and locate and upload the metadata_admins.xml file you saved (see Before you Begin):
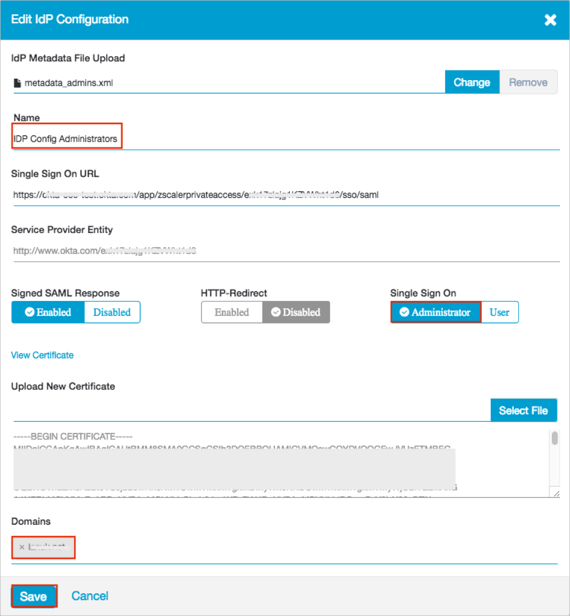
Enter the following:
Name: Enter IDP Config Administrators.
Switch Single Sign On to Administrator.
Domain: Select a required domain.
Click Save.
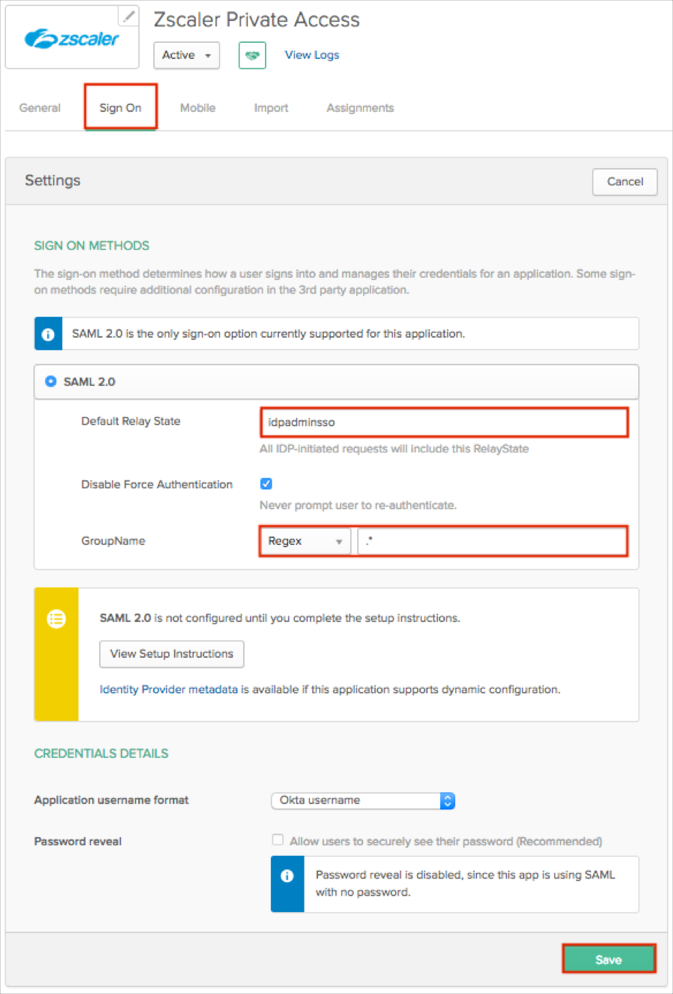
In Okta, select the Sign On tab for the Zscaler Private Access app, then click Edit.
Default Relay State: Enter idpadminsso.
[OPTIONAL]: If you want pass Okta groups as part of the SAML response: Select your preferred group filter from the GroupName drop-down list (the Regex rule with the value ".*" in order to send *all* Okta groups to the Zscaler Private Access instance we used in our example) for the attribute.
Note: Zscaler Private Access group names are limited to 512 characters.
Click Save.
Done!
The following SAML attributes are supported:
| Name | Value |
|---|---|
| FirstName | user.firstName |
| LastName | user.lastName |
| user.userName | |
| DepartmentName | user.department |
| GroupName | This will be configured in the app UI; see groups attribute instructions above. |
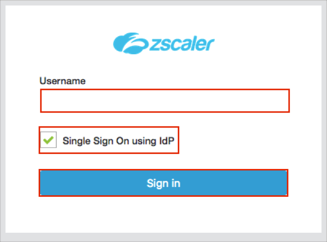
Click Single Sign On using IdP.
Enter your Username into the corresponding field.
Click Sign in:
The Okta/Zscaler Private Access SAML integration currently supports the following features:
Go to https://admin.private.zscaler.com/ and login as an Administrator.
Navigate to Administration > IdP Configuration:
Click + Add IdP Configuration:
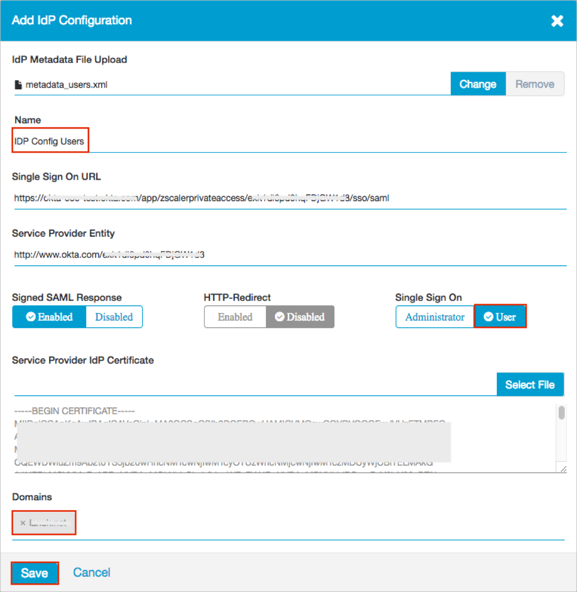
Click Select File and locate and upload the metadata_users.xml file you saved (see Before you Begin):
Enter the following:
Name: Enter IDP Config Users.
Switch Single Sign On to User.
Domain: Select a required domain.
Click Save.
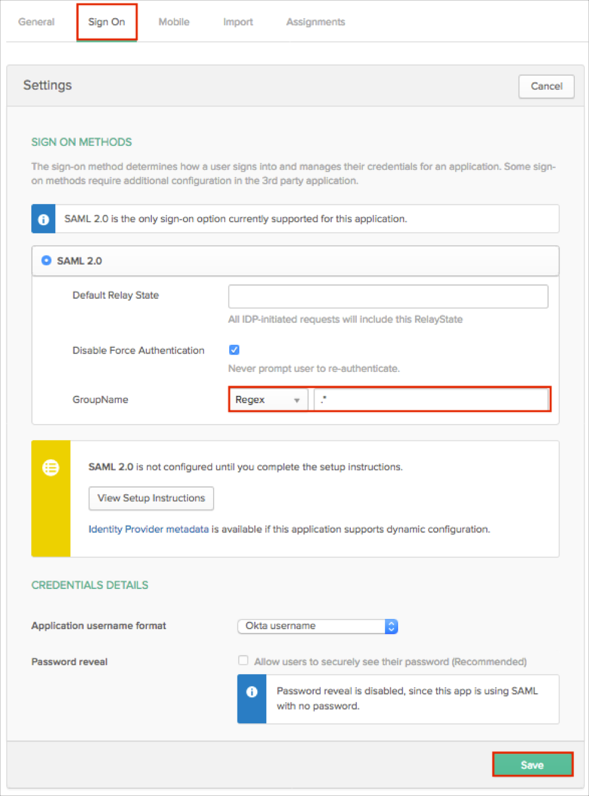
In Okta, select the Sign On tab for the Zscaler Private Access app, then click Edit.
[OPTIONAL]: If you want pass Okta groups as part of the SAML response: Select your preferred group filter from the GroupName drop-down list (the Regex rule with the value ".*" in order to send *all* Okta groups to the Zscaler Private Access instance we used in our example) for the attribute.
Click Save.
Done!
The following SAML attributes are supported:
| Name | Value |
|---|---|
| FirstName | user.firstName |
| LastName | user.lastName |
| user.userName | |
| DepartmentName | user.department |
| GroupName | This will be configured in the app UI; see groups attribute instructions above. |
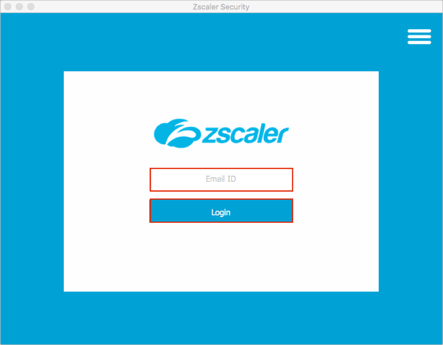
Run the Zscaler client.
Enter your Email ID.
Click Login: