The Okta/Zoomifier SAML integration currently supports the following features:
For more information on the listed features, visit the Okta Glossary.
You will need to copy and paste the following variables during the configuration steps:
IDP Metadata
Sign in to Okta Admin app to have this variable generated for you.
IDP Issuer
Sign into the Okta Admin Dashboard to generate this variable.
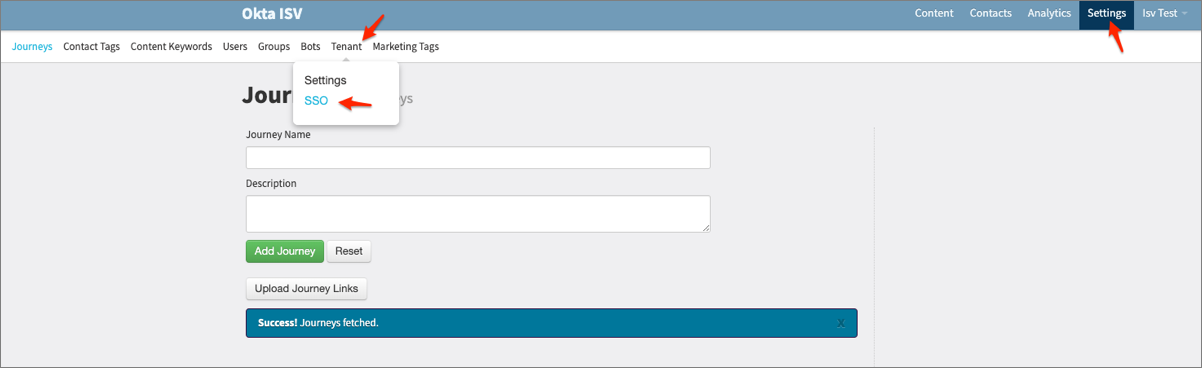
Log in to Zoomifier as administrator.
Navigate to Settings > Tenant > SSO:
Next, configure Zoomifier Admin, or Zoomifier Engage, as described below:
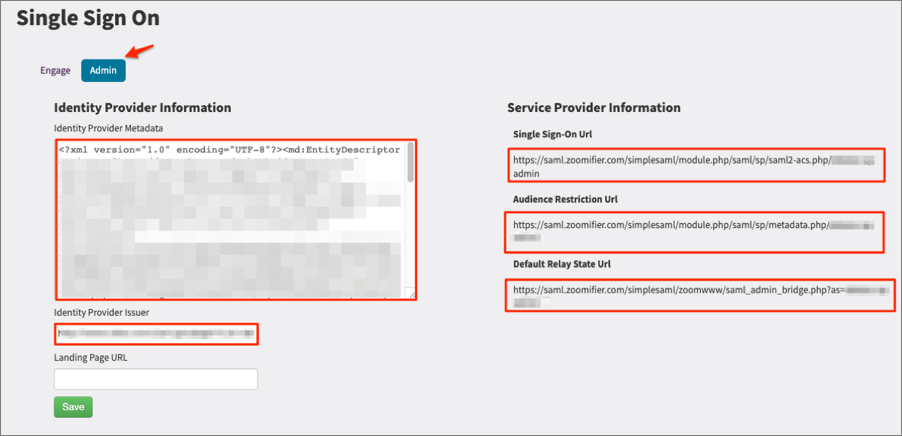
To configure Zoomifier Admin, select the Admin tab, then enter the following:
Identity Provider Metadata: Copy and paste the IDP Metadata value from the Variables section.
Identity Provider Issuer: Copy and paste the IDP Issuer value from the Variables section.
Make a copy of your Single Sign-On Url, Audience Restriction Url, and Default Relay State Url values. These values will be used in step 5 below.
Click Save:
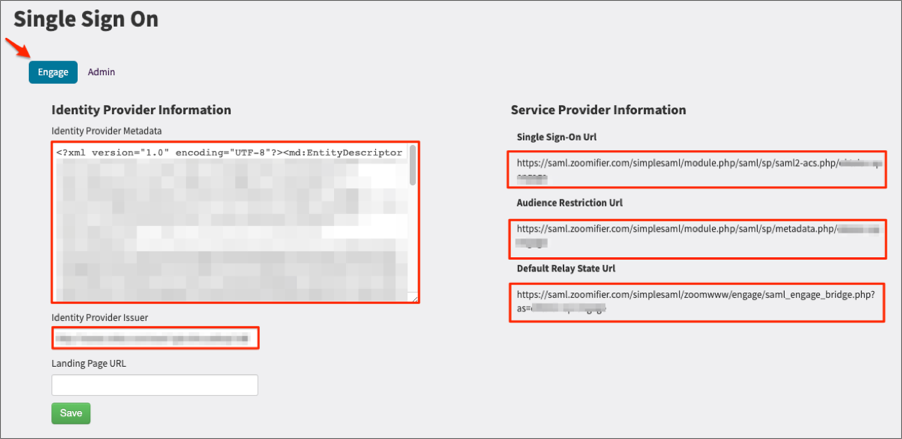
To configure Zoomifier Engage, select the Engage tab, then enter the following:
Identity Provider Metadata: Copy and paste the IDP Metadata value from the Variables section.
Identity Provider Issuer: Copy and paste the IDP Issuer value from the Variables section.
Make a copy of your Single Sign-On Url, Audience Restriction Url, and Default Relay State Url values. These values will be used in step 5 below.
Click Save:
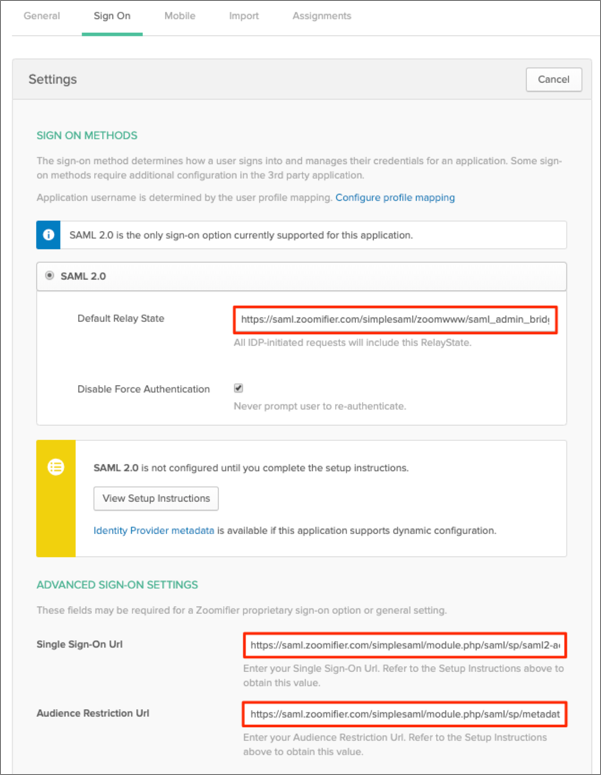
In Okta, select the Sign On tab for the Zoomifier SAML app, then click Edit.
Enter your Single Sign-On Url, Audience Restriction Url, and Default Relay State Url values you made a copy of early into the corresponding fields.
Click Save:
Contact your Customer Success Manager or email Zoomifier support (support@zoomifier.com) and inform them that your SAML setup is complete. Zoomifier will process your request. After receiving a confirmation email, you can start assigning people to the application.
Done!
The following SAML attributes are supported:
| Name | Value |
|---|---|
| user.userName | |
| first_name | user.firstName |
| last_name | user.lastName |