The Okta/Zoho Directory SAML integration currently supports the following features:
For more information on the listed features, visit the Okta Glossary.
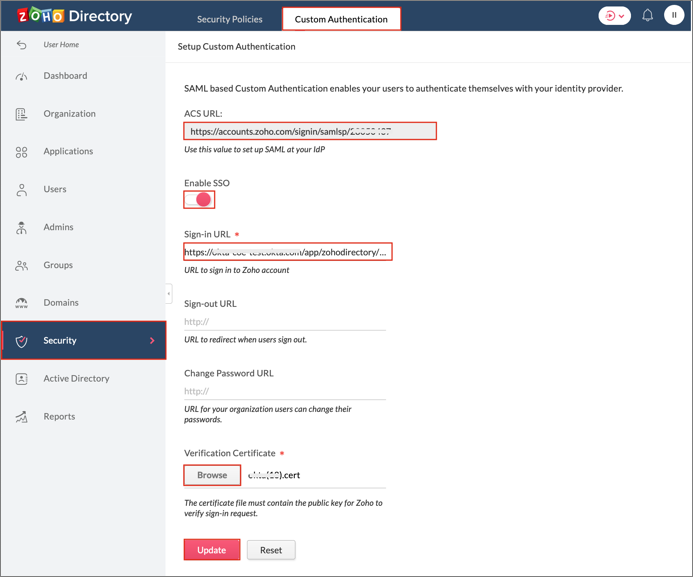
Log in to your Zoho Directory instance as an administrator.
Navigate to Admin Panel > Security > Custom Authentication and enter the following:
ACS URL: Make a copy of this value.
Enable SSO: Turn this on.
Sign-in URL: Copy and paste the following:
Sign in to the Okta Admin app to have this variable generated for you.
Verification Certificate fingerprint: Save the following as Okta.cert, then click Browse to locate and upload it.
Sign into the Okta Admin Dashboard to generate this variable.
Click Update:
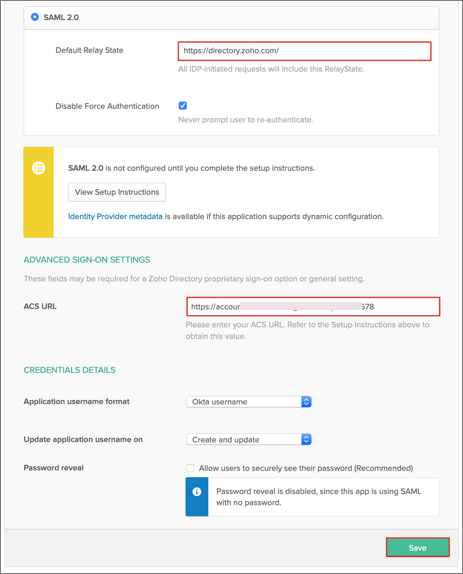
In Okta, select the Sign On tab for the Zoho Directory SAML app, then scroll down to the ADVANCED SIGN-ON SETTINGS section.
Default Relay State: Enter https://directory.zoho.com/
ACS URL: Enter the ACS URL value you made a copy of in step 2.
Click Save:
Done!
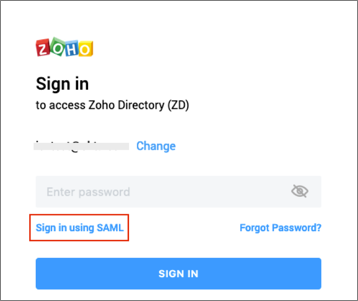
Go to: https://directory.zoho.com/
Enter your email address, then click Next.
Click Sign in using SAML: