Enabling SAML will affect all users who use this application, which means that users will not be able to sign in through their regular log in page. They will only be able to access the app through the Okta service.
Backup URL
YouAttest does not provide backup login URL where users can sign in using their normal username and password. You can contact YouAttest Support to turn off SAML, if necessary.
The admin account you use to setup SAML in YouAttest needs to also exist in your Okta org. You won’t be able to complete the setup if the account with the same username doesn’t exist in your org.
The Okta/YouAttest SAML integration currently supports the following features:
For more information on the listed features, visit the Okta Glossary.
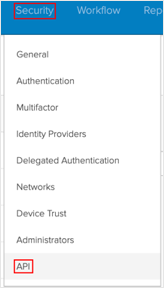
From the Okta admin console, navigate to Security > API:
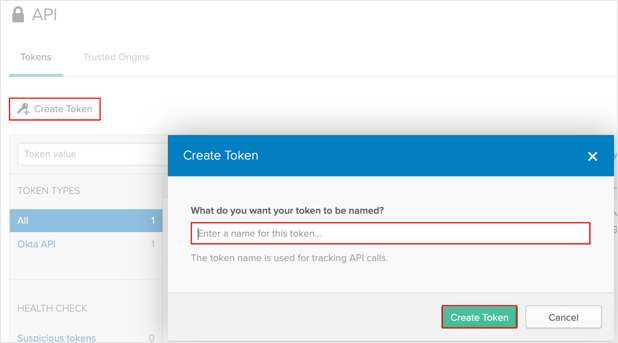
Click Create Token. Add a name for your new API token, then click Create Token:
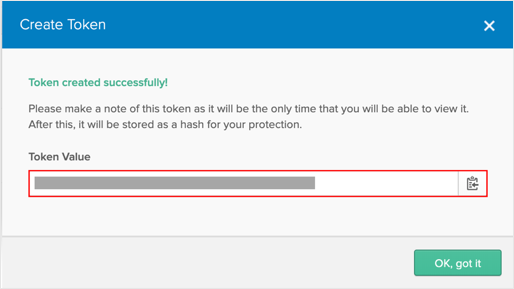
Make a copy of your API token; you will enter this later in YouAttest.
Log in to your YouAttest account as an admin.
Note: As mentioned at the beginning of these instructions, make sure that an account with the same username exists in your Okta org.
Navigate to API Integrations > Add API:
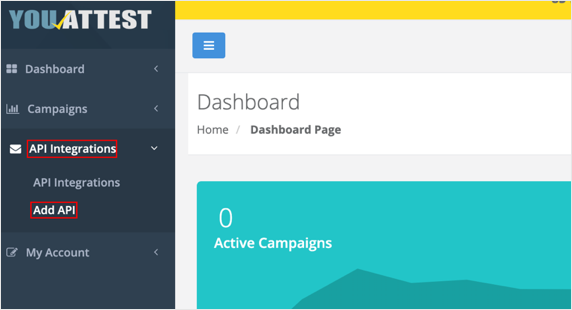
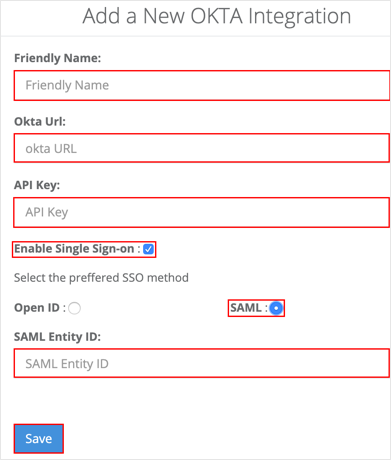
Enter the following:
Friendly Name: Enter a name for your new API integration.
Okta Url: Copy and paste the following:
Sign into the Okta Admin Dashboard to generate this variable.
API Key: Enter the API token you saved in step 3.
Enable Single Sign-on: Check this option.
Select the preferred SSO method: Choose SAML.
SAML Entity ID: Copy and paste the following:
Sign into the Okta Admin dashboard to generate this value.
Click Save:
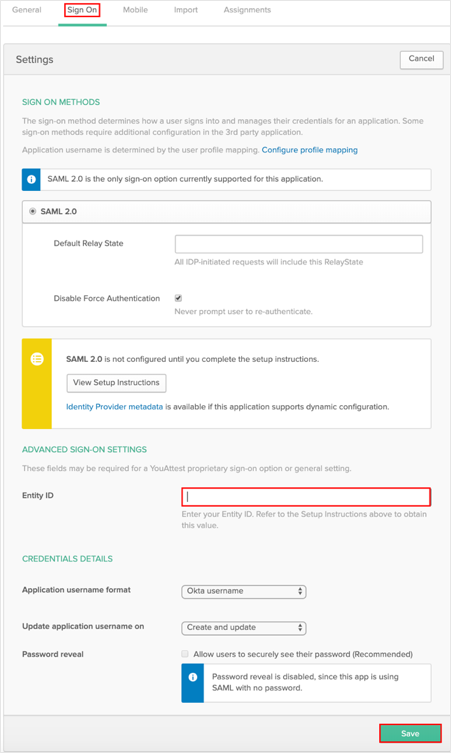
In Okta, select the Sign On tab for the YouAttest SAML app, then click Edit.
Enter the Entity ID value from Step 6 into the corresponding field.
Click Save:
Done!
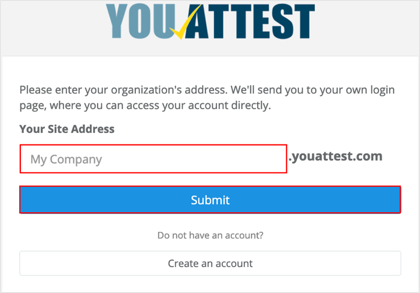
Enter Your Site Address, then click Submit: