Read this before you enable SAML
Enabling SAML will affect all users who use this application, which means that users will not be able to sign in through their regular log in page. They will only be able to access the app through the Okta service.
Backup URL
Yodeck does not provide backup log in URL where users can sign in using their normal username and password. You can contact Yodeck support to turn off SAML, if necessary.
The Okta/Yodeck SAML integration currently supports the following features:
For more information on the listed features, visit the Okta Glossary.
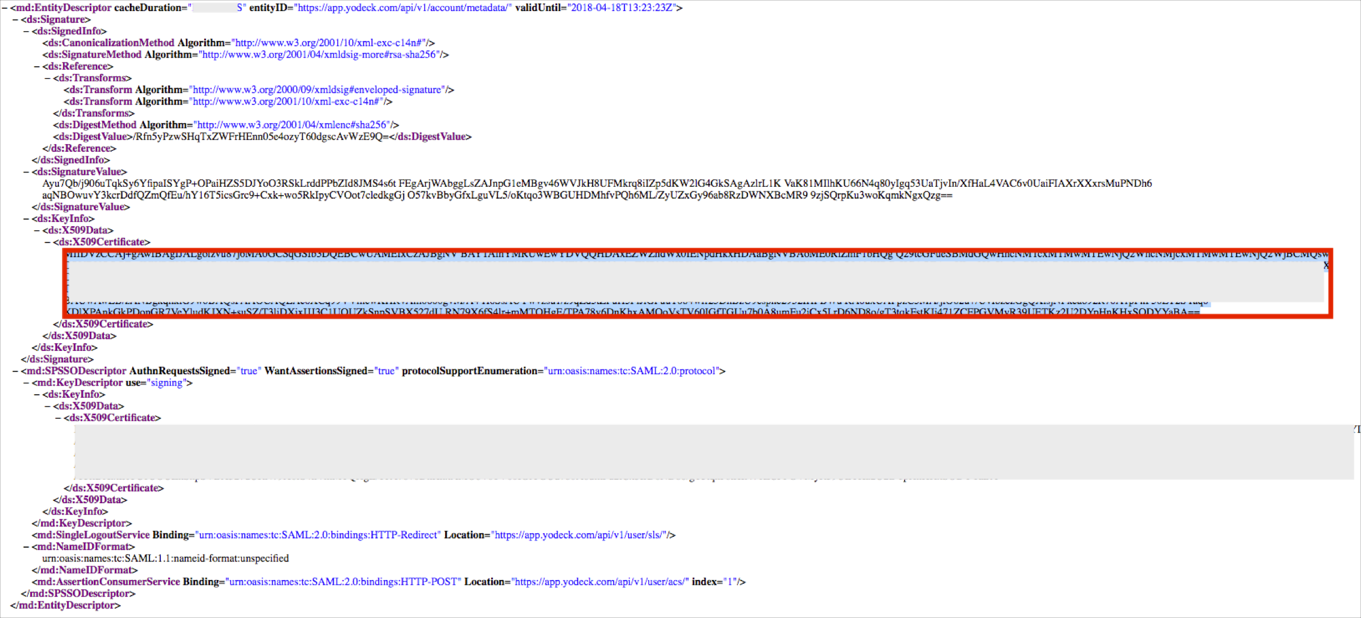
Open the following URL in a browser: https://app.yodeck.com/api/v1/account/metadata/?digest_algo=sha256
Locate, then save the X509Certificate value:
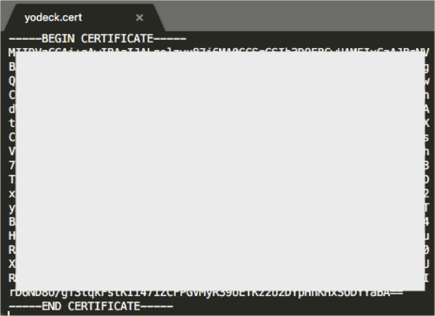
Create a new file in a text editor, in the following format:
-----BEGIN CERTIFICATE-----
[your X509Certificate value] (step 2)
-----END CERTIFICATE-----
Save the file as yodeck.cert:
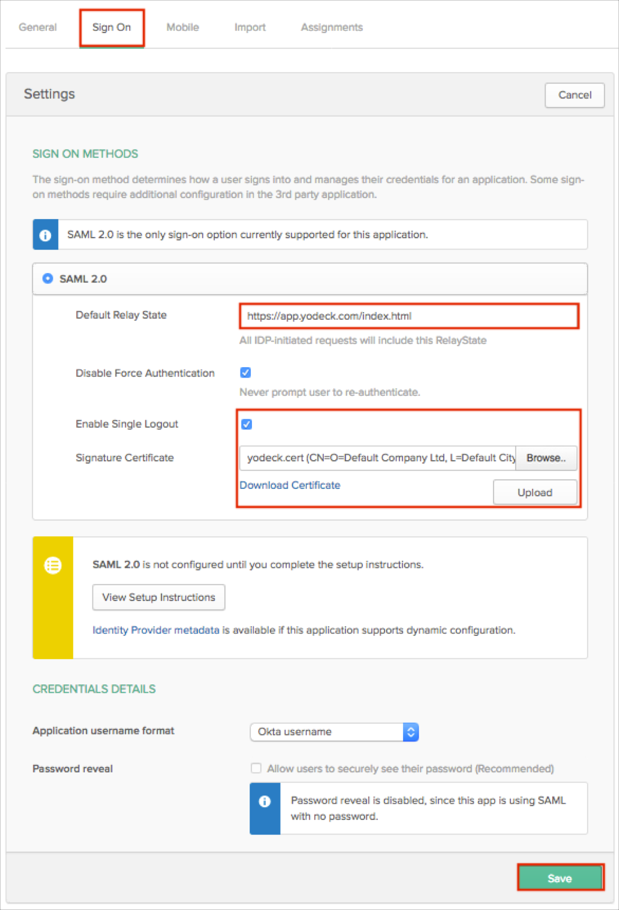
In Okta, select the Sign On tab for the Yodeck app, then click Edit.
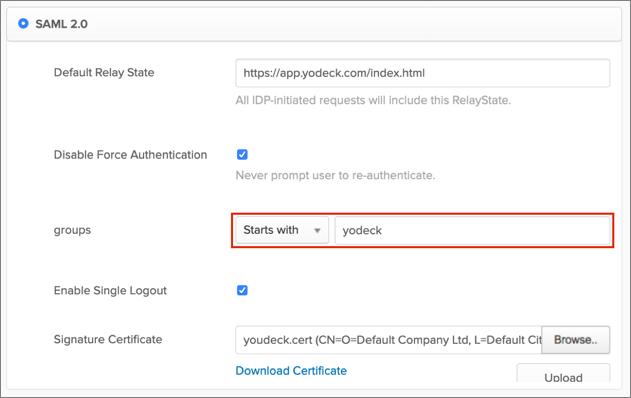
Default Relay State: Enter: https://app.yodeck.com/index.html.
Check Enable Single Logout.
Signature Certificate: Click Browse to locate the yodeck.cert file you saved earlier (step 4), then Upload it to Okta.
Click Save:
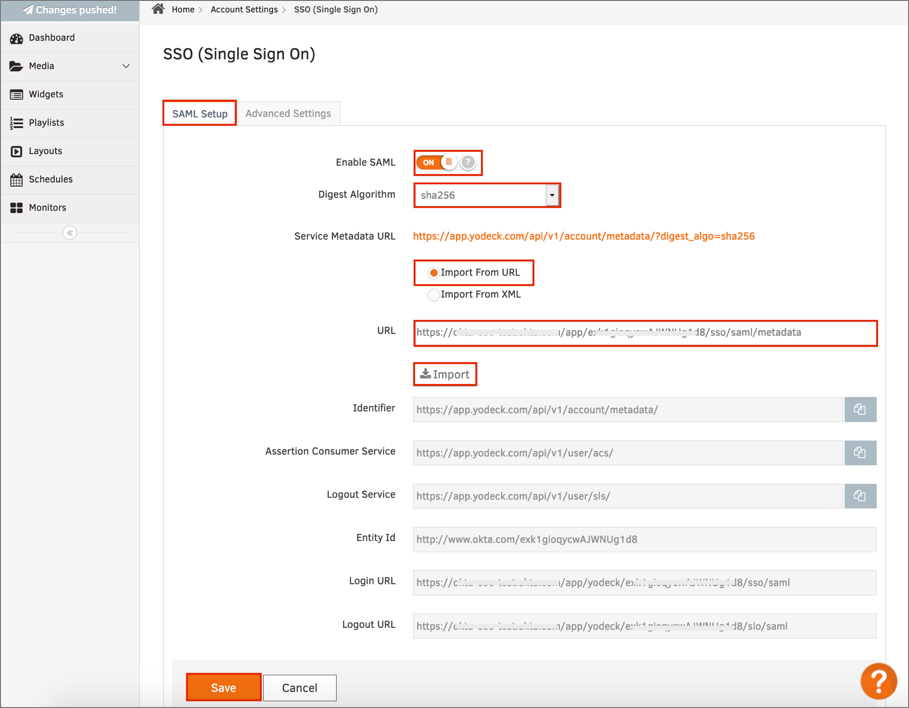
Login to your Yodeck instance as an administrator.
Navigate to Account Settings > SSO (Single Sign On) from the top right dropdown menu.
Select the SAML Setup tab, then enter the following:
Toggle the Enable SAML switch to ON.
Digest Algorithm: Select sha256.
Select the Import From URL radio button.
URL: Copy and paste the following Metadata URL into this field:
Sign into the Okta Admin dashboard to generate this value.
Click Import.
Click Save:
A new tab with a prompt for your Okta credentials will appear in your browser.
Enter your Okta credentials and wait for the SAML test login was successful and SAML SSO has been enabled for your account. message.
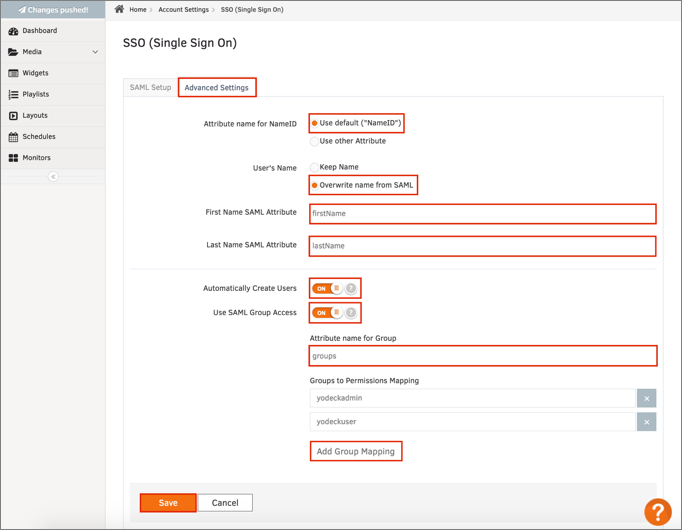
Select the Advanced Settings tab, then enter the following:
Attribute name for NameID: Select Use default ("NameID").
User's Name: Select Overwrite name from SAML.
First Name SAML Attribute: Enter firstName.
Last Name SAML Attribute: Enter lastName.
Automatically Create Users: Turn this ON if you are going to enable JIT (Just In Time) Provisioning.
If you want to Use SAML Group Access to manage your users permissions: Switch this option to ON.
Note: Yodeck doesn’t support creation of user with empty group value. If you turned this feature on, you must create appropriate user groups in Okta, assign required users to the groups and configure groups filter in Okta on the Sign On application tab. The Starts with rule with the value yodeck in order to send Okta groups which name are started with yodeck to the Yodeck instance we used in our example:
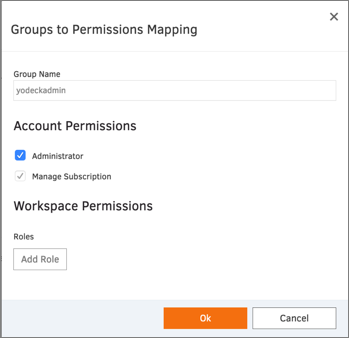
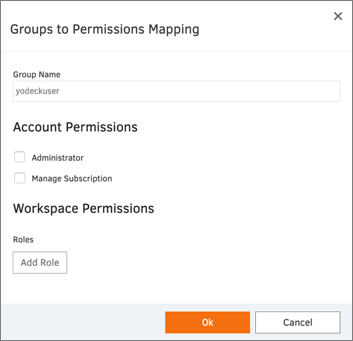
Click Add Group Mapping in order to create appropriate mapping for groups received from Okta.
Note: in our example we have two groups in Okta: yodeckadmin and yodeckuser with the following mapping on the application end:
Click Save:
Done!
The following SAML attributes are supported:
| Name | Value |
|---|---|
| firstName | user.firstName |
| lastName | user.lastName |
| groups | This is configured in the app UI; see groups attribute instructions above. |
Open the following URL: https://app.yodeck.com/login.
Enter your Email.
Click Continue:
