The Okta/Workiva SAML integration currently supports the following features:
For more information on the listed features, visit the Okta Glossary.
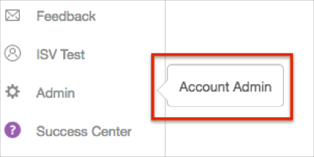
Login to Wdesk as a Security Administrator.
In the bottom left, click Admin and choose Account Admin:
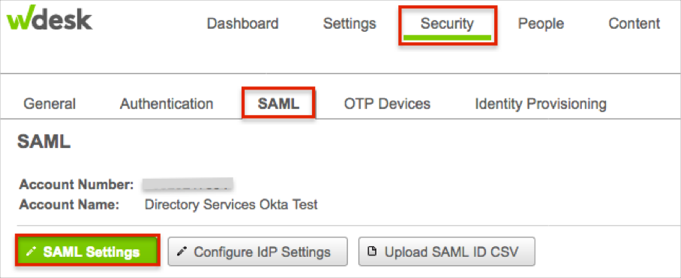
In Wdesk Admin, navigate to Security, then SAML > SAML Settings:
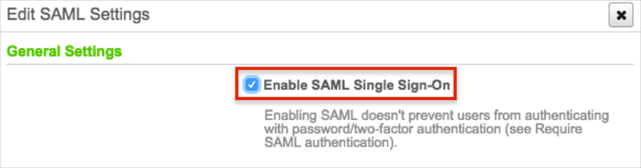
Under General Settings, check the Enable SAML Single Sign On box:
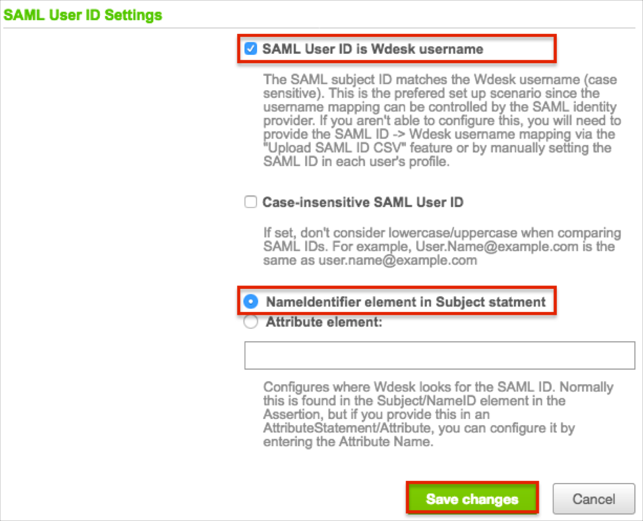
Under SAML User ID Settings:
Enable SAML User ID is Wdesk username.
Enable NameIdentifier element in Subject statement.
Click Save changes.
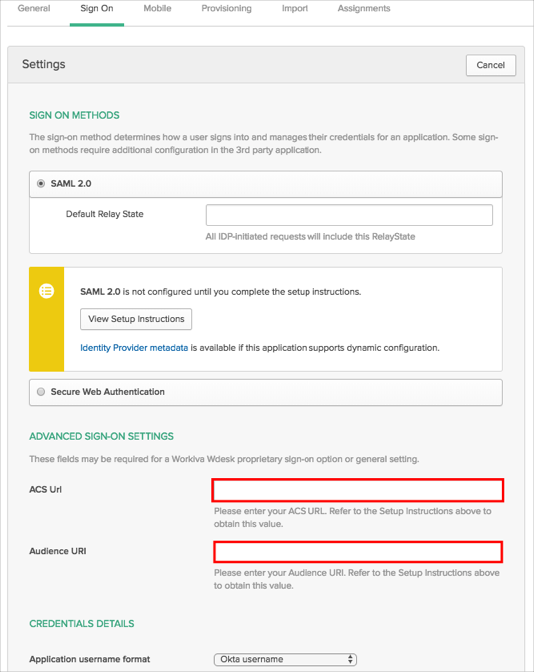
From the SAML Settings tab, save the values for Metadata URL (this is your Audience URI) and Consumer URL (this is your ACS URL):

In Okta, select the Sign On tab for the Workiva app, then click Edit.
Enter the ACS URL and Audience URI values you made a copy of in step 6 into the corresponding fields.
Click Save.
Copy, then save the following IdP Metadata as Metadata.xml:
Sign in to Okta Admin app to have this variable generated for you.
Click Configure IdP Settings; the Edit IdP Settings dialog will open. Click Browse to locate the Metadata.xml file you just saved, then upload it.

Click Save Changes to finish the setup process.
Open your Login URL.
Click the Single Sign-On link:
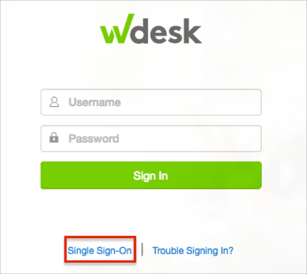
Enter your username or email, then click Continue:
