The Okta/Valotalive SAML integration currently supports the following features:
For more information on the listed features, visit the Okta Glossary.
Contact the Valotalive Support team (support@valotalive.com) and request that they enable SAML 2.0 for your account.
Save, then attach the following Metadata file to your request:
Sign into the Okta Admin dashboard to generate this value.
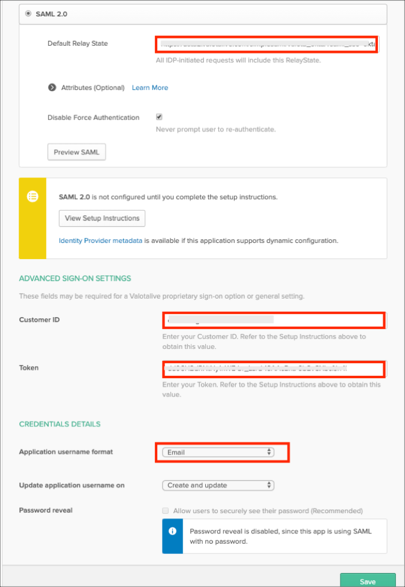
The Valotalive Support team will process your request and will provide you with Default Relay State, Customer ID, and Token values.
In Okta, select the Sign On tab for the Valotalive SAML app, then click Edit:
Enter your Default Relay State, Customer ID, and Token values provided by Valotalive into the corresponding fields.
Application username format: Select Email.
Click Save:
Now you can start assigning people to the application.
Done!
The following SAML attributes are supported:
| Name | Value |
|---|---|
| FirstName | user.firstName |
| LastName | user.lastName |
| user.email |
Make sure you are logged in to Okta.
In Valotalive go to APPS and use the COPY THE LINK in the App grid get a link to content that should only be visible if a user is:
You are authenticated to Okta
You are associated with this app
Note: Valotalive does not provide login/logout functionality as the content is embedded into customers Intranets and the login is already done.