The Okta/Solarwinds SAML integration currently supports the following features:
For more information on the listed features, visit the Okta Glossary.
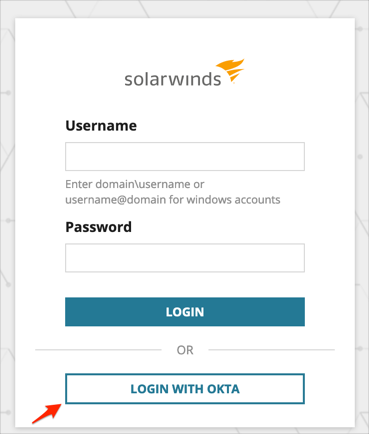
Login to your Solarwinds account.
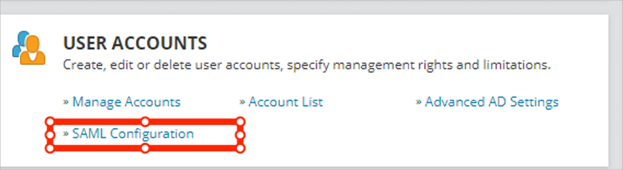
Navigate to SETTINGS > All Settings:

In the USER ACCOUNTS section, click SAML Configuration:
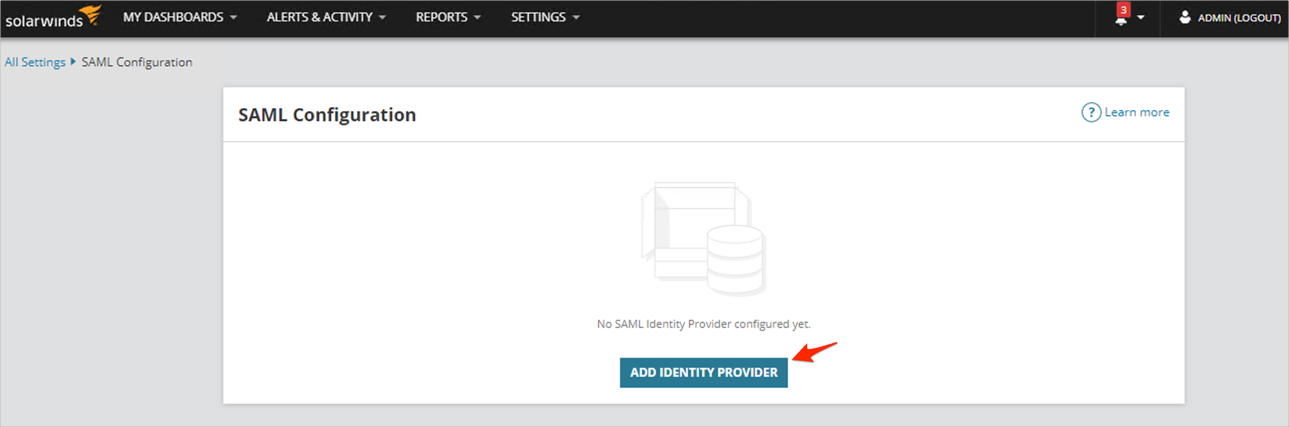
Click ADD IDENTITY PROVIDER:
Click NEXT:
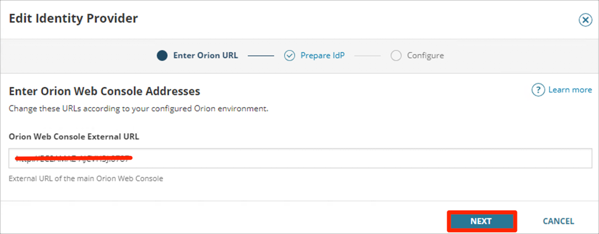
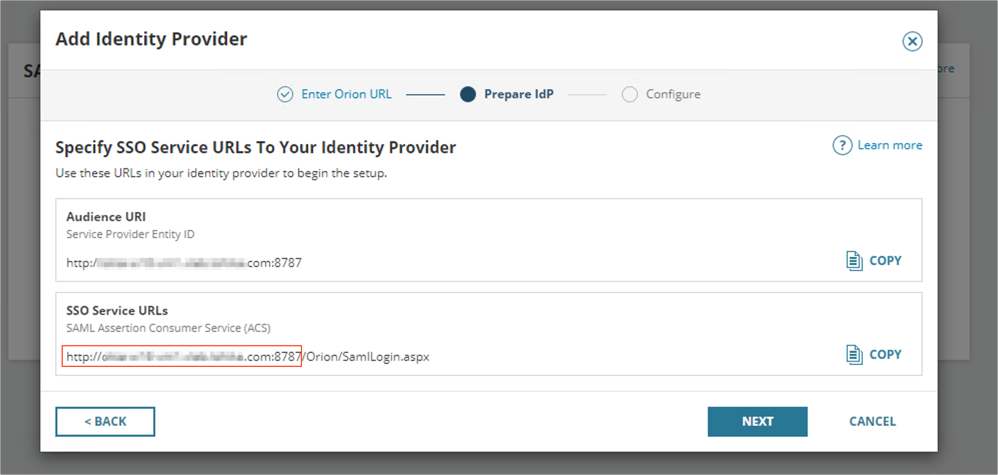
Make a copy of your Base URL of the SSO Service URLs, then click NEXT.
For example: If the SSO Service URLs is http://acme.envirioment.com:1234/Orion/SamlLogin.aspx.
Your Base URL is http://acme.envirioment.com:1234.
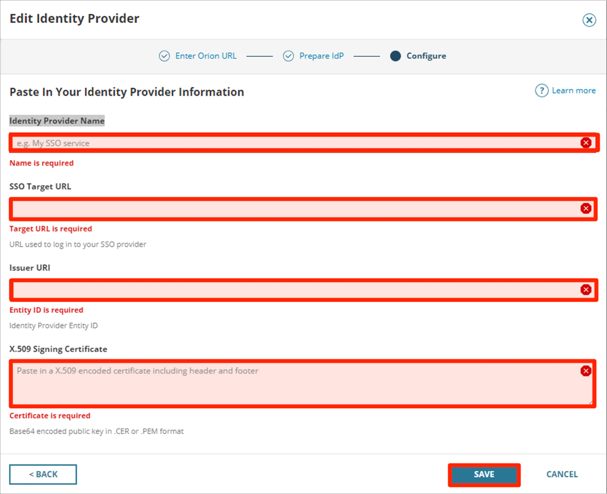
Enter the following:
Identity Provider Name: Enter Okta.
Login URL/SignOn: Copy and paste the following:
Sign into the Okta Admin dashboard to generate this value.
IDP Issuer/Entity ID: Copy and paste the following:
Sign into the Okta Admin Dashboard to generate this variable.
Copy the Certificate Copy and paste the following:
Sign into the Okta Admin Dashboard to generate this variable.
Click SAVE:
Create a SAML user in the Orion Platform. Refer to these similar instructions in Solarwind's documentation, here.
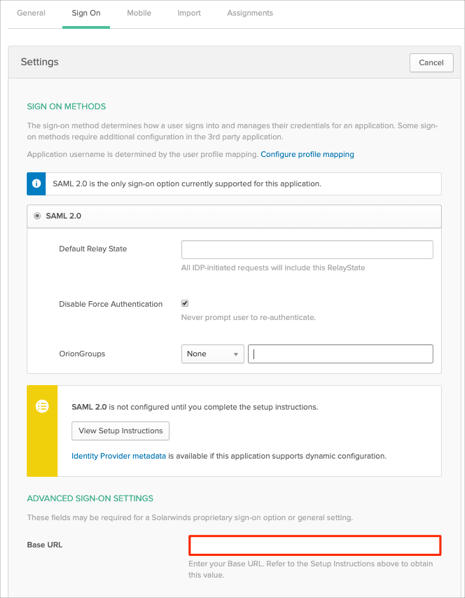
In Okta, select the Sign On tab for the Solarwinds SAML app, then click Edit:
Enter the Base URL value you made a copy of in step 6 into the corresponding field.
Click Save:
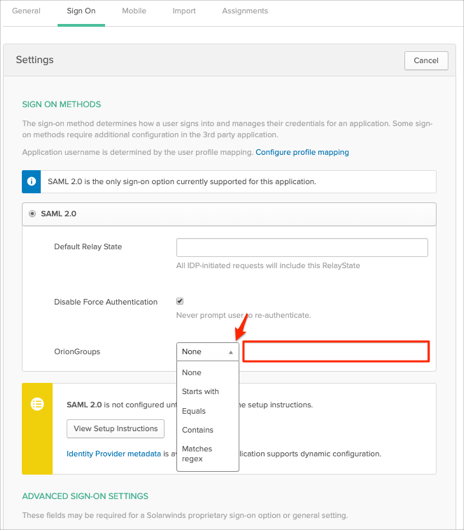
Group Attribute Steps: To send groups as a part of SAML assertion, in Okta select the Sign On tab for the Solarwinds app, then click Edit.
Select the appropriate OrionGroups filter from the drop-down menu, then type the preferred value into the field.
Click Save.
Note: To send all groups a user is assigned to, select Regex and type .* (dot and asterix).
The following SAML attributes are supported:
| Name | Value |
|---|---|
| user.userName | |
| FirstName | user.firstName |
| LastName | user.lastName |
| OrionGroups | This is configured in the app UI; see Group attribute instructions (step 10) above |
Go to: [your-Base URL]/Orion/Login.aspx
Click LOGIN WITH OKTA: