Note: The Sisense application only supports 64-bit Windows Operating Systems.
The Okta/Sisense SAML integration currently supports the following features:
For more information on the listed features, visit the Okta Glossary.
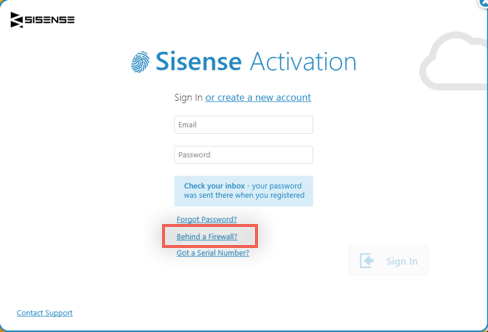
If you have trouble installing Sisense because of a Firewall, log into https://www.sisense.com/my-account/ using your username and password provided by Sisense then do the following:
After you download and begin installation of the Sisense web application, select Behind a Firewall?
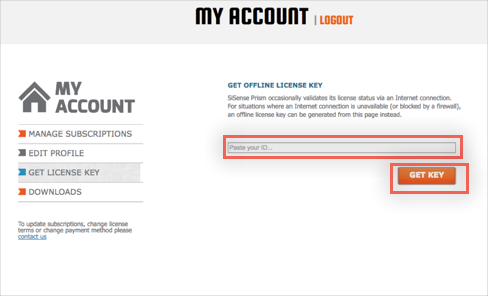
From the subsequent screen, make a copy of the ID:

Log into your Sisense account at https://www.sisense.com/[my-account]/.
Click Get License Key and copy the ID you saved earlier into the text field, then click GET KEY.
You will be provided with a license key, like this:
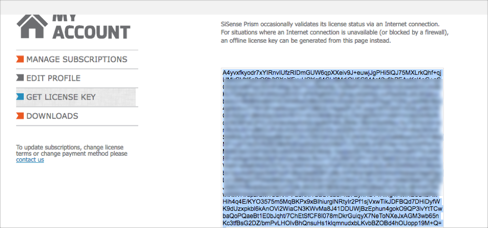
Carry on installing Sisense using the default settings.
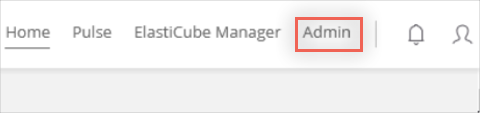
Log in to your Sisense account using the username and password provided to you by Sisense.
Select Admin:
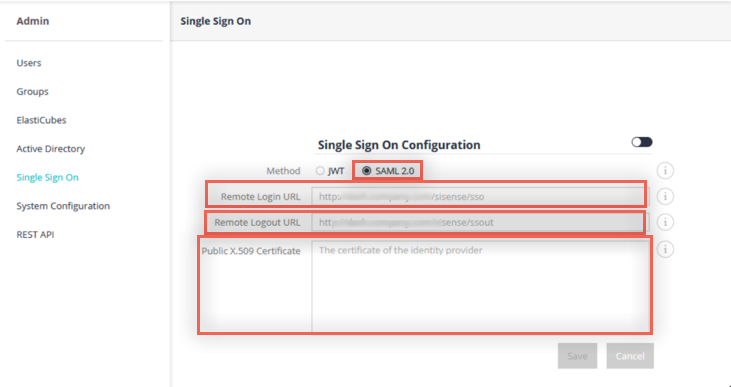
Select Single Sign On and enter the following:
Select SAML 2.0.
Remote Login URL: Copy and paste the following:
Sign into the Okta Admin Dashboard to generate this variable.
Remote Logout URL: Copy and paste the following:
Sign into the Okta Admin Dashboard to generate this variable.
Public X-509 Certificate: Copy and paste the following:
Sign into the Okta Admin Dashboard to generate this variable.
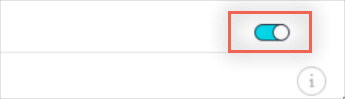
Enable SAML by clicking the activation tab:
Click Save.
In Okta, select the Sign On tab for the Sisense app, then click Edit.
Set your Default Relay State to: [yourBaseUrl]/app/main#/home.
Click Save.
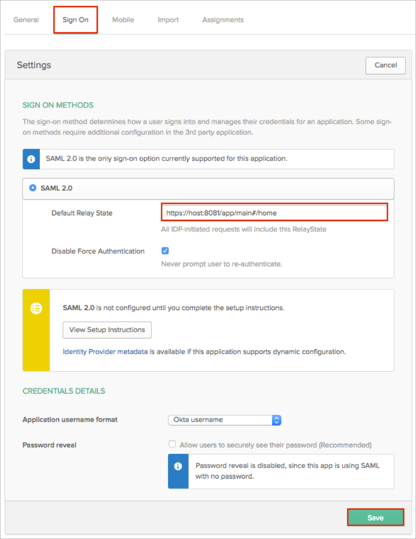
Make sure that you entered the correct value in the Base URL field under the General application tab in Okta. Using the wrong value will prevent you from authenticating via SAML to Sisense.
The following SAML attributes are supported:
| Name | Value |
|---|---|
| User.firstName | user.firstName |
| User.lastName | user.lastName |
| User.Email | user.userName |
Open: [yourBaseURL]/app/main#/home URL.