The Okta/ScreenSteps SAML integration currently supports the following features:
For more information on the listed features, visit the Okta Glossary.
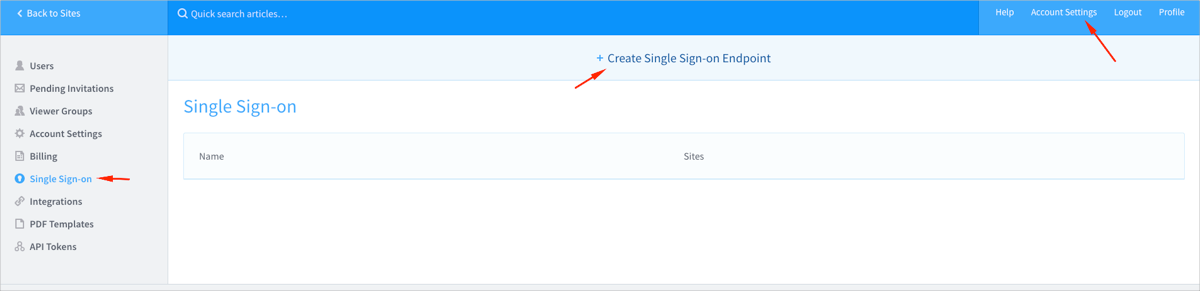
Login to your ScreenSteps account.
Navigate to Account Settings > Single Sign On, then click Create Single Sign-on Endpoint:
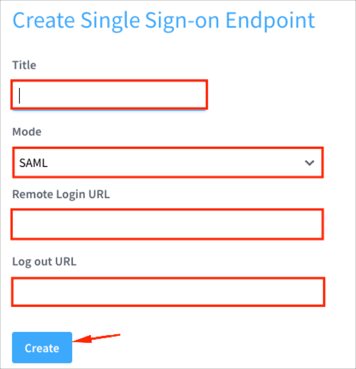
Enter the following:
Title: Enter a preferred title.
Mode: Select SAML.
Remote Login URL: Copy and paste the following:
Sign into the Okta Admin dashboard to generate this value.
Log out URL (optional): Copy and paste the following:
Sign into the Okta Admin Dashboard to generate this variable.
Click Create:
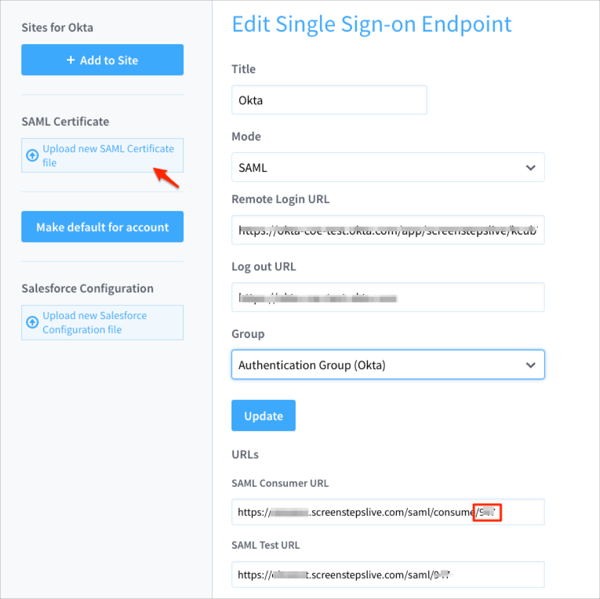
Still on the Edit Single Sign-on Endpoint page, do the following:
SAML Certificate: Download and save the following certificate. Then click Upload new SAML Certificate file to upload it to ScreenSteps.
Sign into the Okta Admin Dashboard to generate this variable.
Make a copy of the portion of the SAML Consumer URL marked in red below. This is your Authentication Endpoint Id.
SAML Test URL: Make a copy of this value, you will use it for an SP-initiated flow.
Click Update:
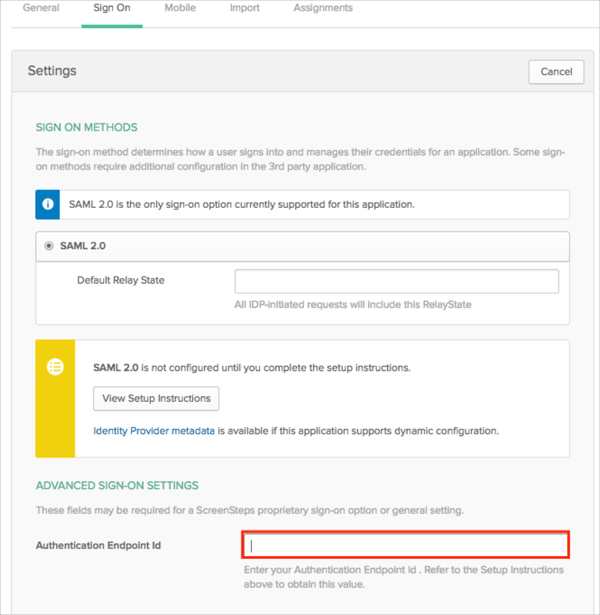
In Okta, select the Sign On tab for the ScreenSteps app, then click Edit.
Enter the Authentication Endpoint Id value you made a copy of in step 4 into the corresponding field.
Click Save:
Make sure that you entered the correct value in the Site Name field under the General tab in Okta. Using the wrong value will prevent you from authenticating via SAML to ScreenSteps.
Go to the [SAML Test URL] you made a copy of in step 4.