Enabling SAML will affect all users who use this application, which means that users will not be able to sign-in through their regular log-in page. They will only be able to access the app through the Okta service.
Backup URL
Rhombus Systems does not provide backup log-in URL where users can sign-in using their normal username and password. You can contact Rhombus Systems Support to turn off SAML, if necessary.
The Okta/Rhombus Systems SAML integration currently supports the following features:
For more information on the listed features, visit the Okta Glossary.
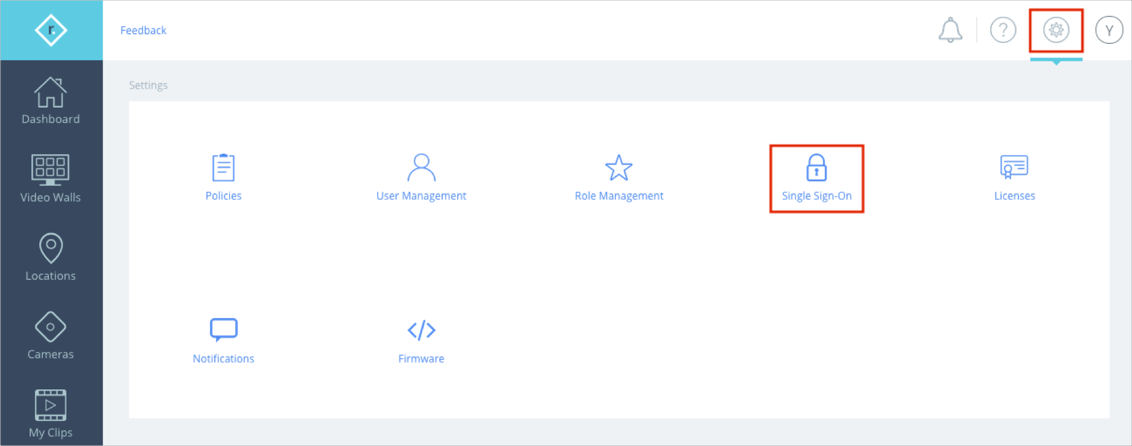
Login to your Rhombus Systems instance as an administrator.
Navigate to Settings > Single Sign-On:
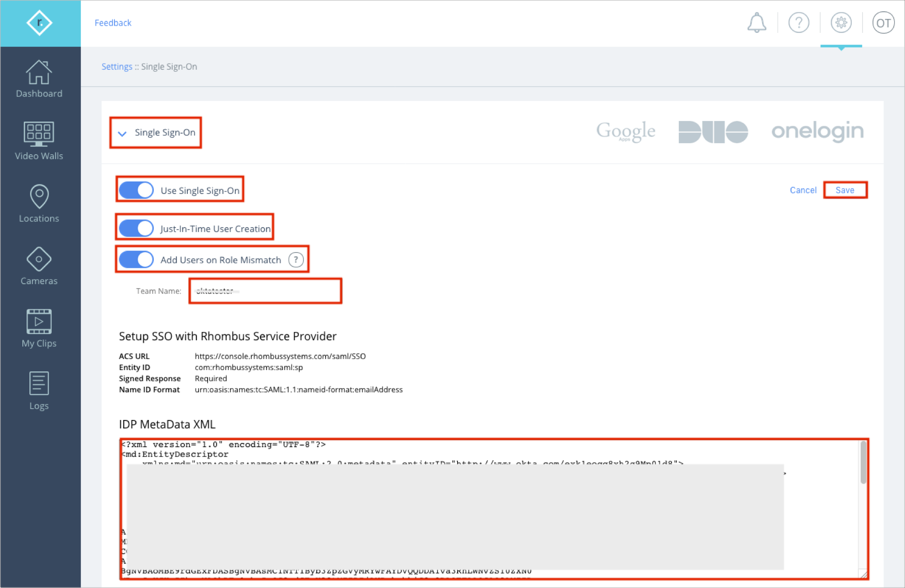
Do the following:
Expand Single Sign-On.
Activate Use Single Sign-On.
Activate Just-In-Time User Creation.
Optionally activate the Add Users on Role Mismatch option.
Note: When Add Users on Role Mismatch is enabled and the service provider role name does not match any Rhombus role name, a user will be created without a role. Users without roles do not have access to any cameras or locations.
Team Name: Enter your company name, for example you can use your email domain name.
Copy and paste the following IDP MetaData XML:
Sign in to Okta Admin app to have this variable generated for you.
Click Save.
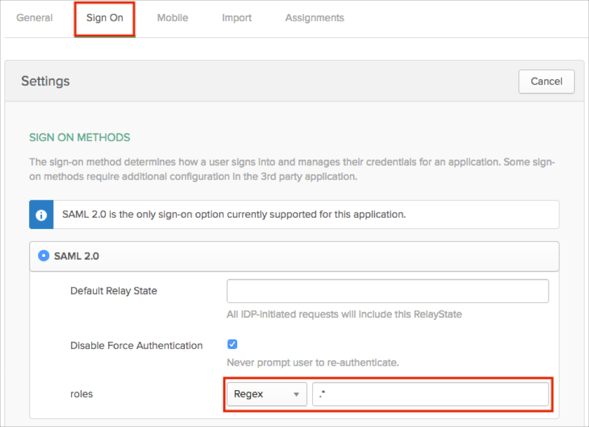
The Rhombus Systems application is pre-configured to pass Okta groups as part of the SAML assertion. In order to send user groups as part of the SAML assertion:
In Okta, select the Sign On tab for the Rhombus Systems app, then click Edit.
Select your preferred group filter from the roles dropdown list (the Regex rule with the value ".*" in order to send *all* groups to the Rhombus Systems instance we used in our example) for the attribute.
Click Save.
The following SAML attributes are supported:
| Name | Value |
|---|---|
| firstName | user.firstName |
| lastName | user.lastName |
| roles | This is configured in the app UI; see roles attribute instructions above. |
Open the following URL: https://console.rhombussystems.com/login
Enter your Email.
Click Next: