How to Configure SAML 2.0 for Replicon
This setup might fail without parameter values that are customized for your organization. Please use the Okta Administrator Dashboard to add an application and view the values that are specific for your organization.
Contents
Supported Features
The Okta/Replicon SAML integration currently supports the following features:
Configuration Steps
There is a two-part process to configure SAML 2.0 for Replicon:
Part 1 - Enable SAML Authentication
-
Note the Company Name on the General tab in Okta for the Replicon app.
- Sign into Replicon with your credentials.
- Navigate to https://na2.replicon.com/<company_name>/services/SecurityService1.svc/help/test/EnableSAMLAuthentication2, where <company_name> is the company name from step 1.
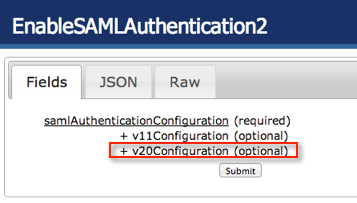
-
Select v20Configuration:
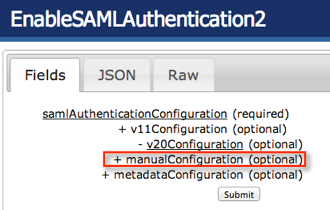
- Select manualConfiguration:
-
Enter the following ssoHTTPPostUrl:
Sign into the Okta Admin dashboard to generate this value.
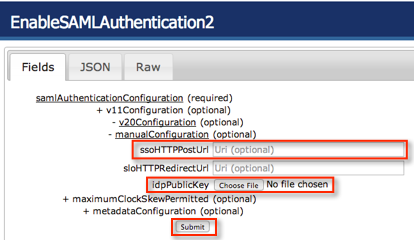
Note: Leave sloHTTPRedirectUrl blank.
-
Download the following certificate.
Sign into the Okta Admin dashboard to generate this value.
- Select Choose File next to idpPublicKey, as shown above, and upload the certificate.
- Select Submit, as shown above.
Part 2 - Set up SAML 2.0
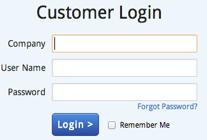
- Go to Replicon at www.replicon.com, select the Login link at the top right, then complete the sign in screen:
-
Select Administration on the top menu:

-
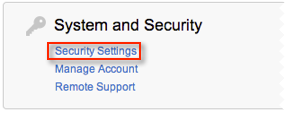
In the administration screen, select System and Security > Security Settings:
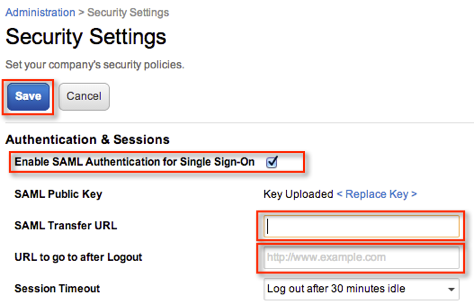
- In the Security Setting window, check Enable SAML Authentication for Single Sign-On:
-
Copy the following URL into the SAML Transfer URL field.
Sign into the Okta Admin dashboard to generate this value.
-
Enter the following URL into the URL to go to after Logout field:
Sign into the Okta Admin dashboard to generate this value.
- Click Save.
-
Select Administration in the breadcrumb link:

- In the administration screen, select Employees and Organization > Users:

- Select your user name and any other names, as desired, then select Edit.
- In the User Profile that opens, change the Authentication Type to SSO:
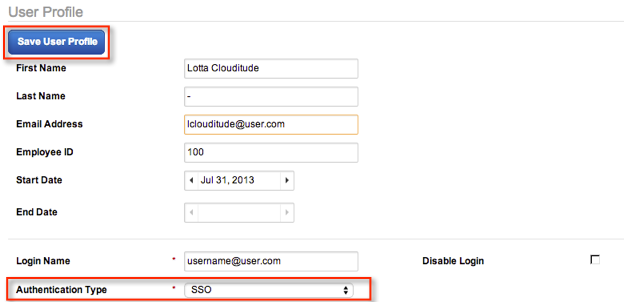
- Select Save User Profile.
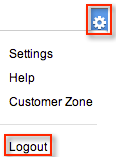
- Select the gear icon at the top right, and then select Logout:
- Done!