Go to https://readme.typeform.com/to/ht8llf, then click start:

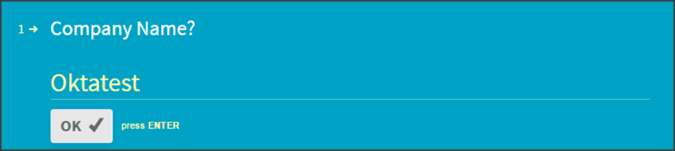
Enter your Company Name, then click OK:
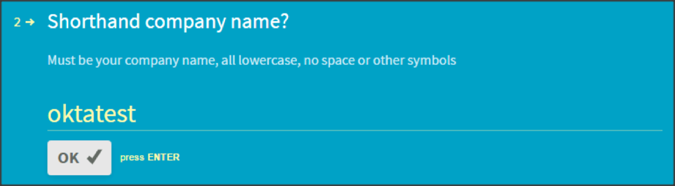
Enter your Shorthand company name, then click OK:
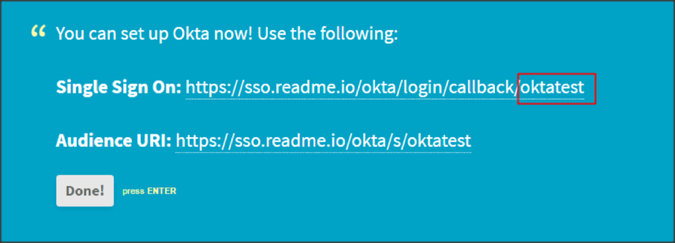
Make a copy of the value shown in red from the Single Sign On value, then click Done:
Enter the following:
Entry point URL: Copy and paste the following:
Sign into the Okta Admin Dashboard to generate this variable.

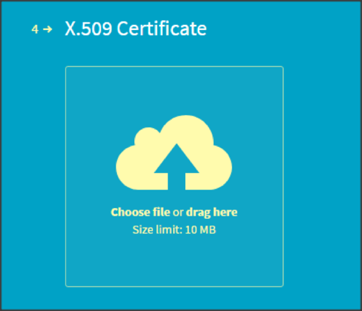
X.509 Certificate: Save the following as cert.pem, then click Choose file to select and upload it.
Sign into the Okta Admin Dashboard to generate this variable.
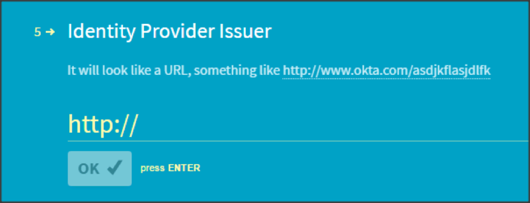
Identity Provider Issuer: Copy and paste the following:
Sign into the Okta Admin Dashboard to generate this variable.
Click Submit.
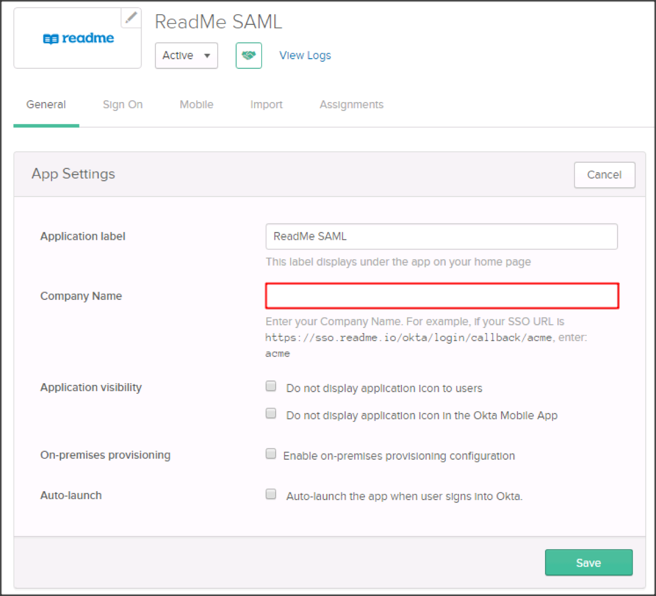
In Okta, select the General tab for the Readme app, then click Edit.
Enter the value you copied in step 4 above into the Company Namefield.
Click Save.
Notes:
The following attributes are supported:
Note: See Adding the readonly Custom Attribute
SP-initiated flows, IdP-initiated flows, and Just In Time (JIT) provisioning are all supported.
Go to: https://sso.readme.io/okta/login/[company_name].
OPTIONAL
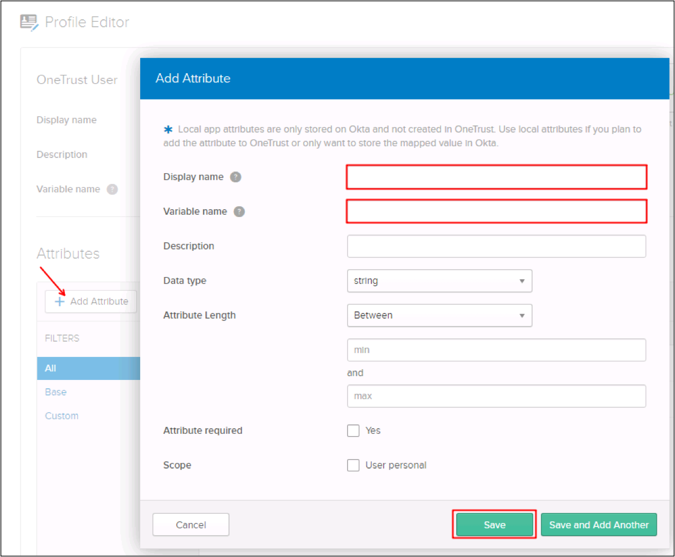
This section describes how to add the custom attribute readonly:
By default Okta only sends two SAML attributes in the SAML assertion: displayName and username. To send the custom attribute readonly, follow the steps below:
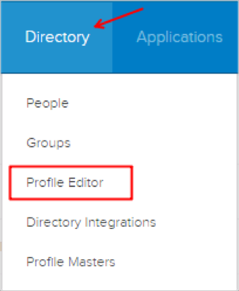
In Okta, navigate to Directory > Profile Editor:
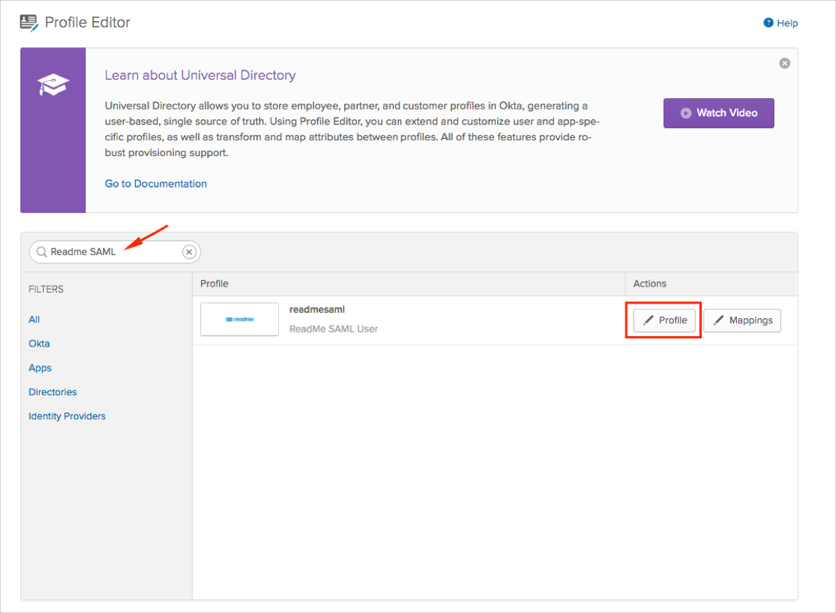
Search for the Readme SAML app, then click Profile:
Click Add Attribute, then enter the following:
Display Name: Enter Readonly.
Variable Name: Enter readonly.
Click Save:
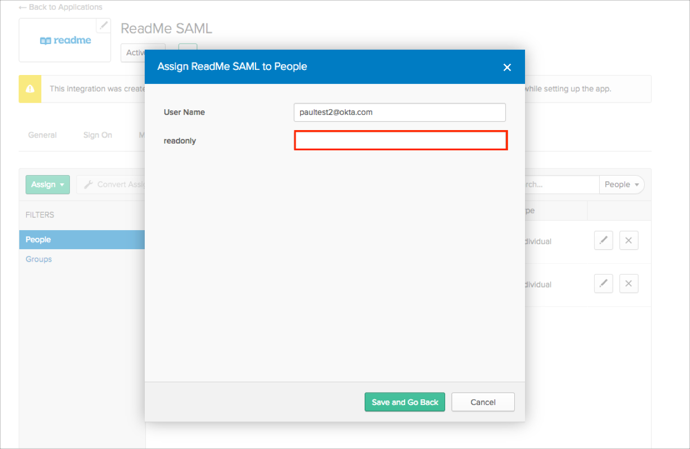
Now, when you assign users to the Readme SAML app, you can specify the attribute readonly:
Done