The Okta/Postman SAML integration currently supports the following features:
For more information on the listed features, visit the Okta Glossary.
Log in to your Postman instance as an administrator.
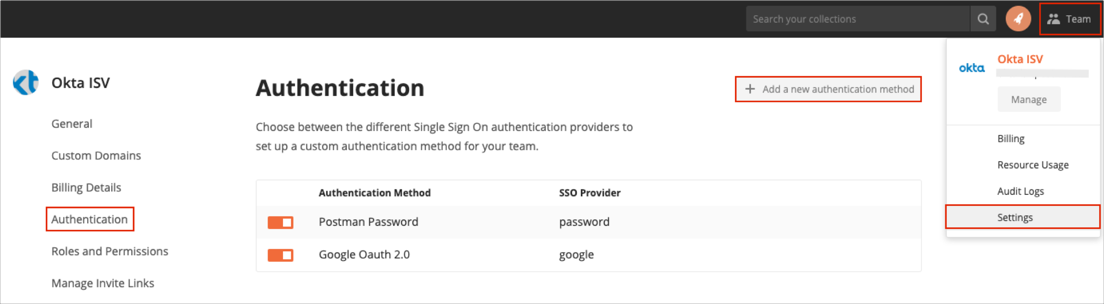
Navigate to Team > Settings > Authentication.
Click Add a new authentication method:
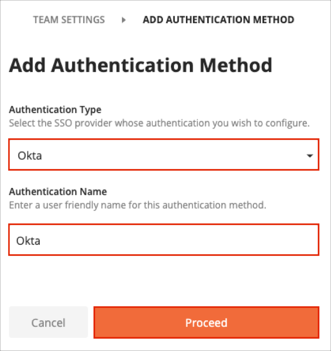
Enter the following:
Authentication Type: Select Okta from the dropdown list.
Authentication Name: Enter Okta.
Click Proceed:
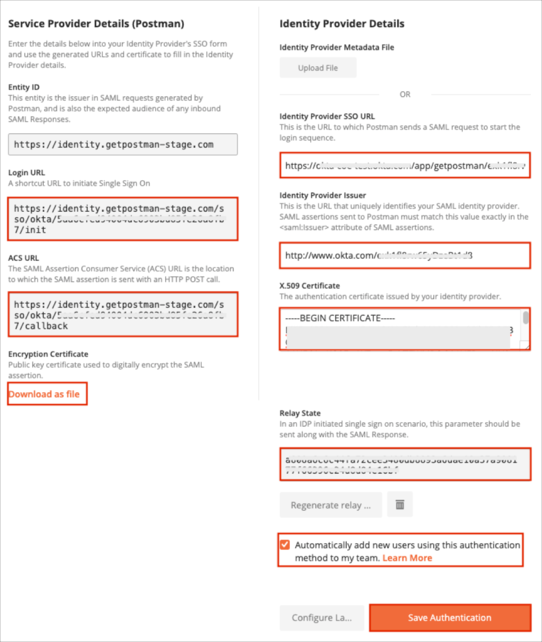
In the Service Provider Details (Postman) section:
Login URL: Make a note of this value.
ACS URL: Make a note of this value.
Encryption Certificate: Click Download as file to download.
In the Identity Provider Details section:
Identity Provider SSO URL: Copy and paste the following:
Sign into the Okta Admin Dashboard to generate this variable.
Identity Provider Issuer: Copy and paste the following:
Sign into the Okta Admin Dashboard to generate this variable.
X.509 Certificate: Copy and paste the following:
Sign into the Okta Admin Dashboard to generate this variable.
Click Generate relay state and make a note of the value.
Check the Automatically add new users using this authentication method to my team box if you want to enable JIT (Just In Time) Provisioning.
Note: The first time a new user logs in to Postman through the Okta, a Postman account is created under two conditions: The team has seats available, and the Allow Signups box was checked during SSO configuration.
Click Save Authentication:
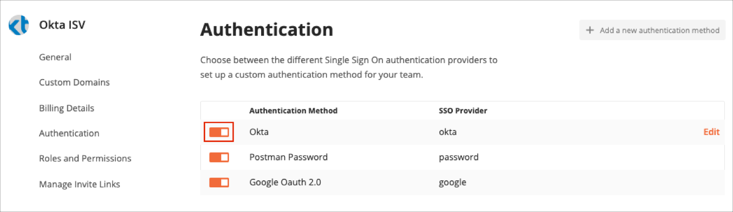
Go back to Team > Settings > Authentication.
Enable the Okta Authentication Method:
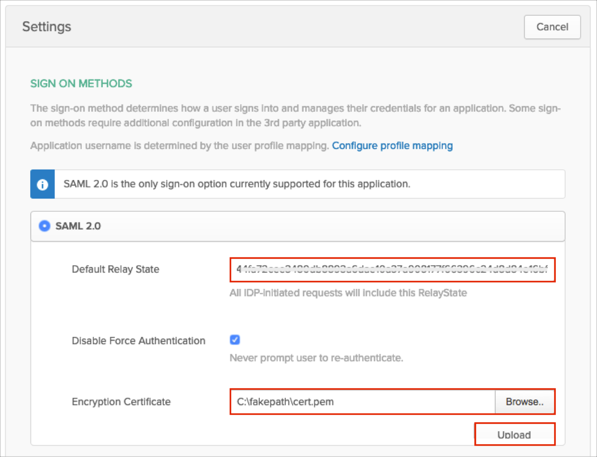
In Okta, select the Sign On tab for the Postman app, then click Edit.
Enter the Default Relay State value from step 6d into the corresponding field.
Upload the Encryption Certificate you downloaded in step 5c.
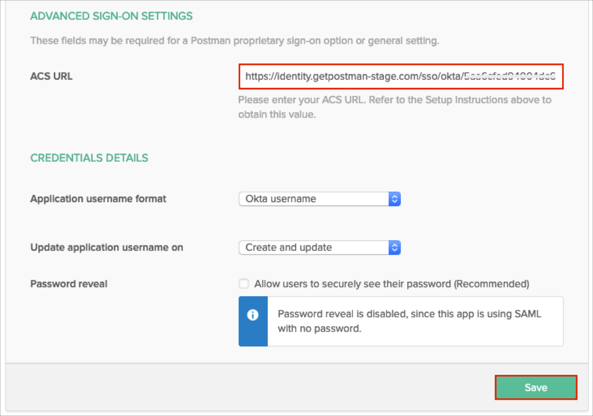
Scroll down to the ADVANCED SIGN-ON SETTINGS section.
Enter the ACS URL value from step 5b.
Click Save:
Done!
Open the Login URL value from step 5a. in your browser.