The Okta/IQVIA SmartSolve SAML integration currently supports the following features:
For more information on the listed features, visit the Okta Glossary.
Send an email to the IQVIA SmartSolve Support team and request they enable SAML 2.0 for your account.
Include the following data with your request:
Copy the following IDP Metadata into a text file and save it as metadata.xml, and attach it to your request.
Sign in to Okta Admin app to have this variable generated for you.
Download and attach the following x.509 Certificate:
Sign in to the Okta Admin dashboard to generate this value.
Also request that the provide you with Assertion Consumer Service URL and External Key values.
Wait for a confirmation email from IQVIA SmartSolve.
In Okta select the Sign On tab for the IQVIA SmartSolve SAML app, then click Edit.
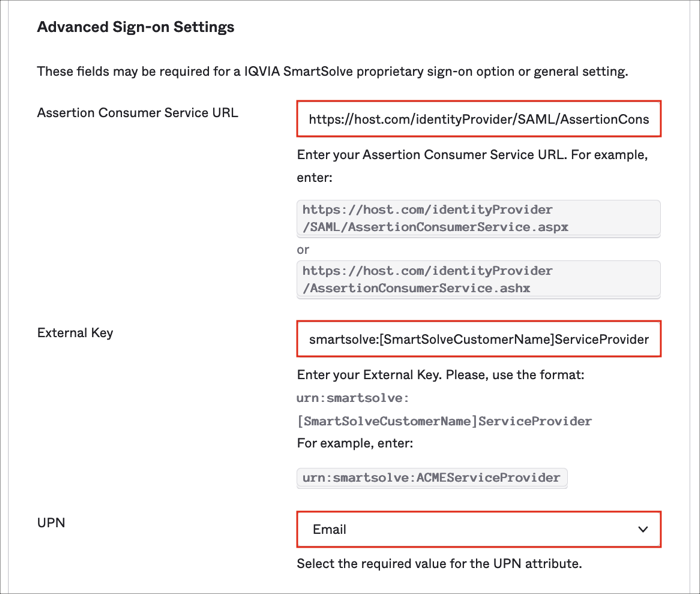
Scroll down to the ADVANCED SIGN-ON SETTINGS section and enter the Assertion Consumer Service URL and External Key values received from IQVIA SmartSolve.
Select Email for the UPN SAML attribute value.
Click Save.
Done!
The following SAML attributes are supported:
| Name | Value |
|---|---|
| UPN | Configured in the app UI; see step 5 above. |
Open your SmartSolve Base URL.