The Okta/Pigeonhole Live SAML integration currently supports the following features:
For more information on the listed features, visit the Okta Glossary.
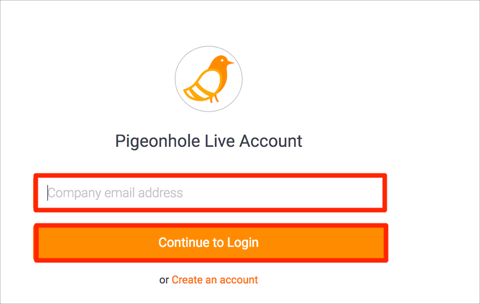
Login to your Pigeonhole Live account.
Click the dropdown arrow, then click SSO configuration:

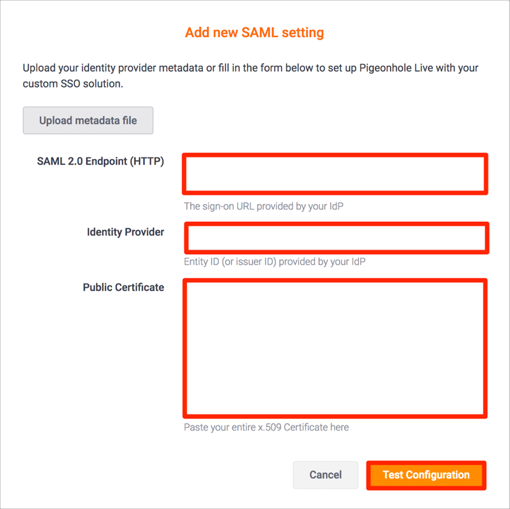
Click Add SAML configuration:

Enter the following information:
Login URL/SignOn: Copy and paste the following:
Sign into the Okta Admin Dashboard to generate this variable.
IDP Issuer/Entity ID: Copy and paste the following:
Sign into the Okta Admin Dashboard to generate this variable.
Copy the Certificate: Copy and paste the following:
Sign into the Okta Admin Dashboard to generate this variable.
Click Test Configuration:
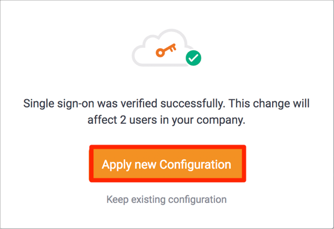
Once configuration is tested, click Apply new Configuration:
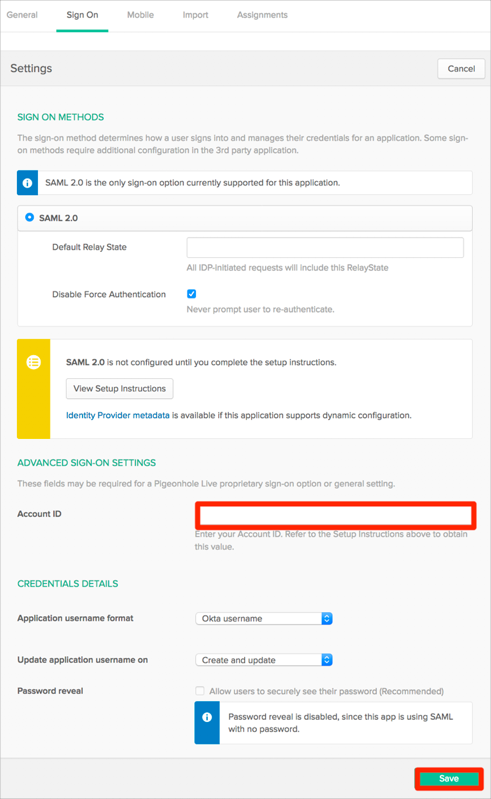
Still on the Pigeonhole Live page make a copy of your Account ID, as highlighted in the red below:

In Okta, select the Sign On tab for the Pigeonhole Live SAML app, then click Edit.
Enter the Account Id value you made a copy of in step 6 into the corresponding field.
Click Save:
Done!
Enter your email address.
Click on Continue to Login: