This guide assumes your Prisma access has an already working Global Protect Environment and you are just replacing the existing Authentication Method to SAML-based Okta authentication.
Enabling SAML will affect all users who use this application, which means that users will not be able to sign in through their regular log in page. They will only be able to access the app through the Okta service.
Backup URL: Palo Alto Networks – Prisma Access does not provide a backup log in URL where users can sign in using their normal username and password. You can contact Palo Alto Networks Support to disable SAML, if necessary.
The Okta/Palo Alto Networks – Prisma Access SAML integration currently supports the following features:
For more information on the listed features, visit the Okta Glossary.
Sign in to your Panorama account.
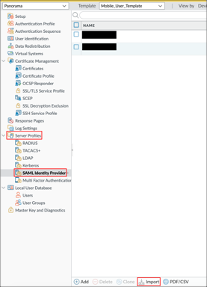
Select the DEVICE tab, then select Mobile_User_Template from the Template dropdown.

Go to Service Profiles > SAML Identity Provider, then click Import:
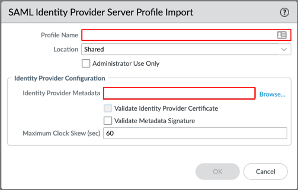
Enter the following:
Profile Name: Enter you preferred profile name.
Identity Provider Metadata: Download and save the following. Then click Browse to locate and upload it:
Sign into the Okta Admin dashboard to generate this value.
Make sure that Validate Metadata Signature is unchecked.
If you configured a CA-issued certificate and would like to use it as the IdP certificate (see https://developer.okta.com/docs/guides/sign-your-own-saml-csr/overview/), check Validate Identity Provider Certificate. Otherwise, uncheck this option as well. (Note: To validate the IdP certificate, you must specify a Certificate Profile in the Authentication Profile you will setup later in step 5.)
Click OK:
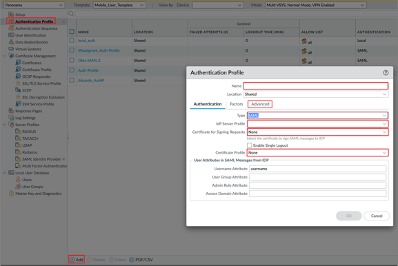
Go to Device > Authentication Profile, click Add, then enter the following:
Name: Provide a name for the Authentication profile.
Type: Select SAML.
IdP Server Profile: Select the IdP Server Profile created in step 4.
Certificate for Signing Requests: Select None.
Certificate Profile: If you are using a CA-issued certificate, add a new certificate profile by following this documentation: https://docs.paloaltonetworks.com/pan-os/9-1/pan-os-admin/certificate-management/configure-a-certificate-profile or use existing one. If you are not using a CA-issued certificate, select None. (Note: If you use a certificate profile, be sure that the name of the CA certificate appears in the CA Certificates area. The certificate profile should be set up with the CA that issued the IdP certificate.)
Select the Advanced tab in the Authentication Profile, then select the Allow List.
Click OK:
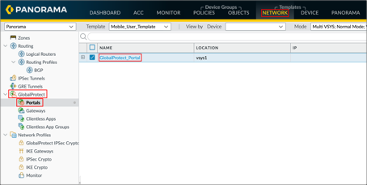
Go to Network > GlobalProtect > Portals, then click on your GlobalProtect_Portal:
Go to Authentication, then click Add:
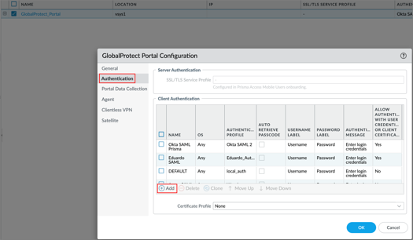
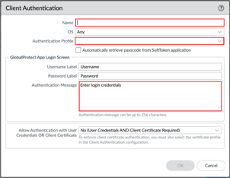
Enter the following:
Provide a Name.
OS: Optional, the default is Any.
Authentication Profile: Select the Authentication profile you configured in step 5.
Authentication Message: Optional. The default value is Enter login credentials.
Click OK:
Go to Network > GlobalProtect > Gateways, then select your GlobalProtect_External_Gateway:
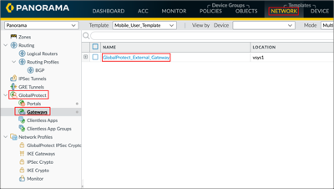
Repeat step 7 and step 8 to setup authentication for your Gateway.
To push the configuration to Prisma access, navigate to Panorama, click Commit in the upper-right, and then click Commit and Push:

Done!
Make sure that you entered the correct value in the Unique Gateway ID and GlobalProtect Portal fields under the General tab in Okta. Using the wrong value will prevent you from authenticating via SAML to Palo Alto Networks – Prisma Access.
Here are some additional resources from Palo Alto that could be useful during the set up:
Go to your GlobalProtect Portal