The Okta/Palo Alto Networks Cloud Identity Engine SAML integration currently supports the following features:
For more information on the listed features, visit the Okta Glossary.
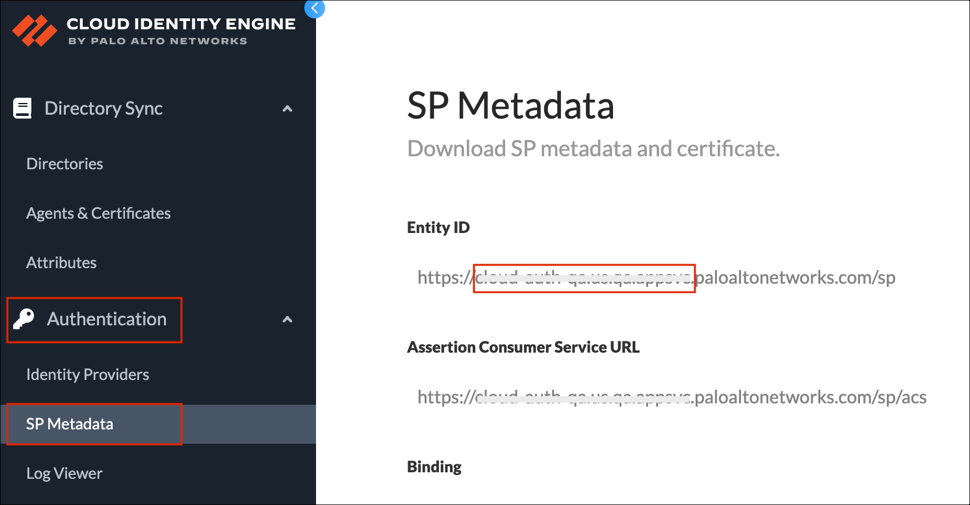
Log in to your Cloud Identity Engine instance as Account Administrator.
In the Cloud Identity Engine app, select Authentication > SP Metadata.
From the Entity ID field make a note of your SAML Region value.
For example: If your Entity ID is https://cloud-auth.us.apps.paloaltonetworks.com/sp
Your SAML Region is cloud-auth.us.apps.
In Okta, go to Directory > Profile Editor.
Search for the Palo Alto Networks Cloud Identity Engine app, then click Profile.
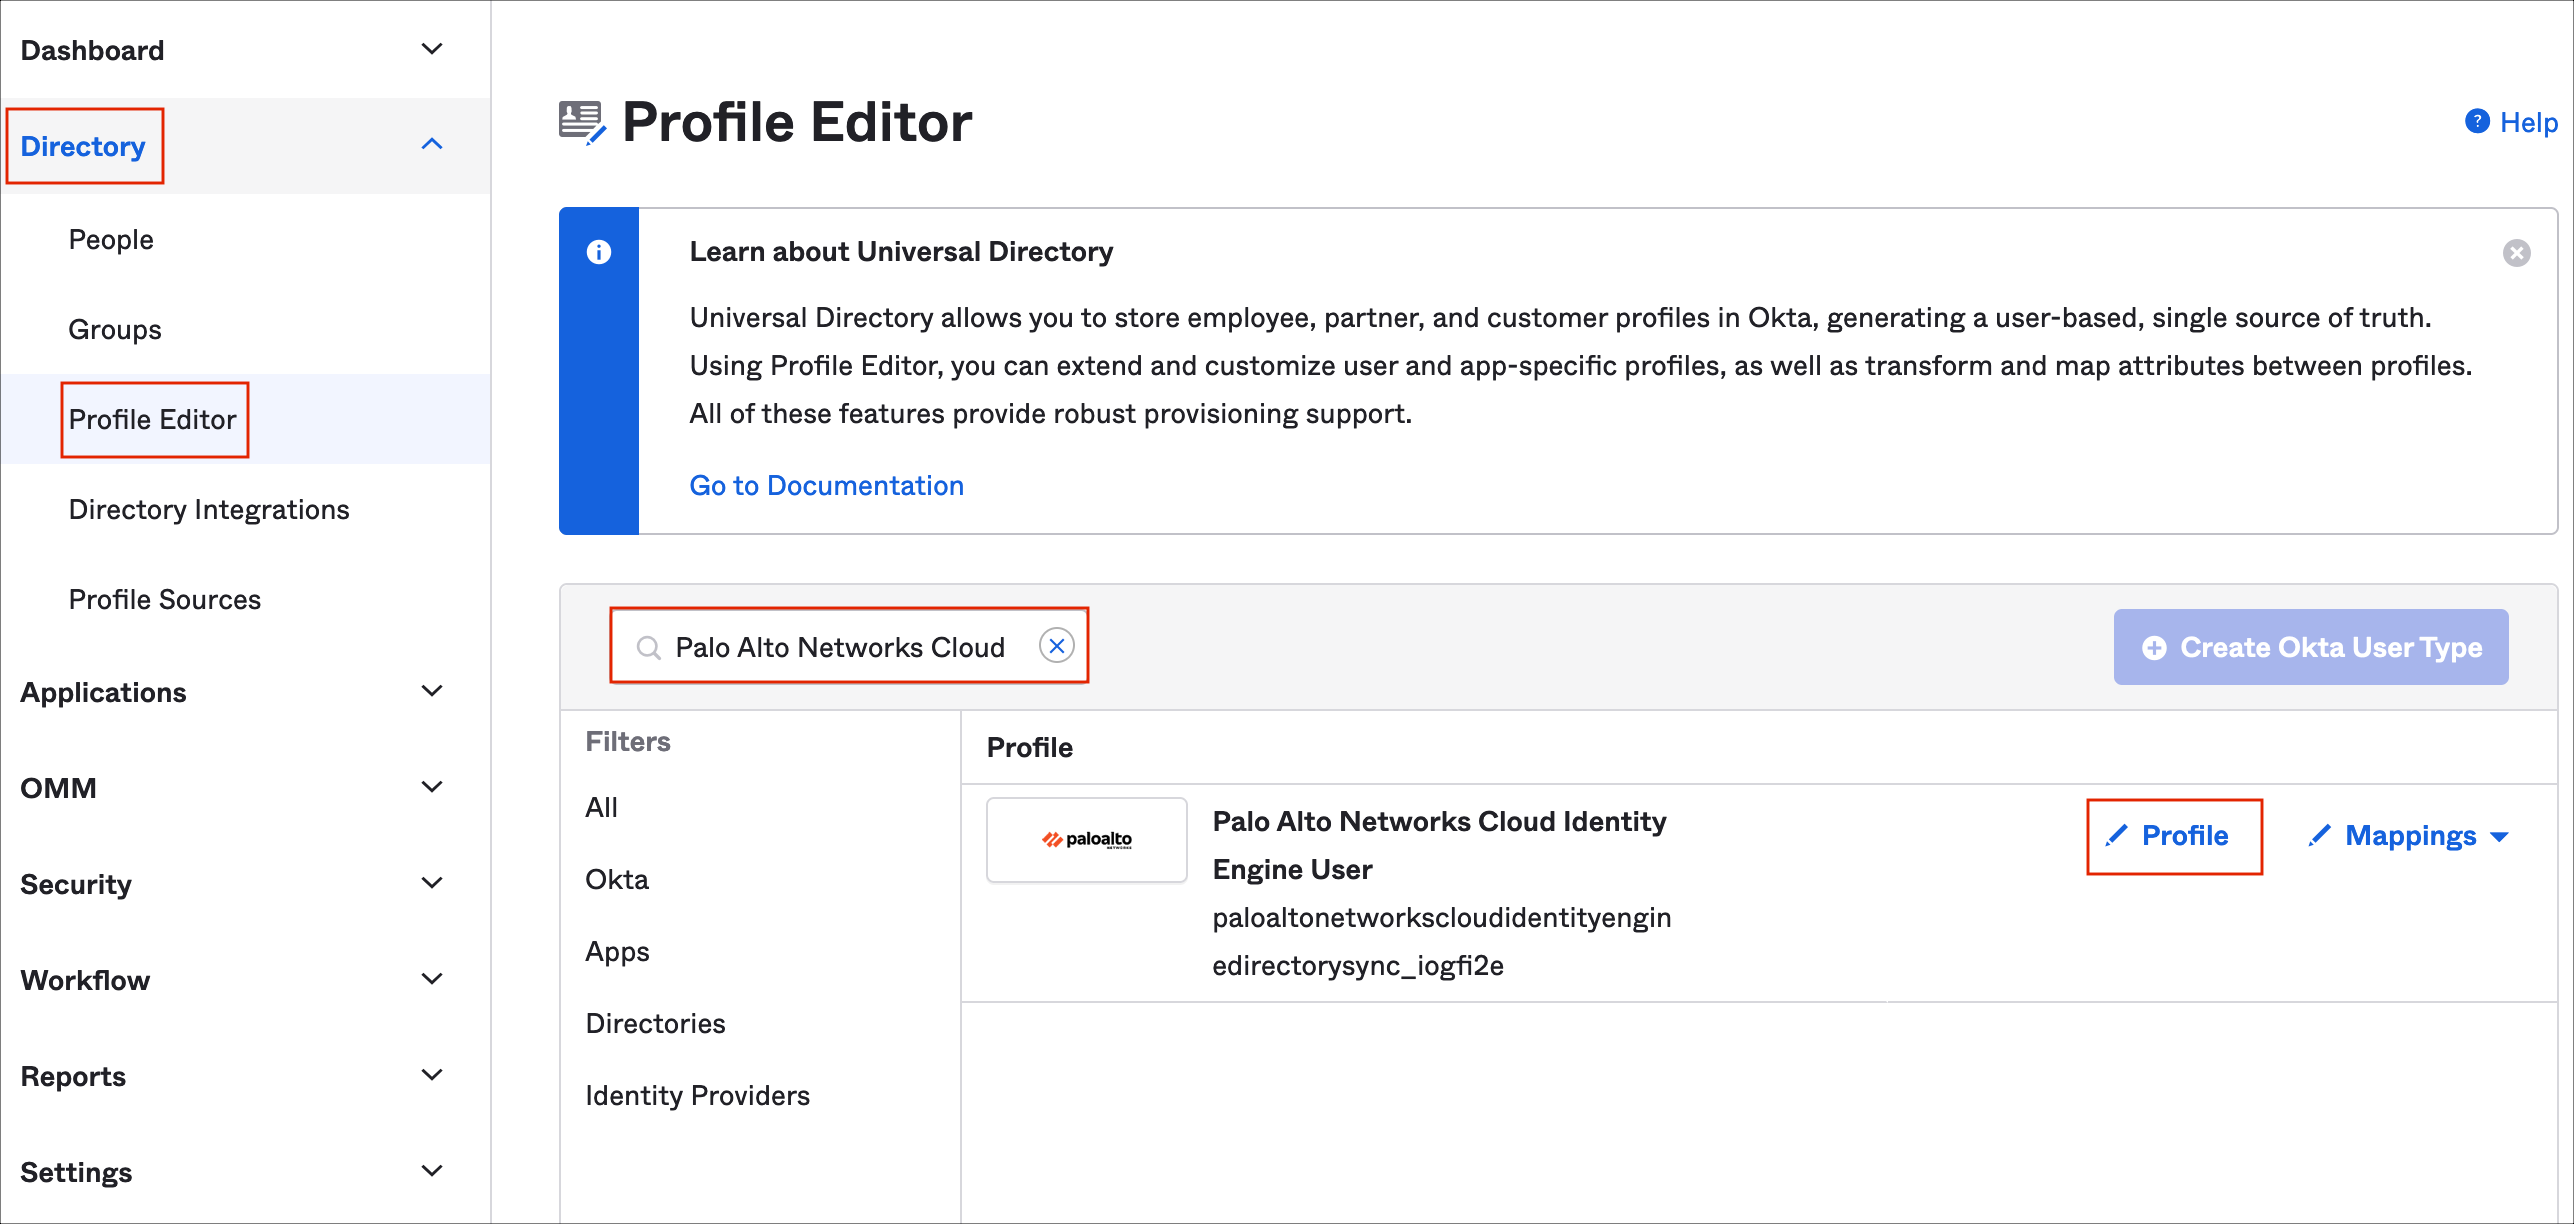
In addition to the default attributes (username and groups), the Palo Alto Networks Cloud Identity Engine application supports the Admin role, Access Domain, and User Domain attributes.
Note: Depending on how you are going to assign your users to the application, you can add Admin role, Access Domain, and User Domain attributes as Group or Personal. Select the required Attribute type when adding the attributes.
The following instructions show you how to successfully send these attributes.
Click Add Attribute, then enter the following information:
Display Name: Enter Admin Role.
Variable Name: Enter adminrole.
Click Save and Add Another.
Enter the following information:
Display Name: Enter Access Domain.
Variable Name: Enter accessdomain.
Click Save and Add Another.
Enter the following information:
Display Name: Enter User Domain.
Variable Name: Enter userdomain.
Click Add Attribute.
Still in Okta, open the Palo Alto Networks Cloud Identity Engine SAML application configuration in the Applications menu, select the Sign On tab for the app, then click Edit.
Select your preferred groups filter from the drop-down list and specify the expression. In our example we have used the Regex rule with the value .* (dot asterix) in order to send all Okta groups to the application instance.
Note: This attribute will be configured in the application UI (see step 17).
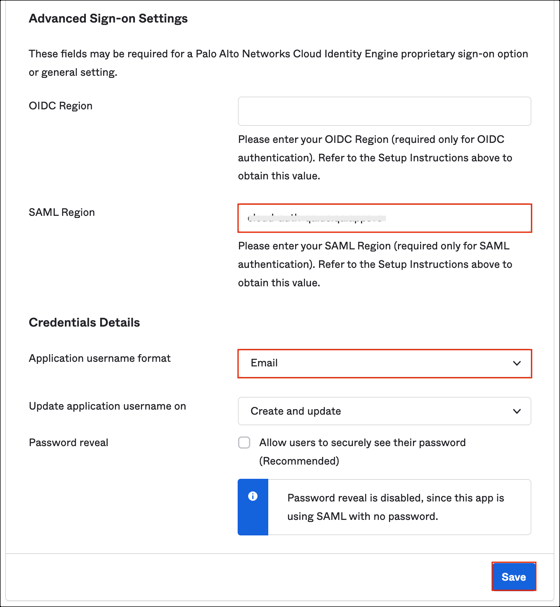
In the Advanced Sign-on Settings section, enter your SAML Region value from step 3.
Application username format: Select Email.
Click Done.
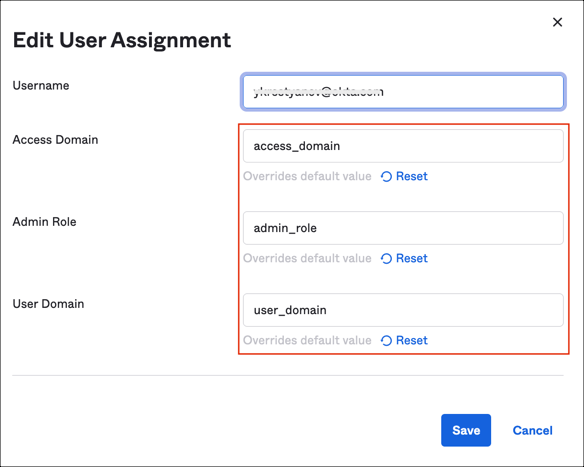
Select the Assignments tab and assign required users or groups. Make sure you provide the required values for Admin Role, Access Domain, User Domain attributes:
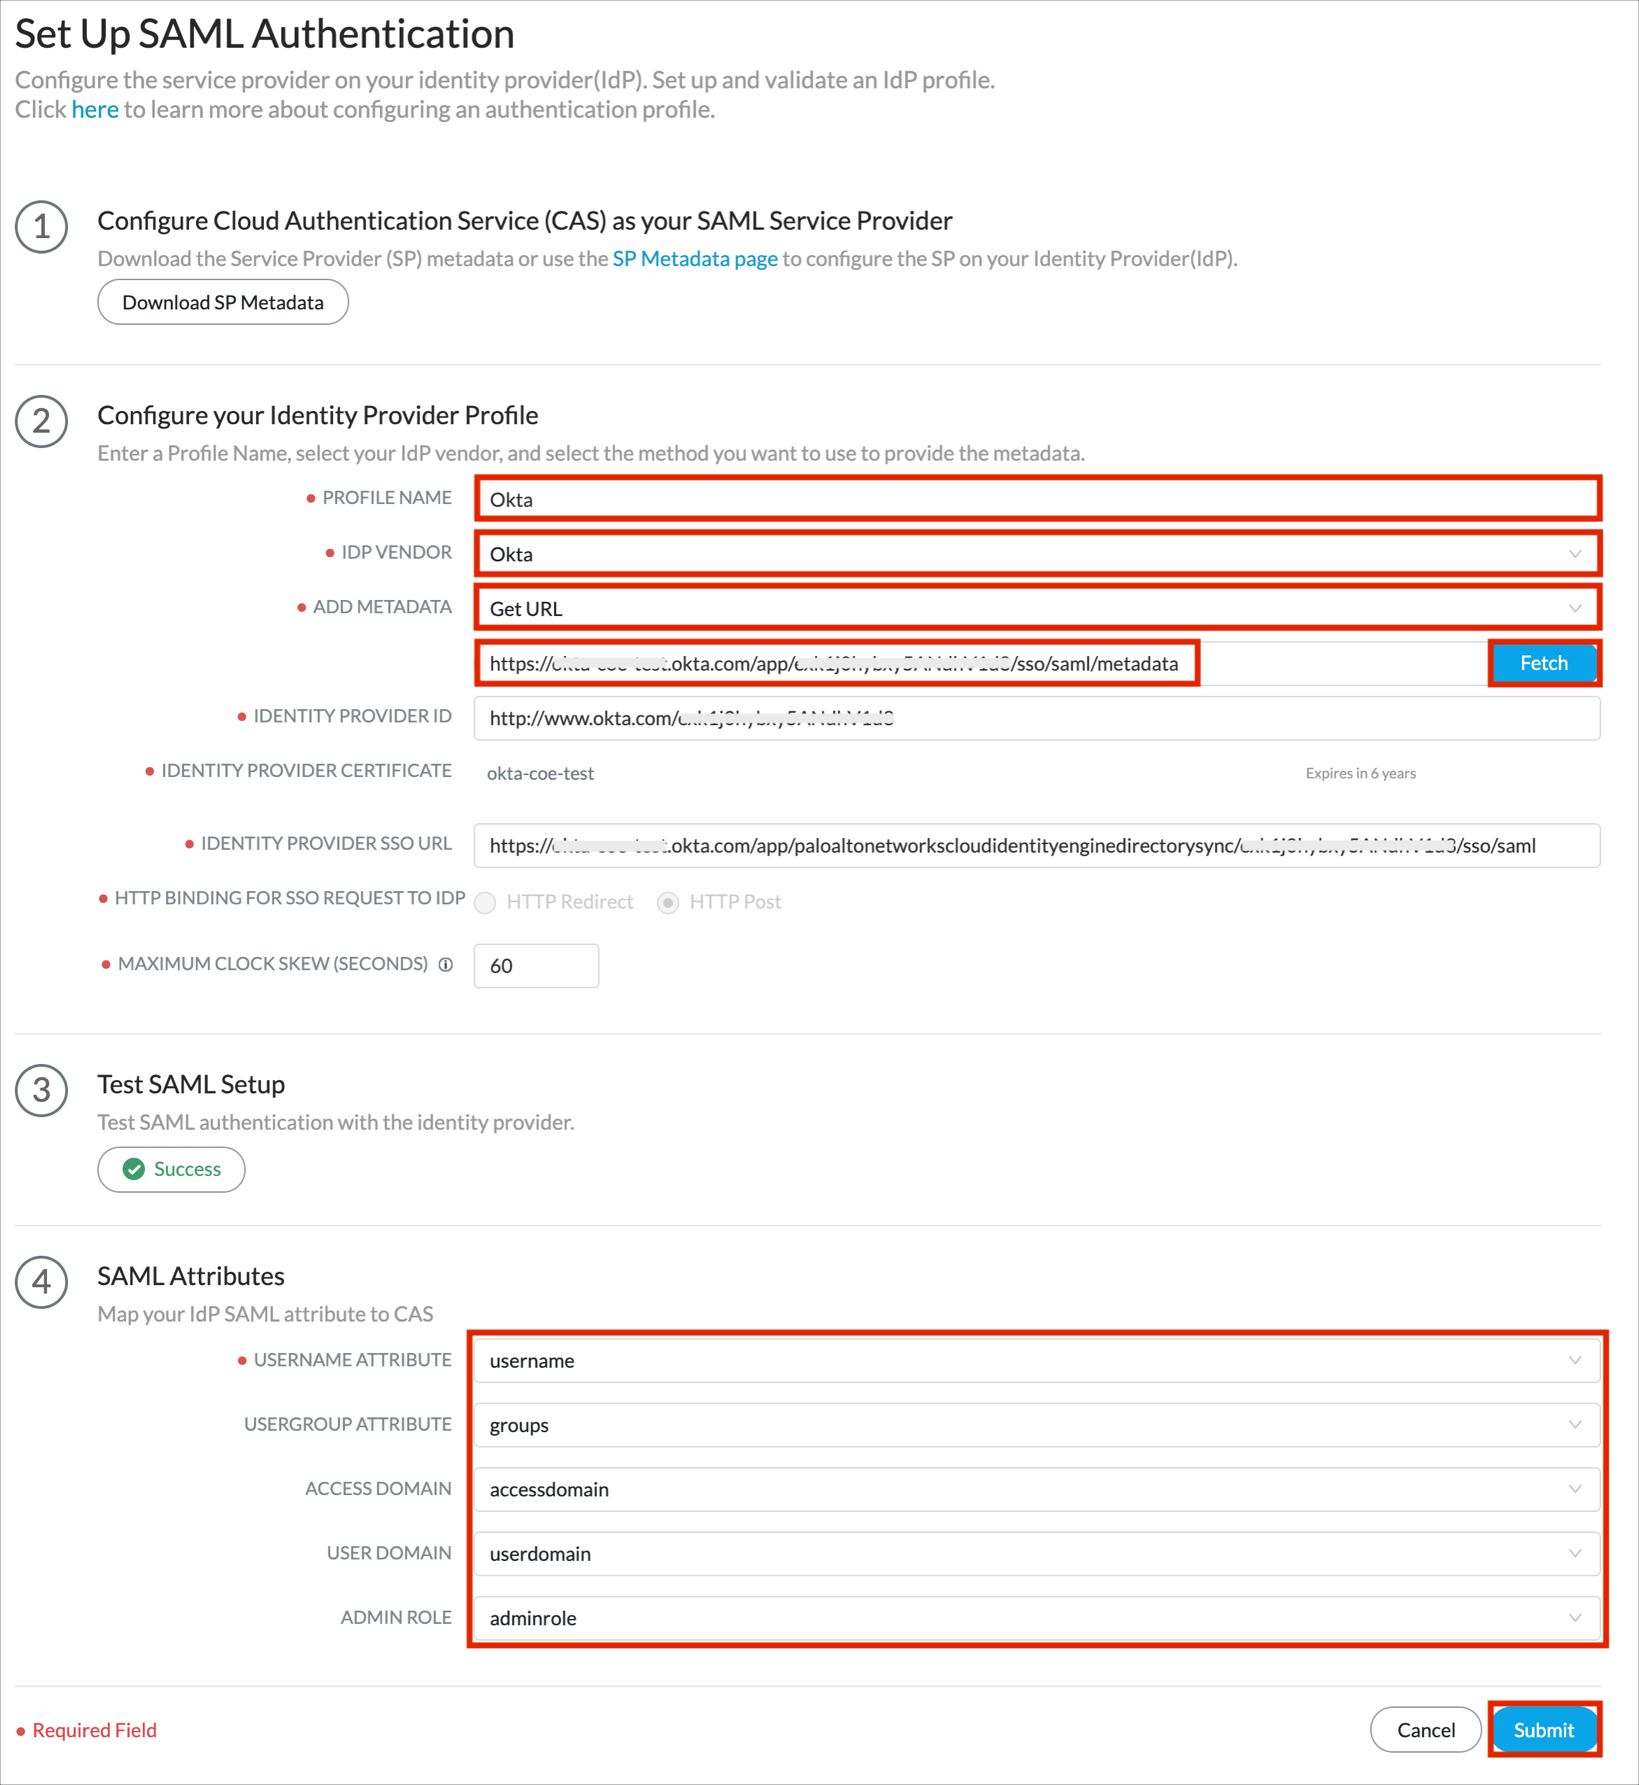
In the Cloud Identity Engine instance, select Identity Providers.
Click Add Identity Provider.

In the Configure your Identity Provider Profile section:
PROFILE NAME: Enter Okta.
IDP VENDOR: Select Okta.
ADD METADATA: Select Get URL, then enter the following URL:
Sign into the Okta Admin dashboard to generate this value.
Click Fetch.
In the Test SAML Setup section, click Test SAML Setup.
In the pop-up window enter your Okta credentials and wait for Test Successful! message.
In the SAML Attributes section enter the following:
USERNAME ATTRIBUTE: Select username
USERGROUP ATTRIBUTE: Select groups
ACCESS DOMAIN: Select accessdomain
USER DOMAIN: Select userdomain
ADMIN ROLE: Select adminrole
Note: The USERNAME attribute is required, the rest of the attributes are optional.
Click Submit.
Finish the steps required in the firewall in order to complete the configuration. For more details, see here. Contact the Palo Alto Networks Cloud Identity Engine Support team if you need more assistance.
Done!
Since only SP-initiated flow is supported we recommend hiding application icon for users.
The following SAML attributes are supported:
| Name | Value |
|---|---|
| username | user.userName |
| accessdomain | appuser.accessdomain |
| adminrole | appuser.adminrole |
| userdomain | appuser.userdomain |
| groups | Configured in the app UI; see groups attribute instructions above. |
Open your firewall Login URL.
Select Use Single Sign-On.
Enter your SSO Account.
Click Continue.