The Okta/OwnBackup SAML integration currently supports the following features:
For more information on the listed features, visit the Okta Glossary.
Sign in to OwnBackup as an administrator.
Click on your account, then select Account Settings:

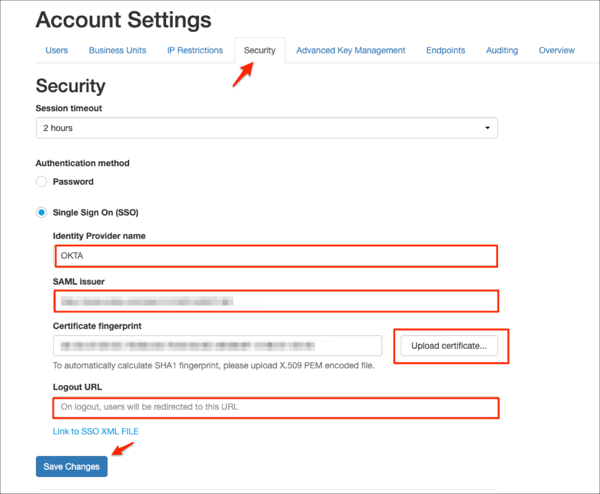
Go to Security SSO > Single Sign-On (SSO), then enter the following:
Identity Provider name: Enter an appropriate name.
SAML Issuer: Copy and paste the following:
Sign into the Okta Admin Dashboard to generate this variable.
Certificate fingerprint: Save the following as okta.pem, then click Upload certificate to locate and upload it:
Sign into the Okta Admin Dashboard to generate this variable.
Logout URL (optional) URL:: Copy and paste the following:
Sign into the Okta Admin Dashboard to generate this variable.
Click Save Changes:
In Okta, select the Sign On tab for the OwnBackup SAML app, then click Edit.
Select your Region:
Main (app1.ownbackup.com): Enter app1
HIPAA Compliant (hipaa1.ownbackup.com): Enter hipaa1
Europe, Middle East, and Asia (emea1.ownbackup.com): Enter emea1
Europe, Middle East, and Asia (uk1.ownbackup.com): Enter uk1
West Europe (Azure) (emea4.ownbackup.com): Enter emea4
Canada Central (AWS) (ca1.ownbackup.com): Enter ca1
US Government 2 West (AWS) (usgov2.ownbackup.com): Enter usgov2
Australia (AWS) (au1.ownbackup.com): Enter au1
Application username format: Select Email.
Click Save:

Done!