Enabling SAML will affect all users who use this application, which means that users will not be able to sign-in through their regular log-in page. They will only be able to access the app through the Okta service.
Backup URL
Oracle Cloud Infrastructure does not provide backup log-in URL where users can sign-in using their normal username and password. You can contact Oracle Cloud Infrastructure support to turn off SAML, if necessary.
The Okta/Oracle Cloud Infrastructure SAML integration currently supports the following features:
For more information on the listed features, visit the Okta Glossary.
Save the following metadata as metadata.xml:
Sign in to Okta Admin app to have this variable generated for you.
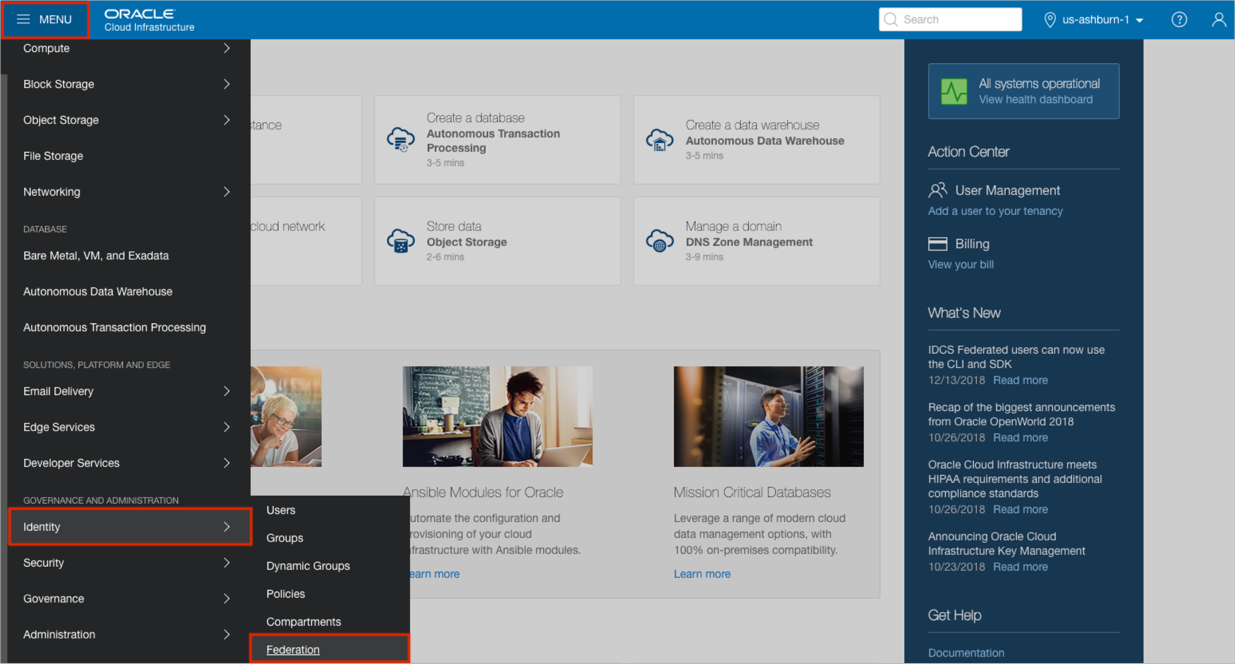
Login to your Oracle Cloud Infrastructure account as administrator.
Navigate to MENU > Identity > Federation:
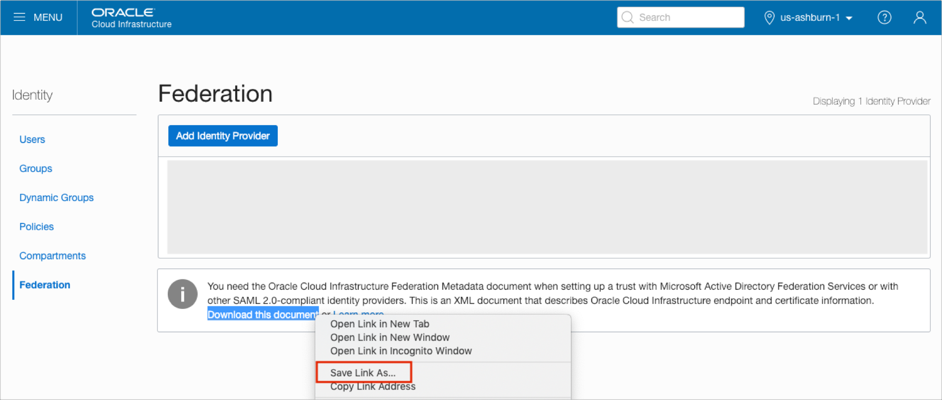
Save the Oracle Cloud Infrastructure metadata file by clicking the Download this document link:
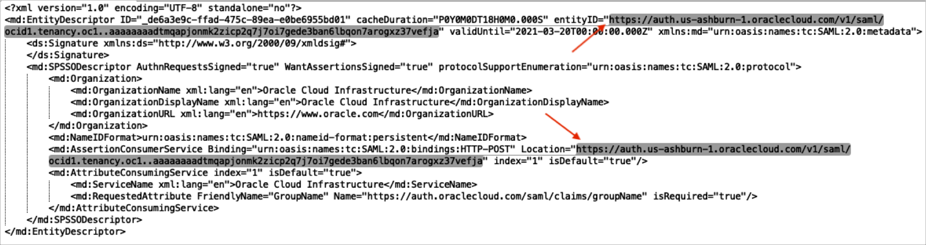
Open the metadata from step 4 in a text editor and save the entityID and AssertionConsumerService values:
Go back to the Oracle Cloud Infrastructure Federation page and enter the following:
Click Add Identity Provider.
NAME: Enter Okta.
DESCRIPTION: Enter any description.
Click the MICROSOFT ACTIVE DIRECTORY FEDERATION SERVICE (ADFS) OR SAML 2.0 COMPLIANT IDENTITY PROVIDER radio button.
Click Browse and select the metadata.xml file from step 1.
Click Continue:

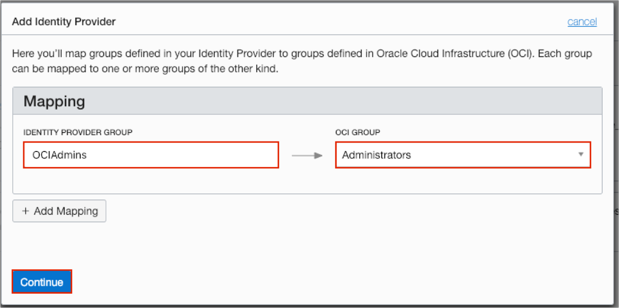
Set a mapping for groups as follows:
For the IDENTITY PROVIDER GROUP field: Enter a group name that will be passed from Okta and select a corresponding group from the OCI GROUP dropdown list.
Note: In our example, we have used OCIAdmins for the Okta group name and the corresponding Administrators group for the OCI GROUP. You can create different groups in Okta, for example OCIAdmins, OCIEveryone etc., and set a mapping for each group.
Click Continue:
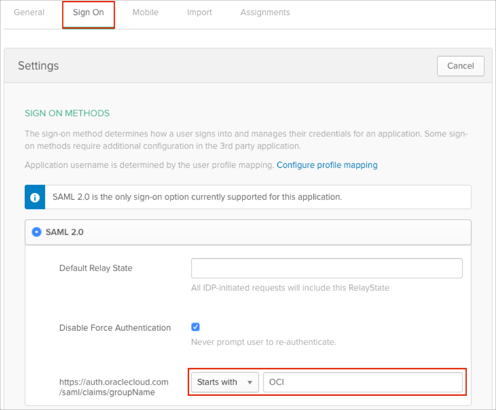
In Okta, select the Sign On tab for the Oracle Cloud Infrastructure app, then click Edit.
Select your preferred group filter from the https://auth.oraclecloud.com/saml/claims/groupName dropdown list and enter a required value.
Note: In our example we have used the Starts with rule with the value OCI in order to send all Okta groups that start with OCI to the Oracle Cloud Infrastructure instance.
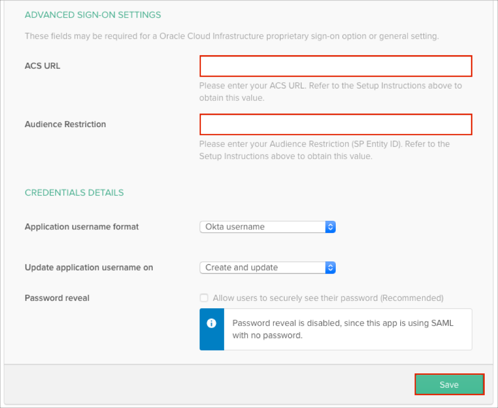
Scroll down to the ADVANCED SIGN-ON SETTINGS section.
Enter the ACS URL (AssertionConsumerService value from step 5) into the corresponding field.
Enter the Audience Restriction (entityID value from step 5) into the corresponding field.
Click Save:
The following SAML attributes are supported:
| Name | Value |
|---|---|
| https://auth.oraclecloud.com/saml/claims/groupName | This is configured in the app UI; see https://auth.oraclecloud.com/saml/claims/groupName attribute instructions above. |
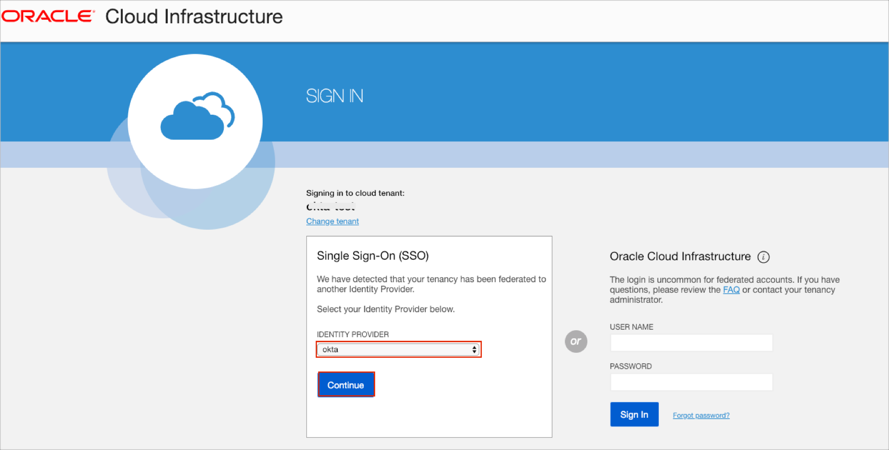
Open your Oracle Cloud Infrastructure login URL:
https://console.[region].oraclecloud.com/?tenant=[tenantid]
Select your Okta configuration from the IDENTITY PROVIDER dropdown list.
Click Continue: