The Okta/Omnilert SAML integration currently supports the following features:
For more information on the listed features, visit the Okta Glossary.
Contact the Omnilert Support team (support@omnilert.com) and request that they enable SAML 2.0 for your account.
Save, then attach the following Metadata file to your request:
Sign into the Okta Admin dashboard to generate this value.
The support team will process your request. After receiving a confirmation email, login to your Omnilert account.
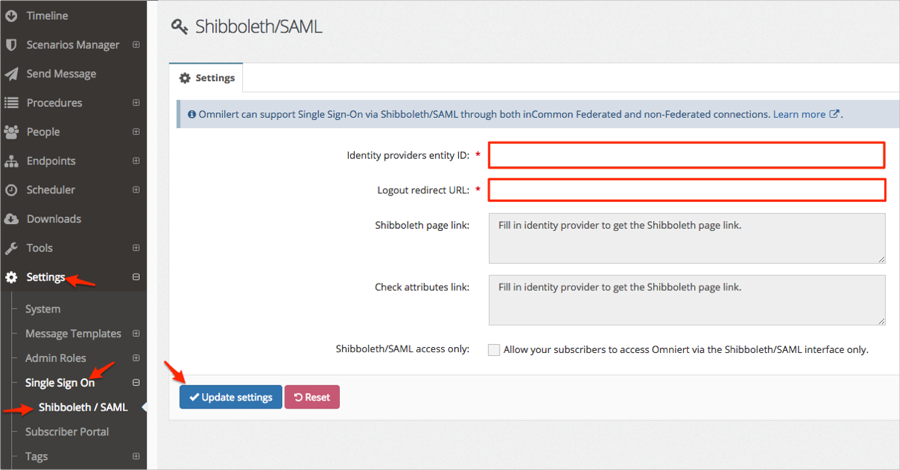
Navigate to Settings > Single Sign On > Shibboleth/SAML, then follow the steps below:
Identity providers entity ID: Copy and paste the following:
Sign into the Okta Admin Dashboard to generate this variable.
Logout redirect URL: Copy and paste the following:
Sign into the Okta Admin Dashboard to generate this variable.
Click Update settings:
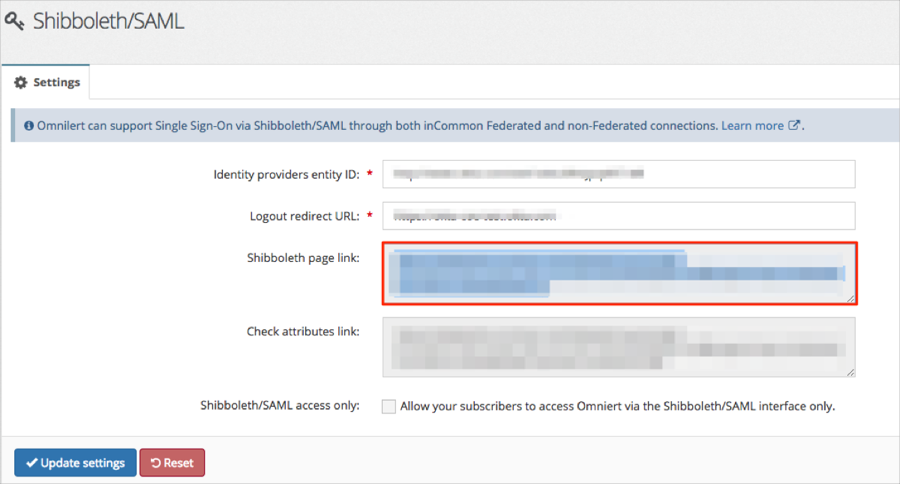
Still on the SAML settings page copy the value appeared in the Shibboleth page link field. This URL will be used to initiate a SP flow:
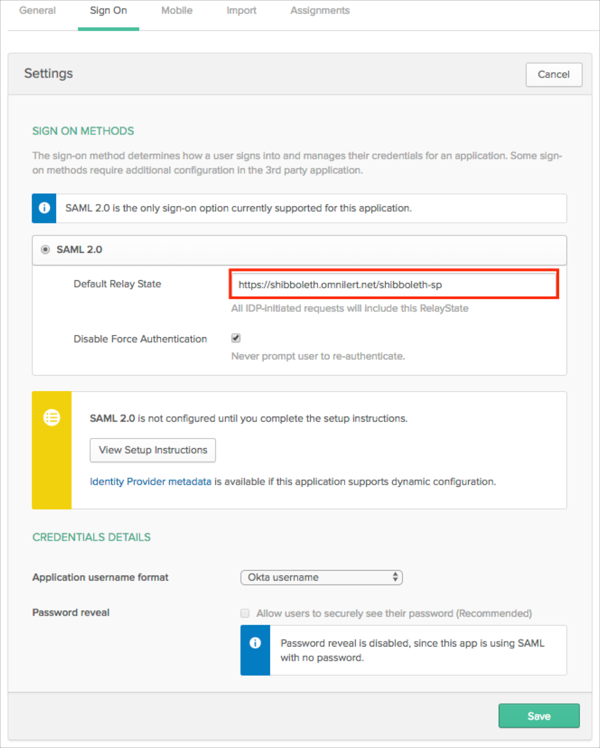
In Okta, select the Sign On tab for the Omnilert app, then click Edit.
Default Relay State: Enter https://shibboleth.omnilert.net/shibboleth-sp.
Click Save.
The following SAML attributes are supported:
| Name | Value |
|---|---|
| givenName | user.firstName |
| sn | user.lastName |
| omnilertUsername | user.login |
Go to [your-Shibboleth-page-link] you made a copy of in step 5.