The Okta/NetSuite SAML integration currently supports the following features:
For more information on the listed features, visit the Okta Glossary.
Sign on to NetSuite with your user credentials.
Go to Setup > Company > Enable Features:
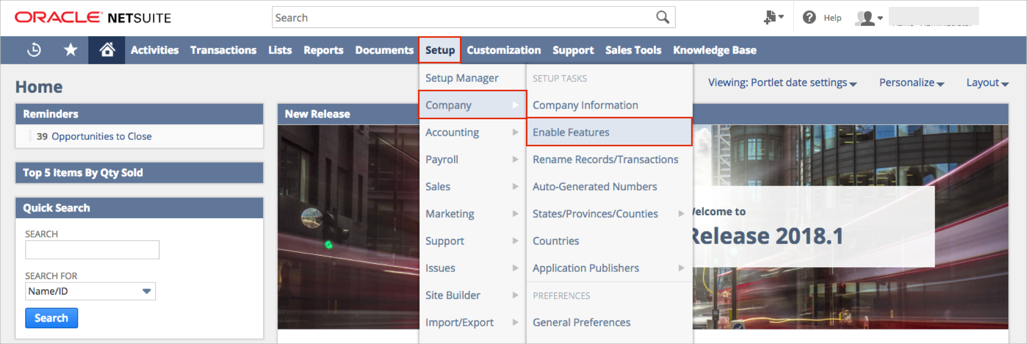
Select SuiteCloud on the Enable Features menu:

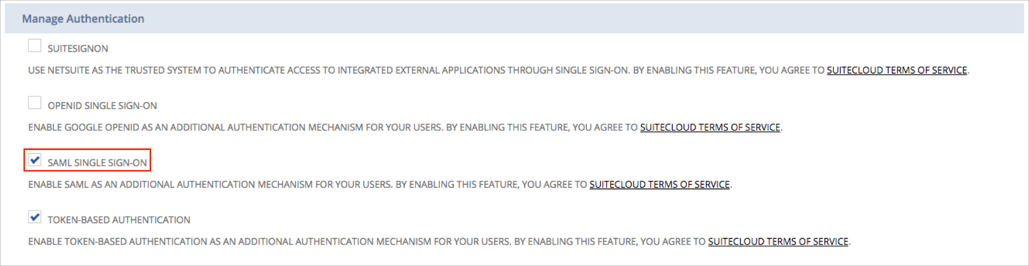
Scroll down to the Manage Authentication section.
Check SAML SINGLE SIGN-ON:
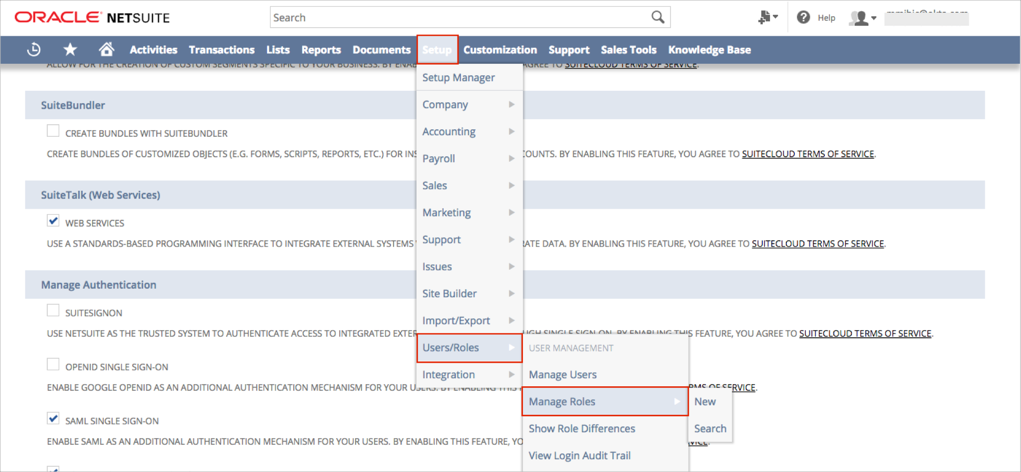
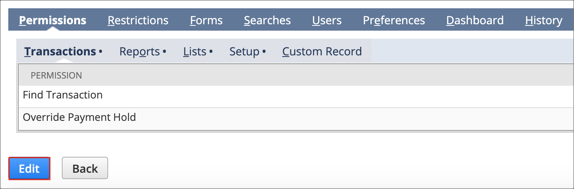
On the top menu, select Setup > Users/Roles, then click Manage Roles:
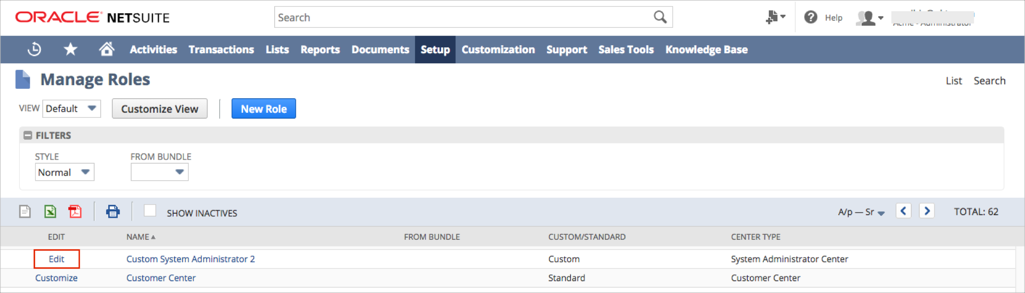
The Manage Roles section that contains a list of all the roles assigned in your organization opens. Select Edit for a role for which you want to enable SAML:
Scroll down to the Permissions section, then click Edit:
Select Setup:

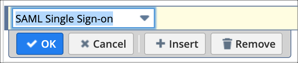
Select the dropdown icon to display the list above the empty box. Select SAML Single Sign-on, then select Add:
Only assign the following permission to roles that need the ability to configure the SAML SSO connection (for example, admin roles). Don't assign this permission to standard user roles.
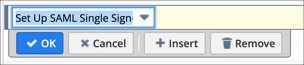
Select Set Up SAML Single Sign-on, and then select Add again:
The granted permissions are listed with the level Full:

Select Save to return to the Manage Roles section.
Repeat steps 7–12 for each role for which you want to enable SAML.
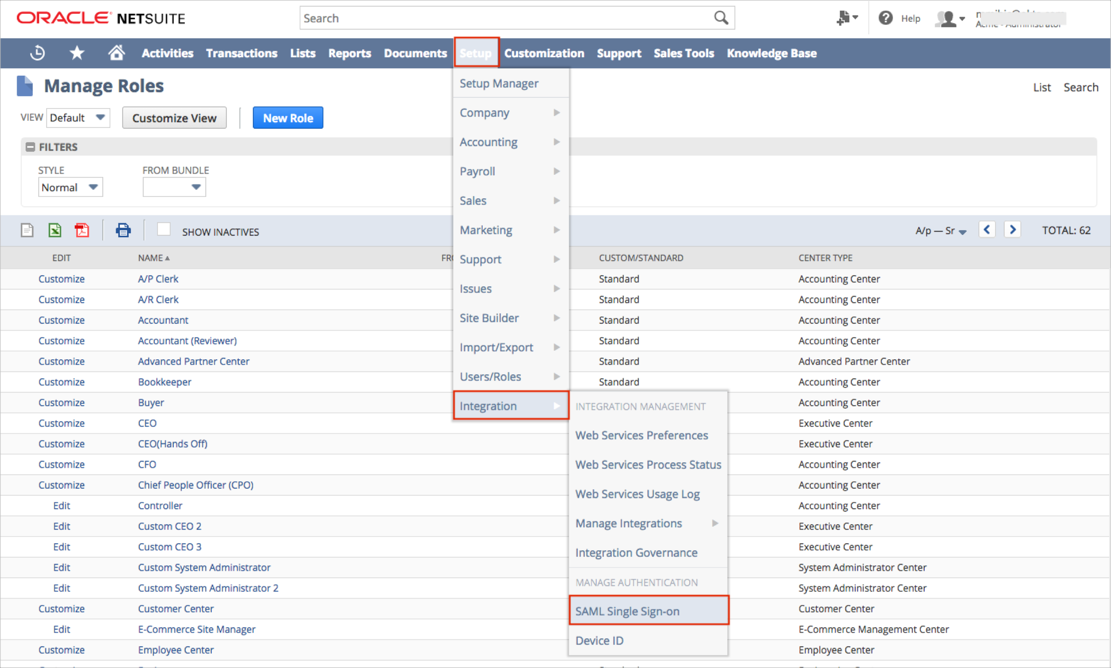
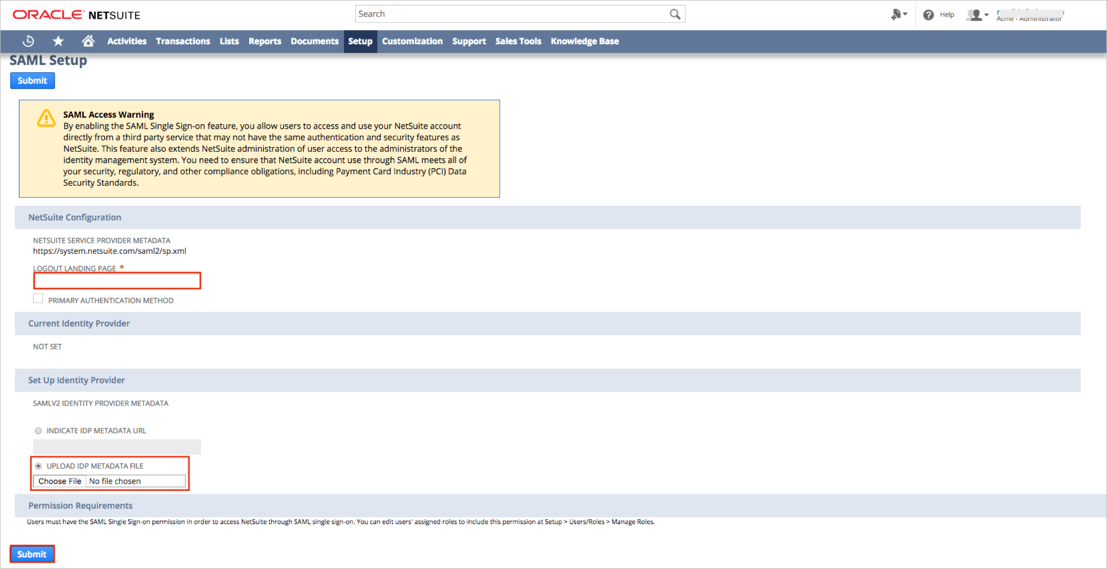
On the main menu at the top of the page select Setup > Integration > SAML Single Sign-on:
The SAML Setup page opens. Enter the following:
LOGOUT LANDING PAGE: Copy and paste the following:
Sign into the Okta Admin dashboard to generate this value.
UPLOAD IDP METADATA FILE: Save the following metadata in a file named metadata.xml. Select UPLOAD IDP METADATA FILE, then select Choose File to locate and upload the metadata.xml file you just created.
Sign into the Okta Admin dashboard to generate this value.
Click Submit.
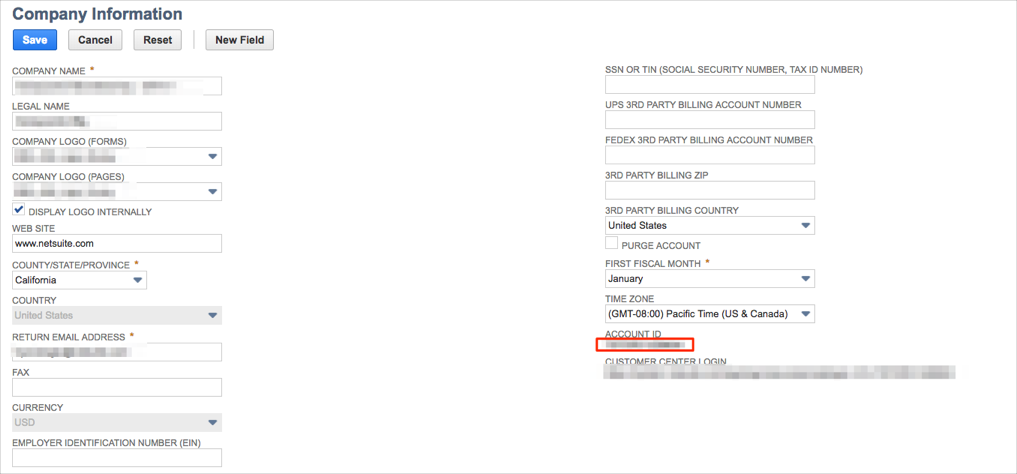
Go to Setup > Company > Company Information:

Make a copy of your NetSuite ACCOUNT ID, marked in red below:
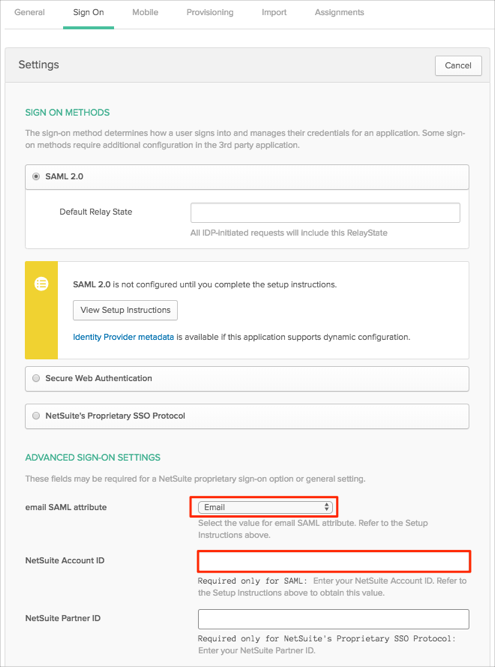
In Okta, select the Sign On tab for the NetSuite SAML app, then click Edit:
email SAML attribute: Select the value that will be used as email SAML attribute (either Email or Username).
NetSuite Account ID: Enter your NetSuite Account ID you made a copy of in step 16.
Click Save:
Done!
The following SAML attributes are supported:
| Name | Value |
|---|---|
| Either user.email or user.userName (depending upon what you selected for email SAML attribute (step 17)) | |
| account | Comes from NetSuite Account ID (step 17) |
Netsuite supports two methods of using SP-initiated SAML:
By going to https://system.netsuite.com/app/center/card.nl?c=[ACCOUNTID].
By using a deep link to start the SP-initiated flow. For example: https://system.netsuite.com/app/test/test.nl?whence=.
Note: This second method only works if you are using a browser where you previously had a login session for Netsuite.
The Shared IdP feature in NetSuite 2018.1 introduces the possibility to trust the same IdP from multiple NetSuite accounts.
To use the same IdP in multiple NetSuite account types, do the following:
You need to add only one NetSuite application instance in Okta.
During NetSuite application configuration in Okta, leave NetSuite Account ID empty:
Configure SAML in all of the NetSuite accounts that you want to use.
Upload the same IdP metadata file (Step 14) in all of the NetSuite accounts that you want to use with SAML.