The Okta/NetDocuments SAML integration currently supports the following features:
For more information on the listed features, visit the Okta Glossary.
Sign in to NetDocuments with your Admin account.
Select Admin in the upper right corner.
Go to Security Center > Advanced Authentication:
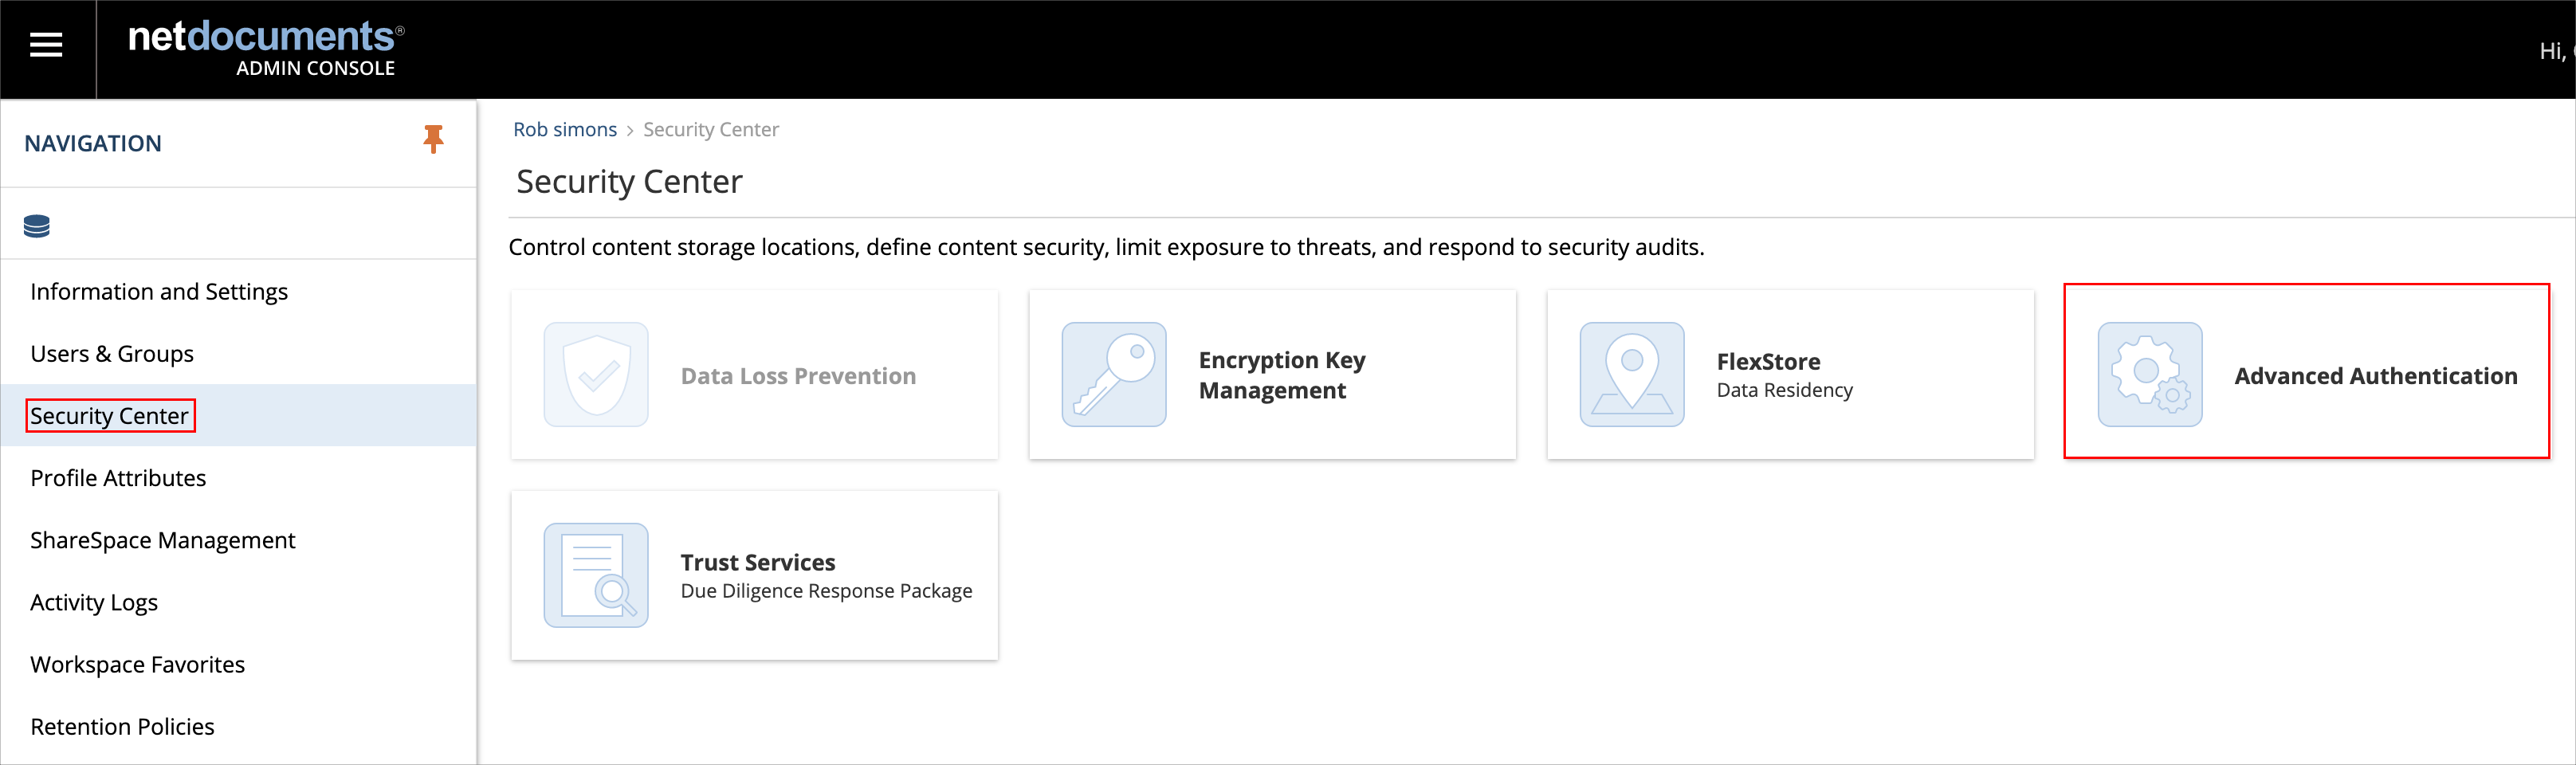
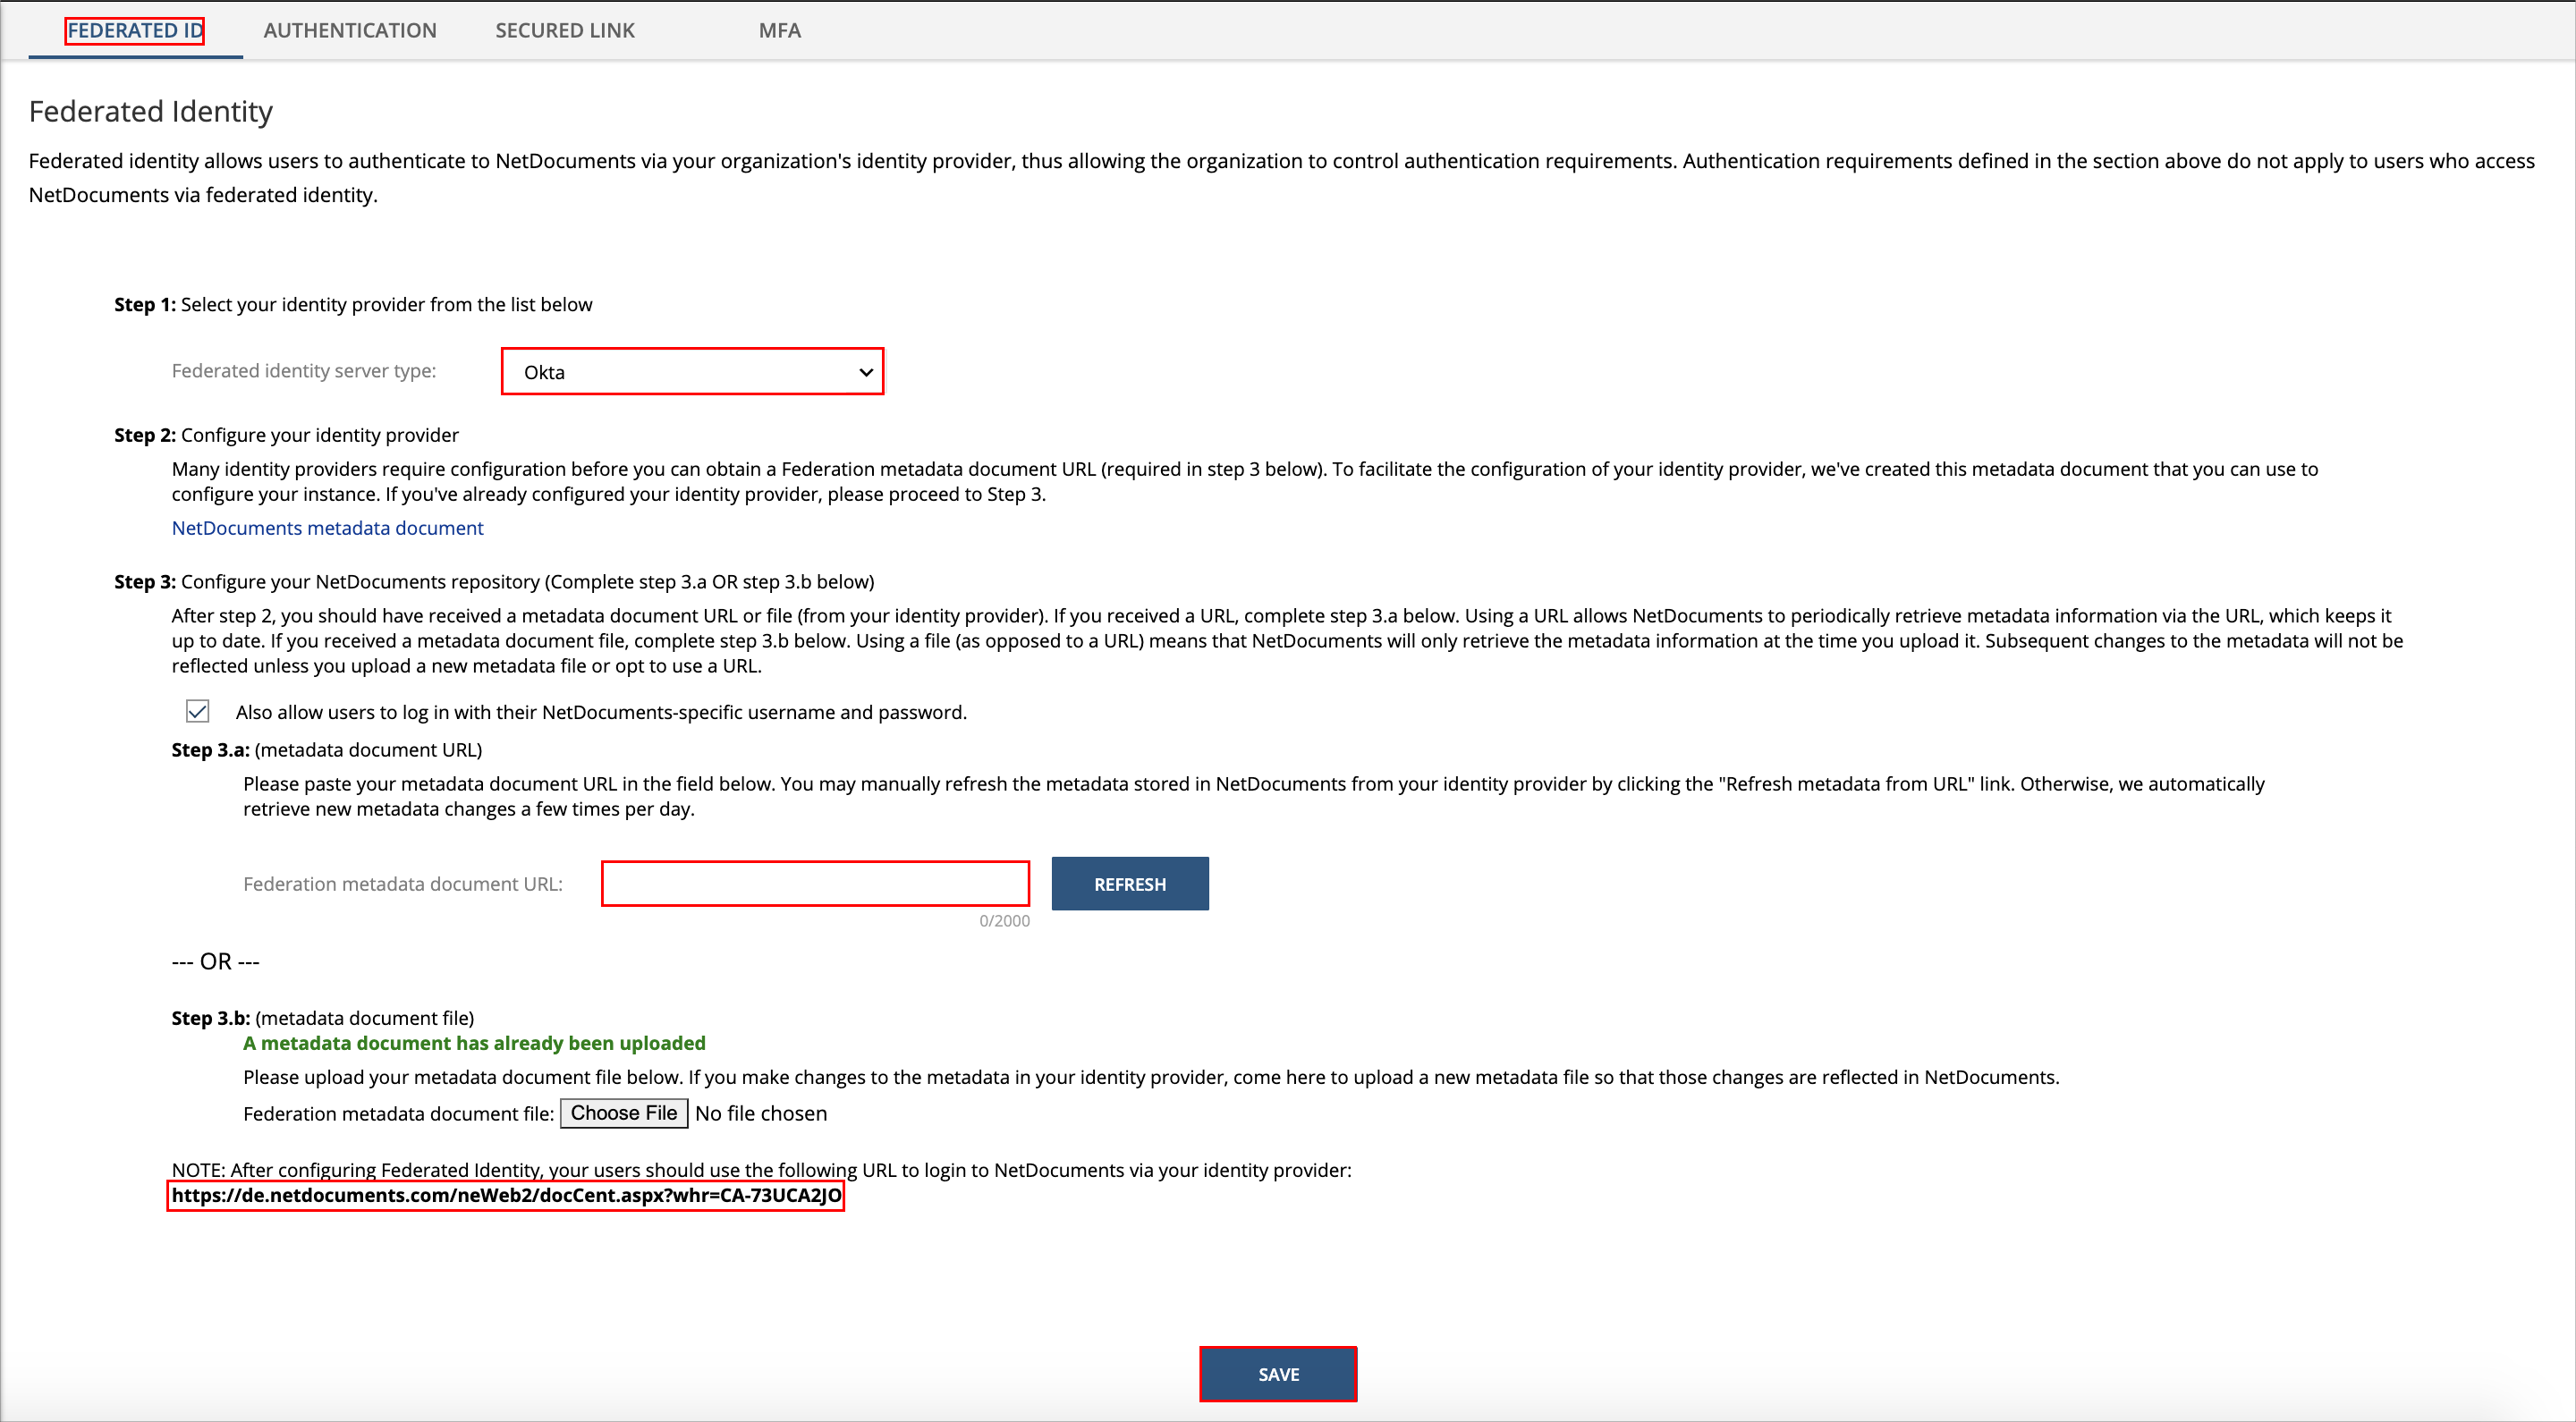
Select the Federated ID tab, then enter the following:
Federated identity server type: Select Okta.
Federation metadata document URL: Copy and paste the following:
Sign into the Okta Admin dashboard to generate this value.
Make a copy of the URL to login to NetDocuments.
Click SAVE:
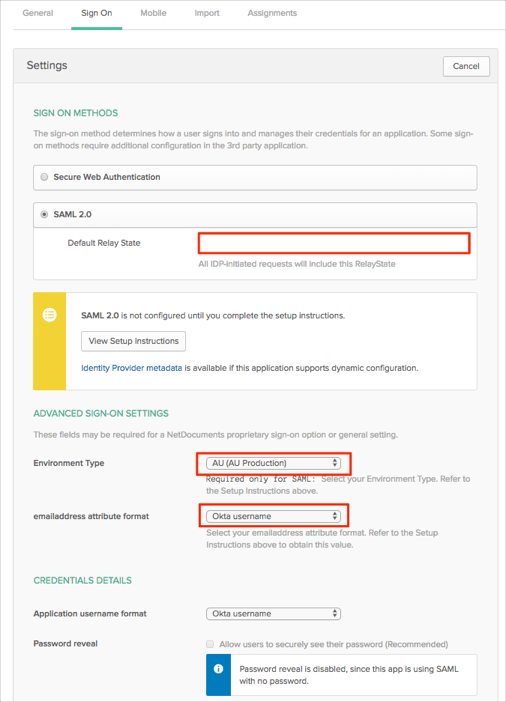
In Okta, select the Sign On tab for the NetDocuments SAML app, then click Edit.
Default Relay State: Paste your URL to login to NetDocuments you made a copy of in step 4.
Select your Environment Type.
Guidelines for your Environment:
https://preview.netdocuments.com/: Select Preview (testing).
https://eu.netdocuments.com/: Select EU (EU Production).
https://vault.netvoyage.com: Select Vault (US Production).
https://au.netdocuments.com: Select AU (AU Production).
https://gov.netdocuments.us: Select GOV.
https://de.netdocuments.com: Select DE (DE Production).
emailaddress attribute format: Select the format of the emailaddress attribute.
Click Save:
The following SAML attributes are supported:
| Name | Value |
|---|---|
| http://schemas.xmlsoap.org/ws/2005/05/identity/claims/emailaddress | user.userName OR user.email |
| http://schemas.xmlsoap.org/ws/2005/05/identity/claims/givenname | user.firstName |
| http://schemas.xmlsoap.org/ws/2005/05/identity/claims/surname | user.lastName |
Go to your URL to login to NetDocuments you made a copy of in step 4.