Read this before you enable SAML
Enabling SAML will affect all users who use this application, which means that users will not be able to sign-in through their regular log-in page. They will only be able to access the app through the Okta service.
Backup URL
NS1 does not provide backup log-in URL where users can sign-in using their normal username and password. You can call NS1 support to turn off SAML, if necessary.
The Okta/NS1 SAML integration currently supports the following features:
For more information on the listed features, visit the Okta Glossary.
Copy and save the following certificate as ns1-saml.crt
-----BEGIN CERTIFICATE-----
MIIFiTCCA3GgAwIBAgIJAJaF6ygh024zMA0GCSqGSIb3DQEBCwUAMFsxCzAJBgNV
BAYTAlVTMREwDwYDVQQIDAhOZXcgWW9yazERMA8GA1UEBwwITmV3IFlvcmsxDjAM
BgNVBAoMBU5TT05FMRYwFAYDVQQDDA1hcGkubnNvbmUubmV0MB4XDTE3MTExNjE3
NTAzNloXDTI3MTExNDE3NTAzNlowWzELMAkGA1UEBhMCVVMxETAPBgNVBAgMCE5l
dyBZb3JrMREwDwYDVQQHDAhOZXcgWW9yazEOMAwGA1UECgwFTlNPTkUxFjAUBgNV
BAMMDWFwaS5uc29uZS5uZXQwggIiMA0GCSqGSIb3DQEBAQUAA4ICDwAwggIKAoIC
AQDKGj47XZRAaklFhMoeSp8N99Ca/Q63oHIHHrXuZqJWkCzsusIAtbcfF9GANRhT
ICrmLILZrX0tqWTkP3v0THuLGcY+u+SD+LIwnOVYOVHjUxdxcAqlAaQdYmdhBp7b
6o26ErnIK8Ur9s9CJ4usy2xxZi+NGL8etsqAXeiWNPVS1zqO6ZSVkZ68BoDyeniy
1/W9/NEZOwMuwiUj8bN76HunIWa13xto49PYk8vgOHVmilkVfVktANSZ5v3yOGD4
DckfD83fRlWHZ/Hwy4QQuB4yehO2yZqKi9BVy0/fMGm5iTk9Pq8VhwESOw/K+ZpY
oJp/mog7r93yo1sW3fn9eyVr1DdXd/j9ahhdl9A+sG9+0iduGxuSRPCnuHXMvJ/F
lM0PU37E0sd/5ZwtZwChx8s9lmDd6yWharkwkKzqDWJjCCQsCiCgfehn74l0boOJ
mOCZedJIpdKDy4xI+bH77ny/aj+3n2kPmxmc1znH2mx4Wqg2h9BlQix8Y2wUeIEh
5HzML56U7qxoDZ3Gcl+0PZdRhakL5CIRMoSF4koEmI8HuJpuavz+aZMtfx1kYdyk
+yawS+/P/4kzDMNOegBTFdZu2CevLW/dIOFgG9OxJIICD6lfZI0UVkmDe0te7rAa
jCLkFO/kCq/lxs+W+c4RhppcNMFTOzbKW86xGdS15naMcwIDAQABo1AwTjAdBgNV
HQ4EFgQUAW03auXMRQqexrorgGvjuh8mIWMwHwYDVR0jBBgwFoAUAW03auXMRQqe
xrorgGvjuh8mIWMwDAYDVR0TBAUwAwEB/zANBgkqhkiG9w0BAQsFAAOCAgEAbISf
XtFRkVQDOuVnjtlOtB6agf5p/NeQgA3P0NFoTIMBaWRzm5v6FifimJKNbwSL5aD0
IXjsguTDsyU1g61KIeegKB1YxKggKWob6J9efdlO88tsfp0Hb4SsddSM+xRxJuM7
cbBq/YqvPIpt6oh9bfevLD/+ZVEAd02cWJh7QyRpiInAiw3h6O6qRzBw5tlAspJR
3m5aImstScI5q93ip/N13uMmla349PT0F90WNEw8PGdOX0EBjUrl4IkZKLJdJyiX
O04esluq4obXzT3ThPQeNT2xOvn+id9CCnMlvKCA+rdYYExqok4H8oiy8abJnBxi
WXAzoD1d0UDTVlYjJ0AA4V9NZkUkpDFPW2Dg21NRVe+xLcHdIYN8A2goOdlGdxM4
C6y29BcvEPxM6oLIroW3U0D4qzpFHz75tE1MfDqlKZT/wOKdzF7Yq5T9lUwhtM86
ZtkkYFIrW8LId0SOw7B0MEf//k50qkh5V7zfumtFregO8YEFcmqvj+C/OVWVTG9i
VJi11Ga/jNpp0mImoPsUkOyFCUG6Ul9HYiFUNKqde/DxQrMC8e+kiRxbzAGqq8SV
zXsFejxafPqw+F4mJuL+vkcsIvpZ8XcUYdWTggJ/H13h9N03gL5a0dOhWOe2mlDw
iPucTgSKt4RsZWl+CmuVzvb4t6u0l+O2teg4MOs=
-----END CERTIFICATE-----
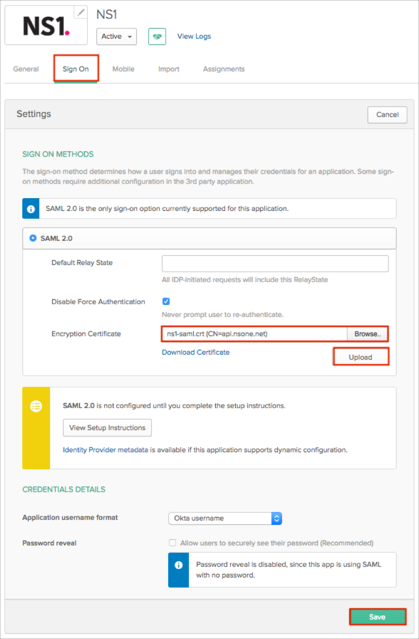
In Okta, select the Sign On tab for the NS1 app, then click Edit.
Encryption Certificate: Click Browse... to locate the ns1-saml.crt certificate you saved in step 1, then click Upload.
Click Save:
Contact the NS1 Support team at support@ns1.com and request that they enable SAML 2.0 for your account. Also ask them to provide you with the SSO ID value.
Include the following Metadata URL with your request to NS1:
Sign into the Okta Admin dashboard to generate this value.
Assign the application to your users:
Note: Any Okta users whose NS1 username is not their Okta username will require you to manually set a correct NS1 User name for that user in the Okta NS1 application.

Once you have completed the configuration steps, contact the NS1 Support team to let them know when you’re ready to enable SSO from the NS1 side. You will continue to be able to login via your NS1 authentication until the NS1 Support team completes this step. Once the NS1 Support team has enabled SSO, users will only be able to login via Okta authentication. Please let them know if you have a switch-over date/time in mind.
Done!
Make sure that you entered the correct value in the SSO ID field under the General tab in Okta as provided on Step 3. Using the wrong value will prevent you from authenticating via SAML to NS1.
The following SAML attributes are supported:
| Name | Value |
|---|---|
| user.email | |
| FirstName | user.firstName |
| LastName | user.lastName |
| Login | user.userName |
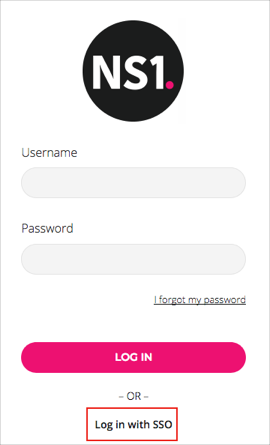
Open the following URL: https://my.nsone.net/.
Click Log in with SSO:
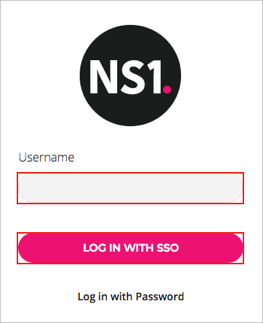
Enter your NS1 Username.
Click LOG IN WITH SSO: