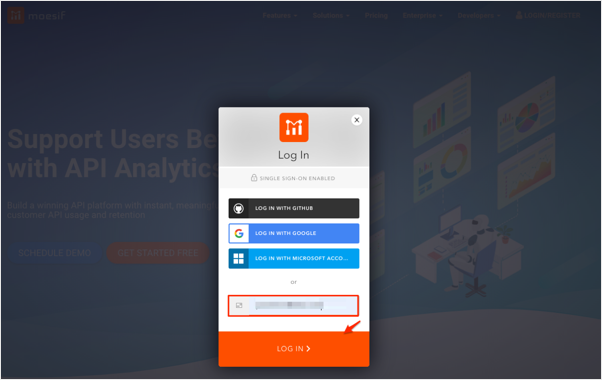
Enabling SAML will affect all users who use this application, which means that users will not be able to sign in through their regular log in page. They will only be able to access the app through the Okta service.
Backup URL
Moesif does not provide backup log-in URL where users can sign-in using their normal username and password. You can contact Moesif Support (support@moesif.com) to turn off SAML, if necessary.
The Okta/Moesif API Analytics SAML integration currently supports the following features:
For more information on the listed features, visit the Okta Glossary.
Contact the Moesif Support team (support@moesif.com) and request that they enable SAML 2.0 for your account.
Save, then attach the following Metadata file to your request:
Sign into the Okta Admin dashboard to generate this value.
The Moesif Support team will process your request. After receiving a confirmation email, you can start assigning people to the application.
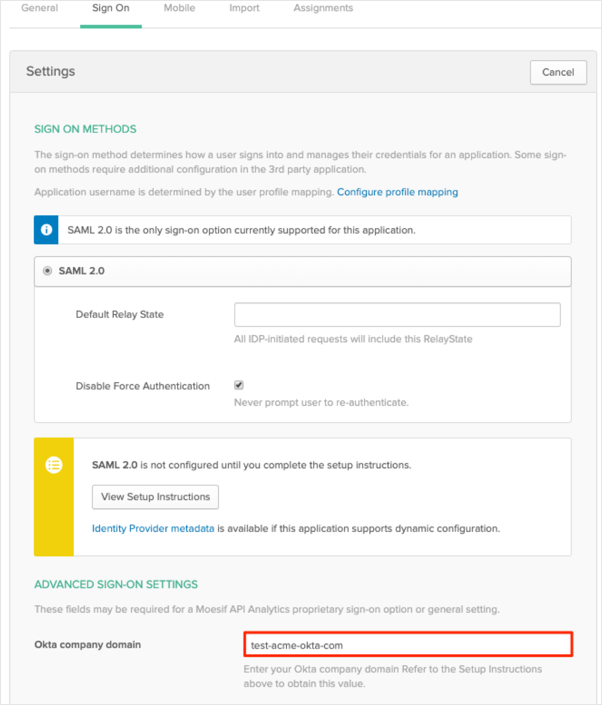
In Okta select the Sign On tab for the Moesif API Analytics SAML app, then click Edit:
Enter your Okta company domain replacing any "." with "-" into the corresponding field.
For example, if your Okta company domain is test-acme.okta.com, enter test-acme-okta-com.
Click Save:
Done!
Make sure that you entered the correct value in the Subdomain field under the General tab in Okta. Using the wrong value will prevent you from authenticating via SAML to Moesif API Analytics.
The following SAML attributes are supported:
| Name | Value |
|---|---|
| user.userName | |
| given_name | user.firstName |
| family_name | user.lastName |
| role | appuser.role |
See Custom Attributes to add custom attributes.
Go to https://www.moesif.com
Click LOGIN/REGISTER, then select the Log In tab:
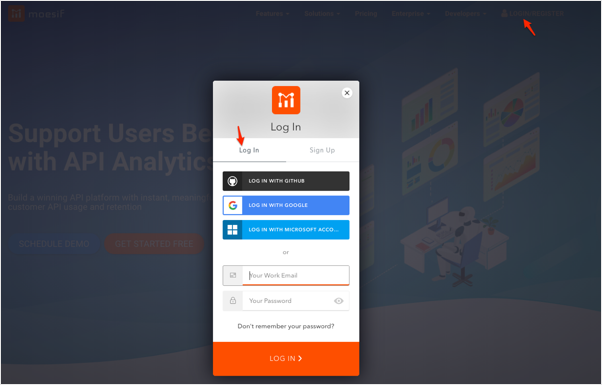
Enter your email, then click LOG IN tab:
By default Okta sends only 3 SAML attributes in the SAML assertion: email, given_name, and family_name.
To send the custom attribute role, follow the steps below:
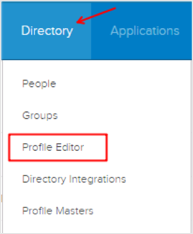
In Okta, navigate to Directory > Profile Editor.
Search for the Moesif API Analytics app, then click the Profile edit button:
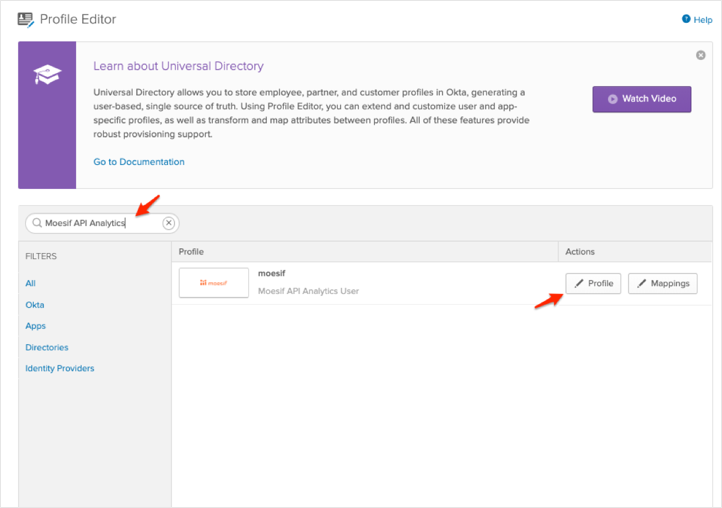
Click Add Attribute, then enter the following:
Display Name: Enter role.
Variable Name: Enter role.
Check Define enumerated list of values and add the three predefined roles supported by Moesif:
admin
member
read-only
Click Save:
Note: Scope (optional): If you check User personal, the current attribute will be available both when you assign a single user to the app and when you assign a group to the app.
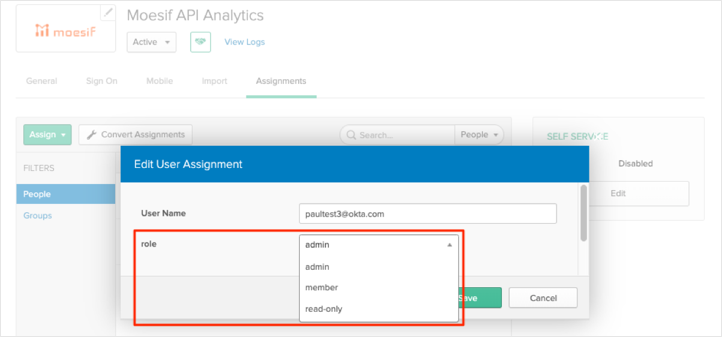
Now, when you assign users to the Moesif API Analytics SAML app, you can select the role attribute:
Done!