The Okta/Mapbox SAML integration currently supports the following features:
For more information on the listed features, visit the Okta Glossary.
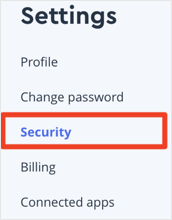
Log in to your Mapbox account.
Select the Settings tab:

Select Security from the left navigation pane:
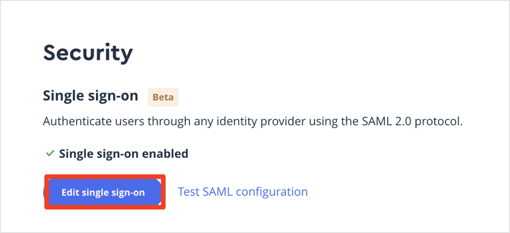
Click Edit single sign-on:
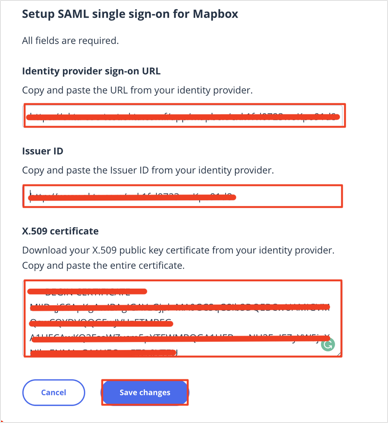
Enter the following:
Identity provider sign-on URL: Copy and paste the following:
Sign into the Okta Admin Dashboard to generate this variable.
Issuer ID: Copy and paste the following:
Sign into the Okta Admin Dashboard to generate this variable.
X.509 Certificate: Copy and paste the following:
Sign into the Okta Admin Dashboard to generate this variable.
Click Save changes:
Done!
The following SAML attributes are supported:
| Name | Value |
|---|---|
| Role | appuser.role |
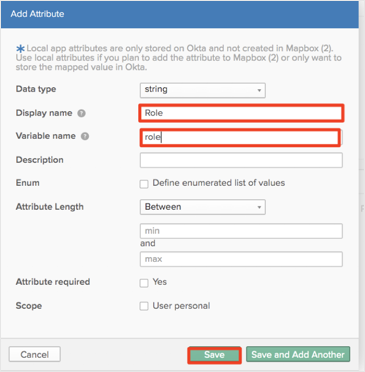
Here is an example describing how to add and use the Role attribute:
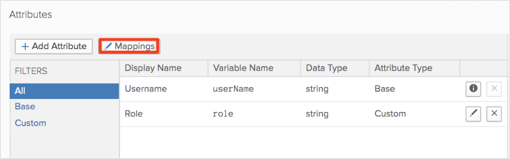
In Okta, navigate to Directory > Profile Editor.
Search for the mapbox app, then click Profile:

Click Add Attribute, then enter the following:
Display name: Enter a preferred attribute name. In our example, we used Role.
Variable name: role.
Click either Save or Save and Add Another.
Note: Scope (optional): If you check User personal, the current attribute will be available once you assign the user to the Mapbox application and will not be available once you assign the group to the app.
Click Mappings:
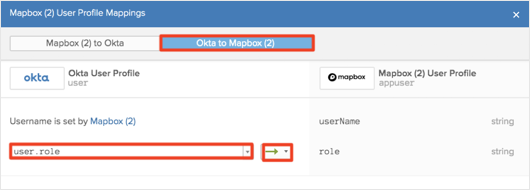
Select the Okta to Mapbox tab.
Start typing the required attribute from the Okta Base User profile (or use the drop-down list) and select the attributes you want to map.
In our example, we have selected the role attribute, and then use the green arrows (Apply mapping on user create and update).
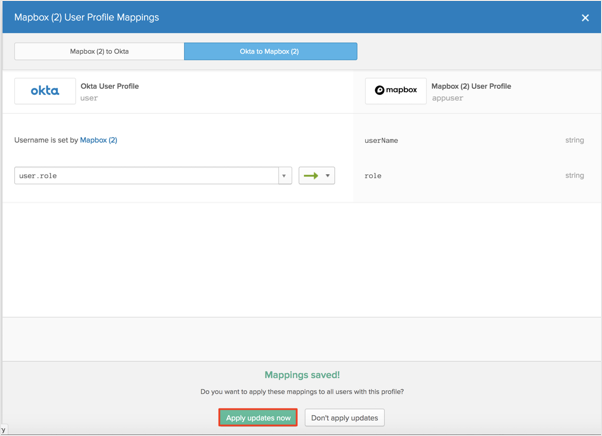
Click Save Mappings:
Click Apply updates now:
Okta will now pass the Role attribute with the value of the Role field from the Okta Base User Profile to the Mapbox.