The Okta/KnowBe4 SAML integration currently supports the following features:
For more information on the listed features, visit the Okta Glossary.
Log into your KnowBe4 account.
Go to: Account Settings > Account Integrations > SAML.
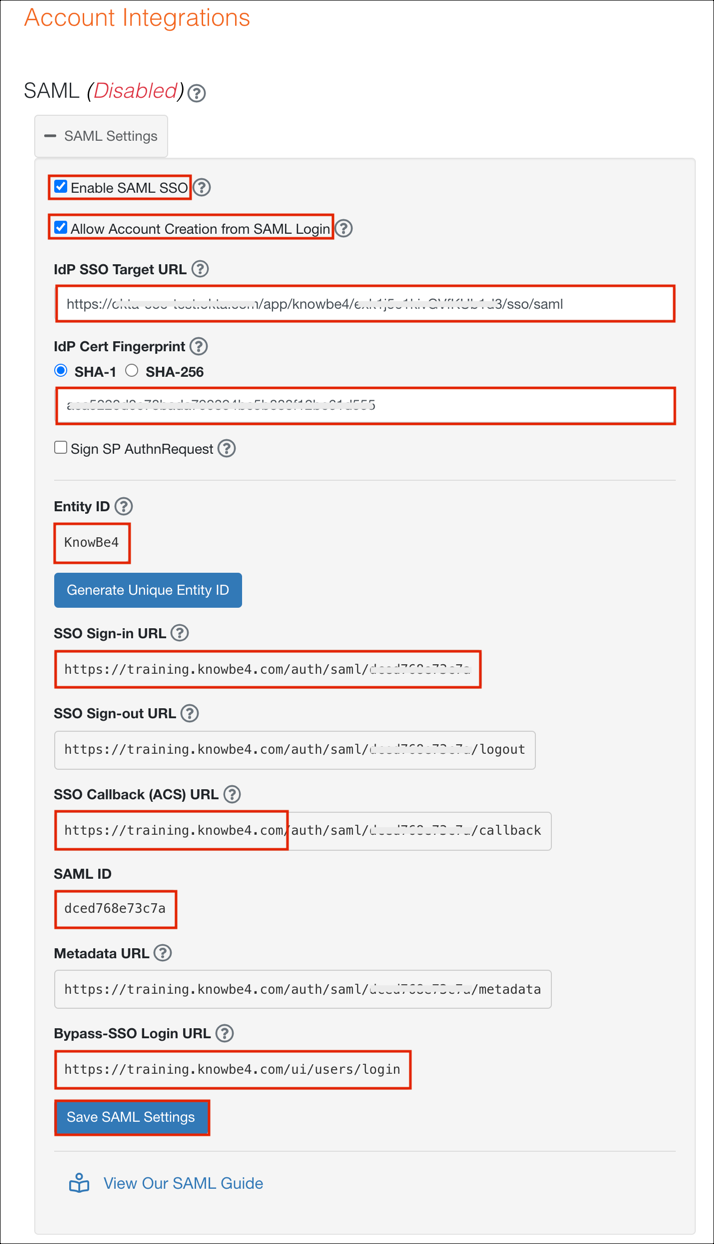
Under SAML settings, enter the following:
Enable SAML SSO: Check this box.
Allow Account Creation from SAML Login: Check this to enable SAML JIT (Just In Time) Provisioning.
IdP SSO Target URL: Copy and paste the following:
Sign in to the Okta Admin app to generate this variable.
IdP Cert Fingerprint: Select either SHA-1 or SHA-256, then enter the corresponding value:
SHA-1:
Sign into the Okta Admin Dashboard to generate this variable.
SHA-256:
Sign into the Okta Admin Dashboard to generate this variable.
Entity ID: Either leave the default value (KnowBe4) or click Generate unique Entity ID to generate a unique Entity ID value.
Note: If you generated a unique Entity ID, you need to enter this value on the Sign On application tab in Okta. If you are using the default value (KnowBe4), leave the Entity ID field in Okta settings blank.
SSO Sign-in URL: Make a note of this value, it’s required for the SP-initiated SSO.
Make a note of your Base URL value from the SSO Callback (ACS) URL.
For example: If your SSO Callback (ACS) URL is https://training.knowbe4.com/auth/saml/XXXXXXXXXXXX/callback
Your Base URL is https://training.knowbe4.com.
SAML ID: Make a note of this value.
Bypass-SSO Login URL: Make a note of this value. This URL bypasses the SSO redirect and can be used to log in to the KnowBe4 console using your email and password.
Click Save SAML Settings.
In Okta, select the Sign On tab for the KnowBe4 SAML app, then click Edit.
Scroll down to Advanced Sign-on Settings.
Enter your Base URL and SAML ID values (step 3) into the corresponding fields.
Optionally enter your Entity ID (step 3).
Click Save:
Done!
Open your SSO Sign-in URL from step 3.