The Okta/Keeper Password Manager and Digital Vault SAML integration currently supports the following features:
Generate two certificates (Personal Exchange Format (PFX) and Certificate file (CRT)):
Open your terminal and type the following commands:
Generate private key:
openssl genrsa -out privatekey.pem 2048
Generate request:
openssl req -new -sha256 -key privatekey.pem -out certificaterequest.csr
Generate certificate:
openssl req -x509 -sha256 -days 365 -key privatekey.pem -in certificaterequest.csr -out certificate.crt
Generate PKCS#12 file:
openssl pkcs12 -keypbe PBE-SHA1-3DES -certpbe PBE-SHA1-3DES -export -in certificate.crt -inkey privatekey.pem -out requiredkey.pfx -name “displayed-name”
Note: The certificates will be in your user directory. (for example, if your username is johnsmith, you will see the files under johnsmith in your system directory.
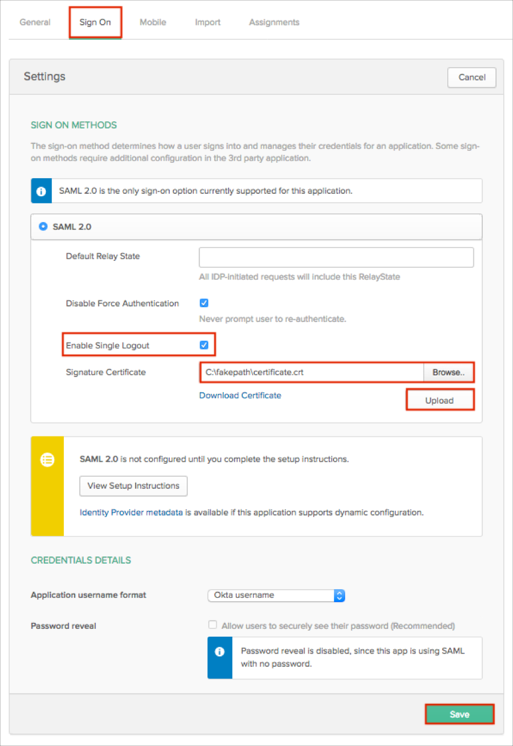
In Okta, select the Sign On tab for the Keeper Password Manager and Digital Vault app, then click Edit.
Check Enable Single Logout.
Signature Certificate: Click Browse to locate, then Upload to upload the .crt you generated when you created your self-signed .pfx file (in step 1).
Click Save:
Refresh these instructions in your browser or close them and click View Setup Instructions again. This will generate a correct metadata.
Save the following metadata file as metadata.xml:
Sign in to Okta Admin app to have this variable generated for you.
Login to the Admin Console at https://keepersecurity.com/console and login as the Keeper Administrator.
SSO integration is applied to specific nodes (organizational units) within your Admin Console. To display the node structure, select Advanced Configuration, then Show Node Structure:

Select the Admin tab.
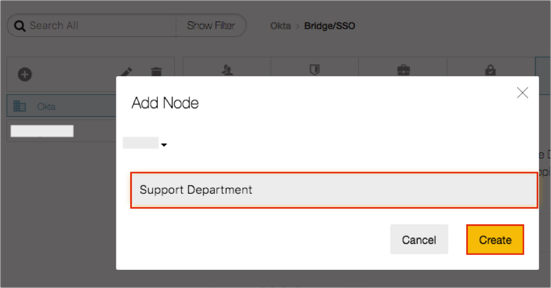
Click the + (plus) icon to create a new node that will host the Keeper SSO Connect integration:

Enter a node name, then click Create. (In the below example, we named the node Support Department and added it beneath the root node.)
Select your new node.
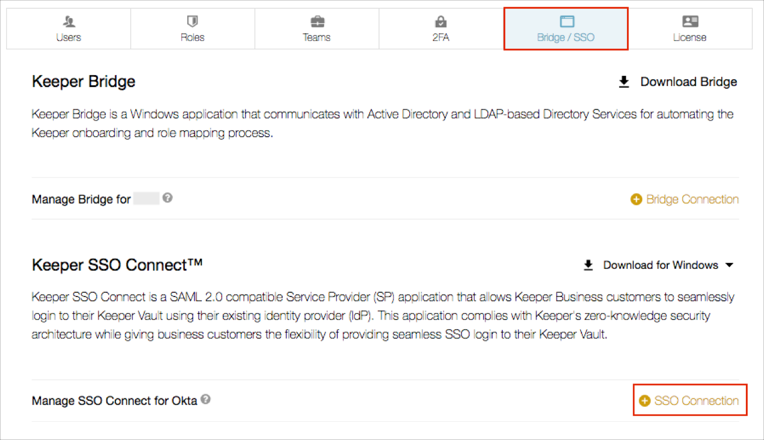
Select the Bridge/SSO tab, then select + SSO Connection:
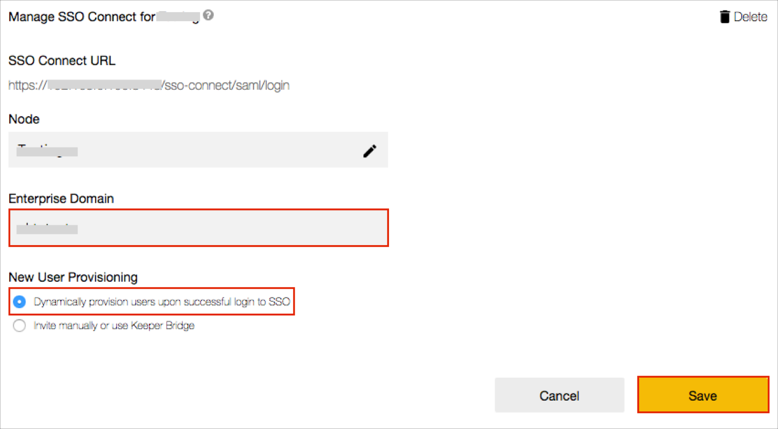
Enter your Enterprise Domain alias. This alias should be named something that is easy for your users to remember because they may need to type the name into their mobile and apps (iOS, Android, Mac, Windows) upon first logging into a new device.
OPTIONAL: Select Dynamically provision users upon successful login to SSO if you want to enable Just In Time (JIT) provisioning.
Click Save:
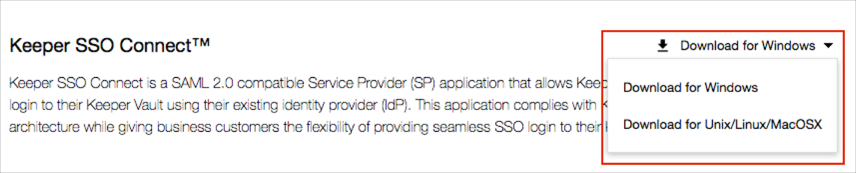
Download and install the Keeper SSO Connect application:
Login to the Keeper SSO Connect application with your Keeper Administrator email address and master password.
The first time you log in, you will be prompted to select the SSO Connection from the admin console.
Do the following:
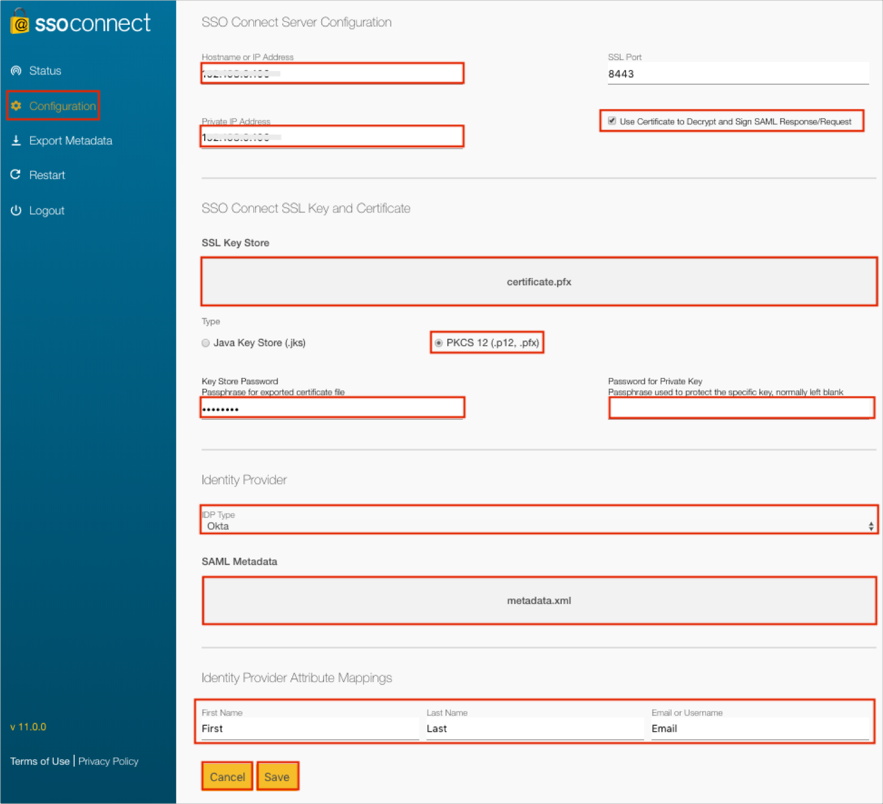
Select the Configuration menu.
Enter your Hostname or IP Address.
Enter your Private IP Address.
Check Use Certificate to Decrypt and Sign SAML Response/Request.
SSO Key Store: Upload your .pfx file (step 1).
Type: Select PKCS (.p12, .pfx).
Enter your Key Store Password.
Enter your Password for Private Key (if you have one).
IDP Type: Select Okta.
Identity Provider Attribute Mappings: Leave the following default values:
First Name: First
Last Name: Last
Email or Username: Email
Click Save.
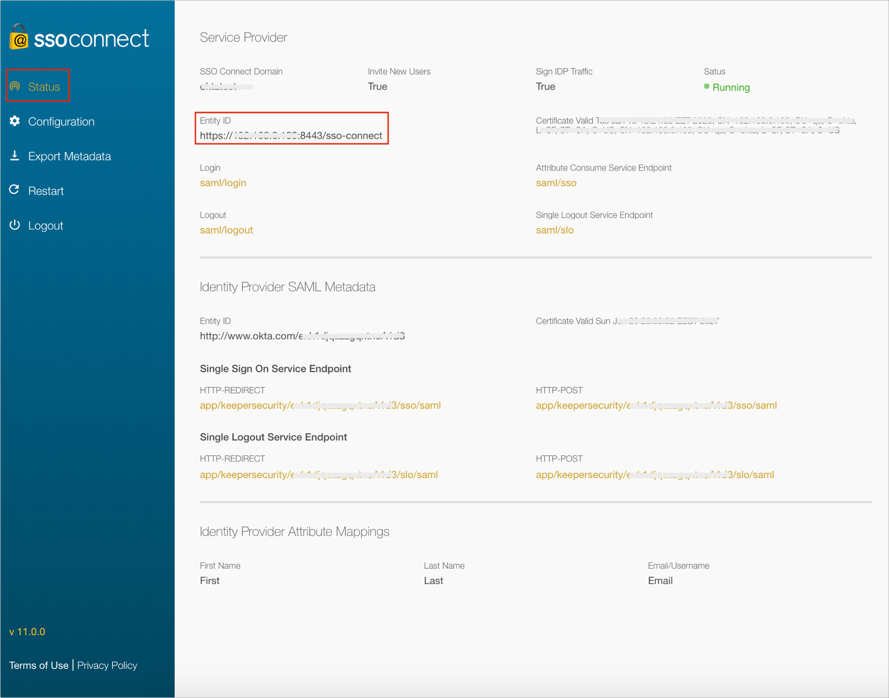
Select Status from the left menu.
Save the Entity ID value from the Service Provider section.
In Okta, select the General tab for the Keeper Password Manager and Digital Vault app, then click Edit.
Enter the Entity ID value you saved earlier (step 19) into the Server Base URL field.
Click Save.

Done!
The following SAML attributes are supported:
| Name | Value |
|---|---|
| First | user.firstName |
| Last | user.lastName |
| user.userName |
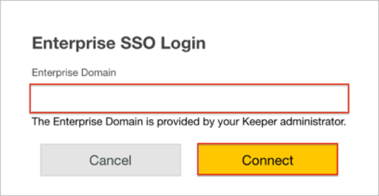
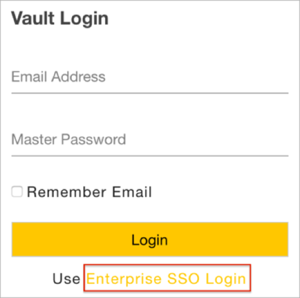
Open the Login URL: https://keepersecurity.com/vault/#.
Select Enterprise SSO Login:
Enter your Enterprise Domain.
Click Connect: