The Okta/Kapost SAML integration currently supports the following features:
For more information on the listed features, visit the Okta Glossary.
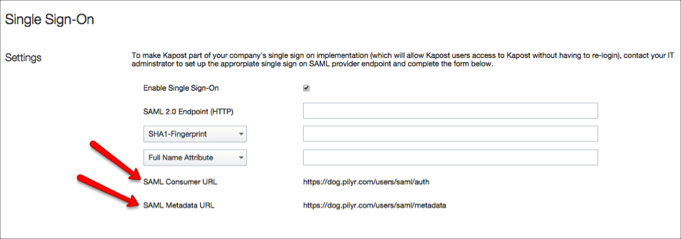
Login to Kapost as an administrator, then go to Settings > Single Sign On.
Check Enable Sign Sign-On.
Make a copy of the values from the SAML Consumer URL and SAML Metadata URL fields.
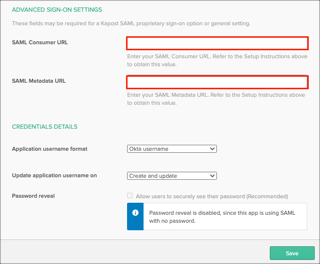
In Okta, select the Sign On tab for the Kapost app, then click Edit:
Enter the values you just saved into the corresponding fields.
Click Save:
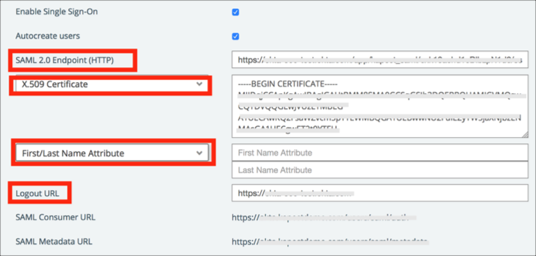
In Kapost SSO Settings section, enter the following:
SAML 2.0 Endpoint (HTTP): Copy and paste the following Login URL/SignOn URL:
Sign into the Okta Admin Dashboard to generate this variable.
X.509 Certificate: Use the dropdown menu and select X.509 Certificate, then copy and paste the following:
Sign into the Okta Admin Dashboard to generate this variable.
First/Last Name Attribute: Enter First Name and Last Name attributes:
Logout URL: Copy and paste the following:
Sign into the Okta Admin Dashboard to generate this variable.
Done!
The following SAML attributes are supported:
| Name | Value |
|---|---|
| First Name Attribute | user.firstName |
| Last Name Attribute | user.lastName |
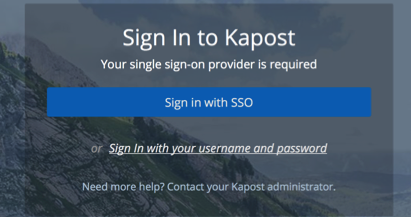
Go to the SAML Consumer URL.
Click Sign in with SSO: