
The Okta/Jamf Pro SAML integration currently supports the following features:
For more information on the listed features, visit the Okta Glossary.
Log in to your Jamf Pro account as administrator.
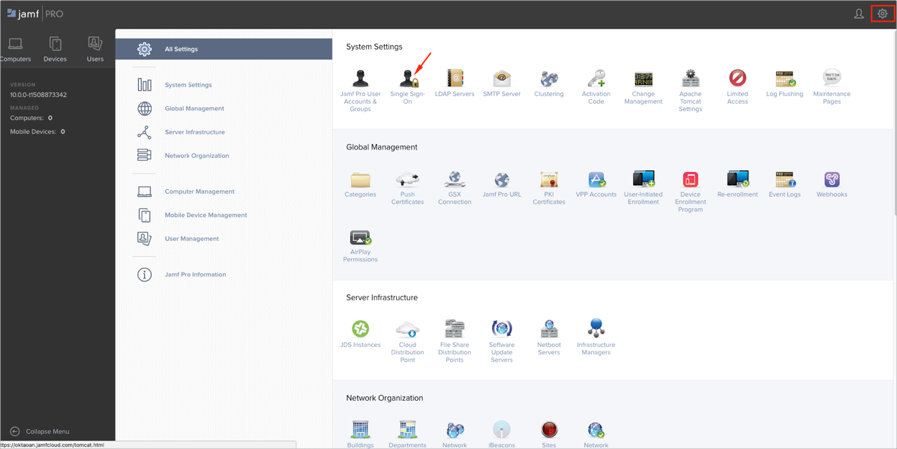
Click on the gear icon at the top-right corner, then select Single Sign-On:

Click Edit in the bottom right, then enter the following:
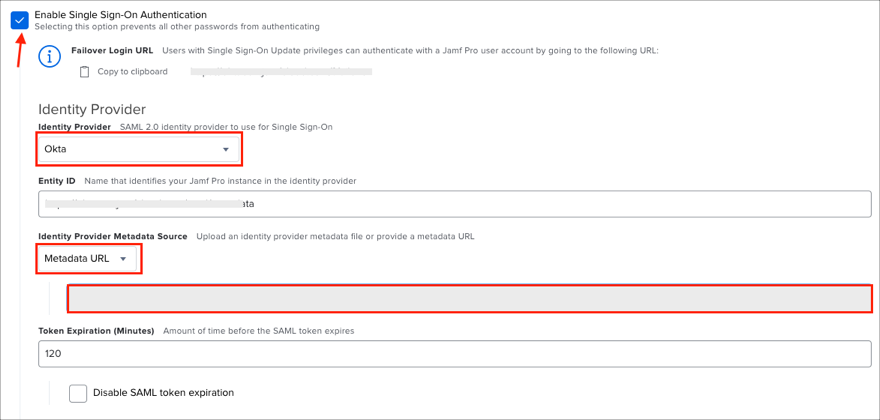
Select Enable Single Sign-On Authentication.
Identity Provider:
Identity Provider: Select Okta.
Identity Provider Metadata Source: Select Metadata URL, then copy and paste the following:
Sign into the Okta Admin dashboard to generate this value.

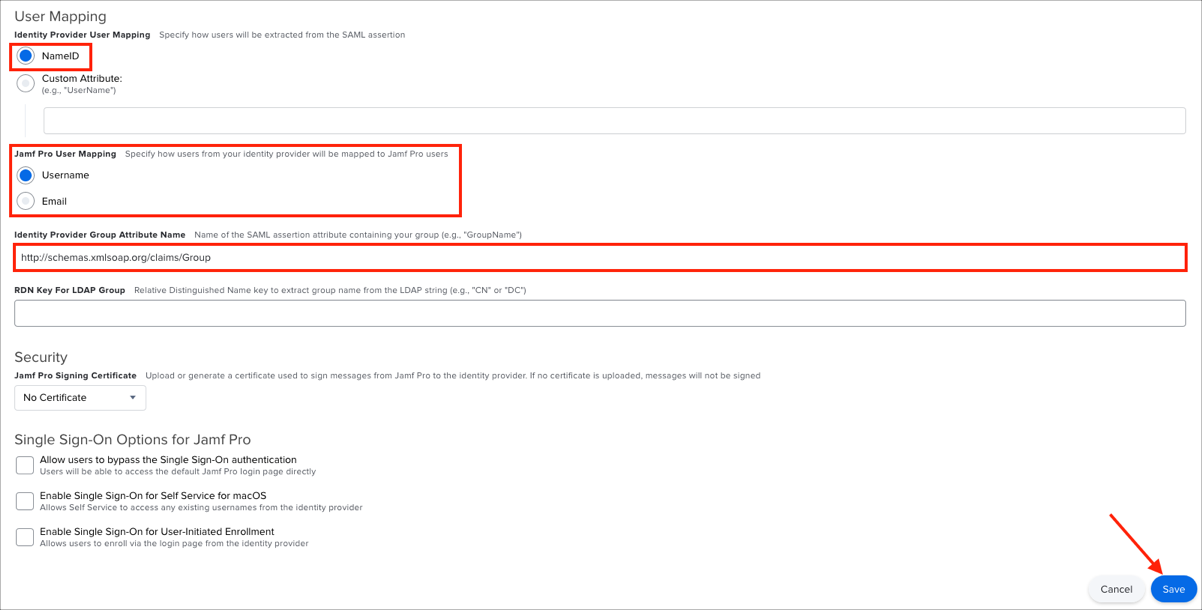
User Mapping:
Identity Provider User Mapping: Select NameID.
Jamf User Mapping: This value has to match the Application username from Okta. By default, it is set to Username.
Identity Provider Group Attribute Name: Ensure it is set to http://schemas.xmlsoap.org/claims/Group
Click Save:

Optional: Group Attribute Steps:
In Jamf Pro, go to: System Settings > Jamf Pro User Accounts & Groups, then click + New:
Choose Create Standard Group.
Enter the Group Name to match the group in Okta that you would like to assign the set of privileges. This is the value that will be matched between Jamf Pro and Okta to assign the correct privileges upon log in to Jamf Pro.
Select the privilege set from the popup menu. If you chose Custom, select the Privileges tab, then select the checkbox for each privilege that you want to grant the group.
Click Save.
Note: This group has no members. All that is required is a name and privilege set. Members are determined by whoever has this group name present as a SAML attribute when logging into Jamf Pro
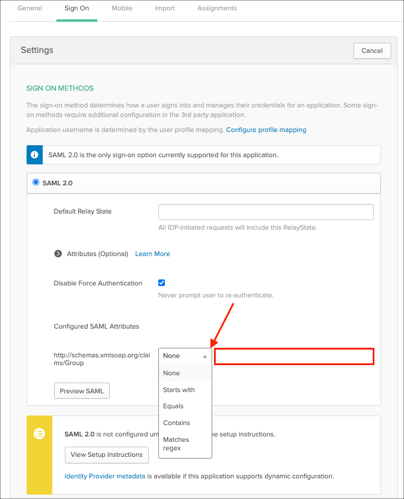
in Okta select the Sign On tab for the Jamf Pro app, then click Edit.
Select the appropriate group filter from the dropdown menu, then type the preferred value into the field.
Click Save.
Note: To send all groups a user is assigned to, select Matches regex and type .* (dot asterix).

Done!
The following SAML attributes are supported:
| Name | Value |
|---|---|
| http://schemas.xmlsoap.org/claims/Group | This will be configured in the app UI; see Group attribute instructions (step 4) above. |
Go to: https://[your-jss-domain]