The Okta/JAMF Software Server (JSS) SAML integration currently supports the following features:
Login to your JAMF Software Server (JSS) account as administrator.
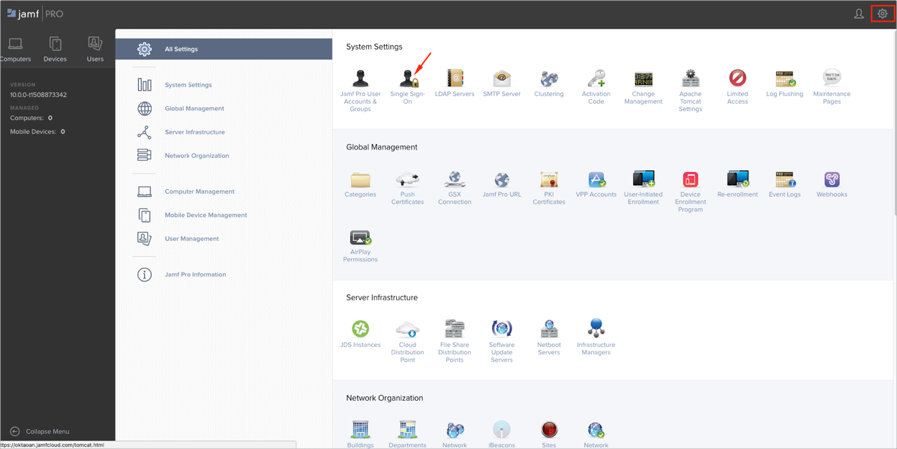
Click on the gear icon at the top-right corner, then select Single Sign-On:
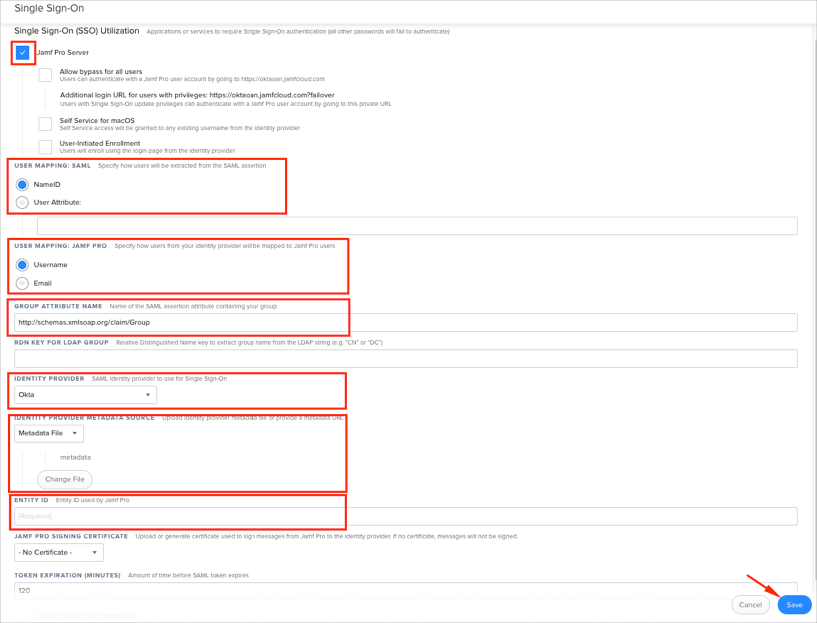
Click Edit, then enter the following (see screen shot at the end of step for reference):
Select the Jamf Pro Server checkbox.
USER MAPPING: SAML: Select NameID.
USER MAPPING: JAMF PRO: This value has to match the Application username from Okta. By default, it is set to Username.
GROUP ATTRIBUTE NAME: Copy and paste the following:
http://schemas.xmlsoap.org/claims/Group
IDENTITY PROVIDER: Select Okta.
IDENTITY PROVIDER METADATA SOURCE: Copy and save the following as metadata.xml. Select Metadata file, then upload the saved file.
Sign in to Okta Admin app to have this variable generated for you.
ENTITY ID: Enter the following (with your own JSS Domain):
https://[your-jss-domain]/saml/metadata
Click Save.
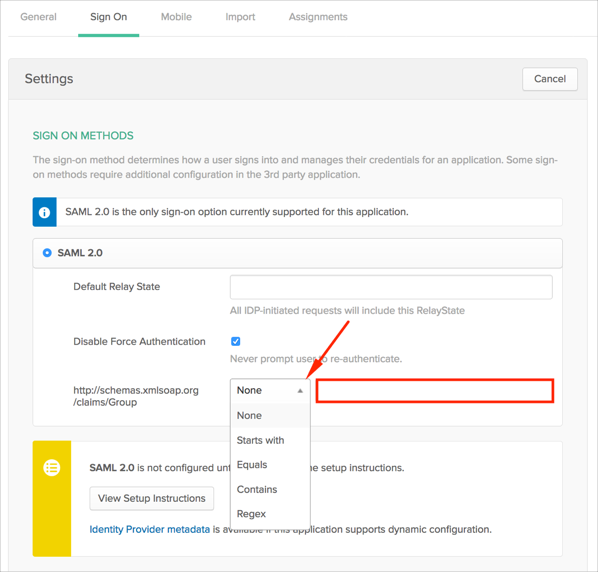
Optional: Group Attribute Steps:
To send groups as a part of SAML assertion, in Okta select the Sign On tab for the JAMF Software Server (JSS) app, then click Edit.
Select the appropriate filter from the drop-down menu, then type the preferred value into the field.
Click Save.
Done!
The following SAML attributes are supported:
| Name | Value |
|---|---|
| http://schemas.xmlsoap.org/claims/Group | This will be configured in the app UI; see Group attribute instructions (step 4) above. |
Go to https://[your-jss-domain] URL.