Please refer to the configuration instructions that apply to your version of Interact:
Notes
These SAML instructions contain Single Log-Out (SLO) configuration steps that are optional. If you are not going to use SLO skip the steps that are marked as [Optional SLO], and highlighted in blue font.
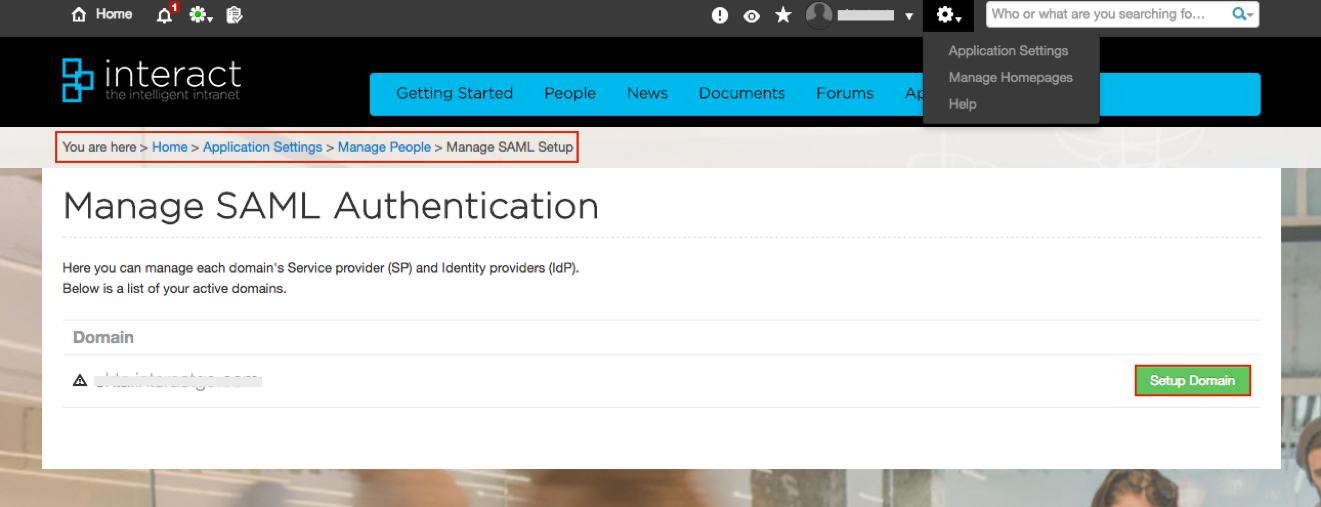
Sign in to Interact as an administrator.
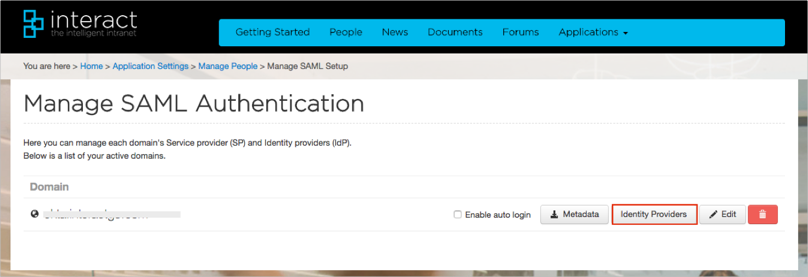
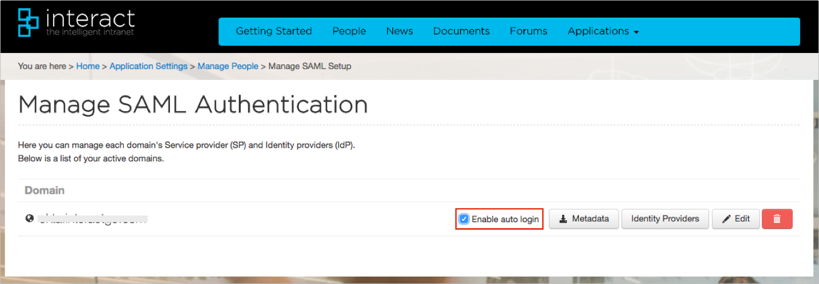
Navigate to Application Settings > Manage People > Manage SAML Authentication.
Select Setup Domain:
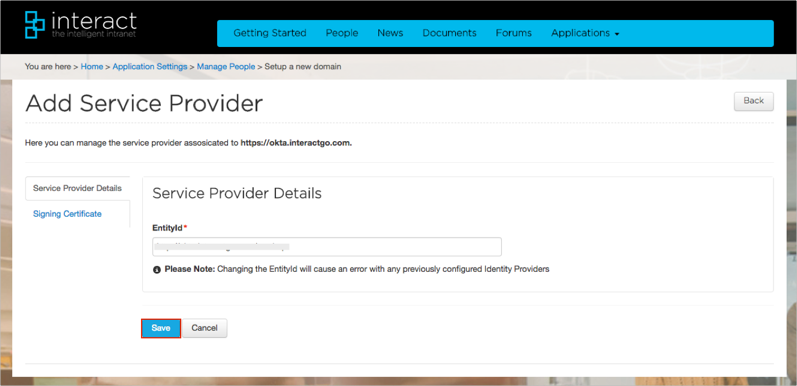
Click Save in order to add a new Service Provider:
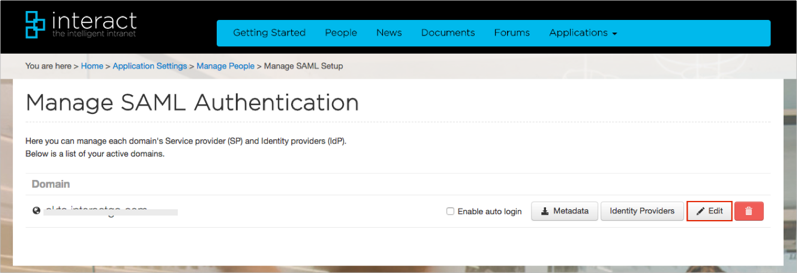
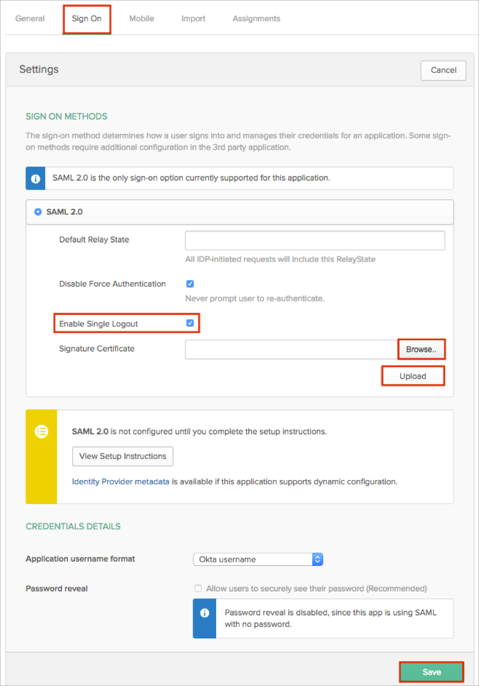
[Optional: SLO]: Click Edit:
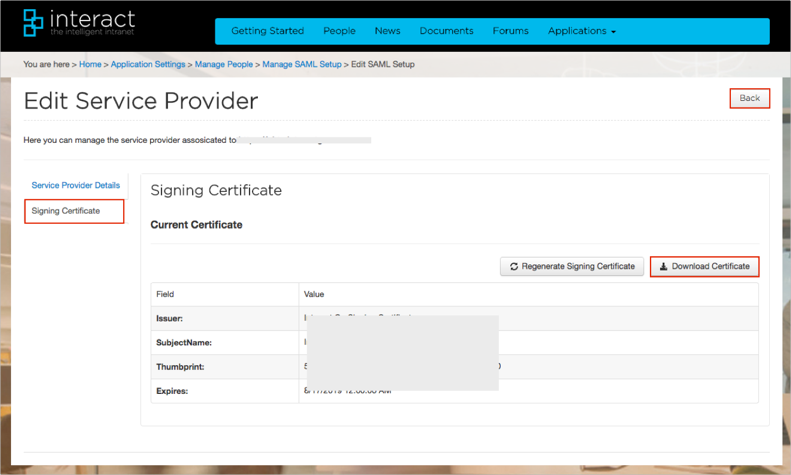
[Optional: SLO]: Select Signing Certificate.
[Optional: SLO]: Download the Service Provider certificate by clicking Download Certificate.
[Optional: SLO]: Click Back.
[Optional: SLO]: In Okta, select the Sign On tab for the interact app, then click Edit.
[Optional: SLO]: Check Enable Single Logout.
[Optional: SLO]: Use Browse to locate and select the Service Provider certificate you downloaded in step 7, then click Upload to upload it to Okta.
[Optional: SLO]: Click Save
Click Identity Providers:
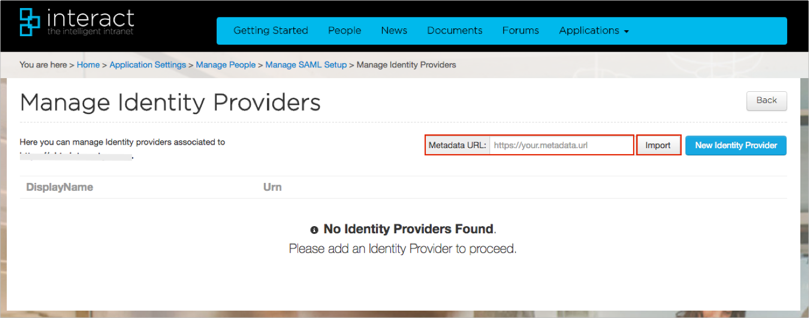
Enter the following Metadata URL into the corresponding field, then click Import:
Sign into the Okta Admin dashboard to generate this value.
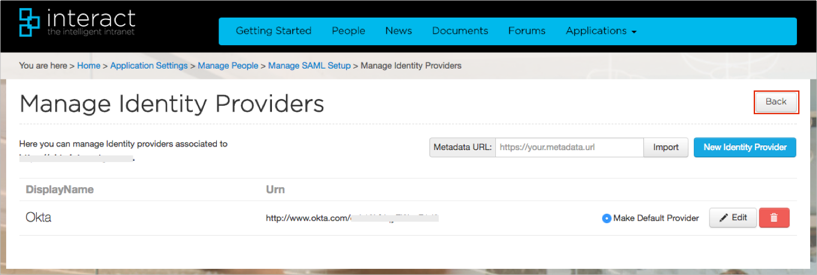
Select the Make Default Provider radio button, then click Edit:
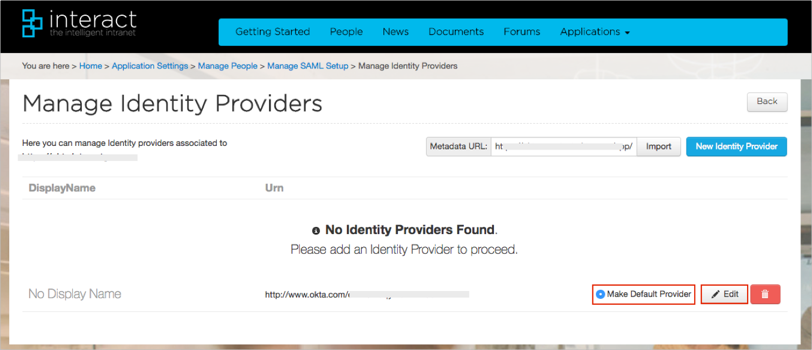
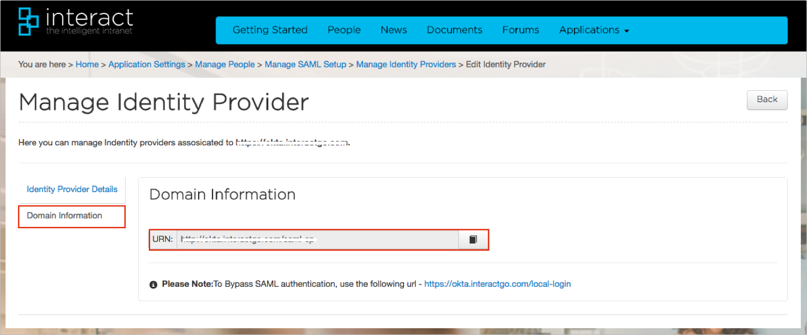
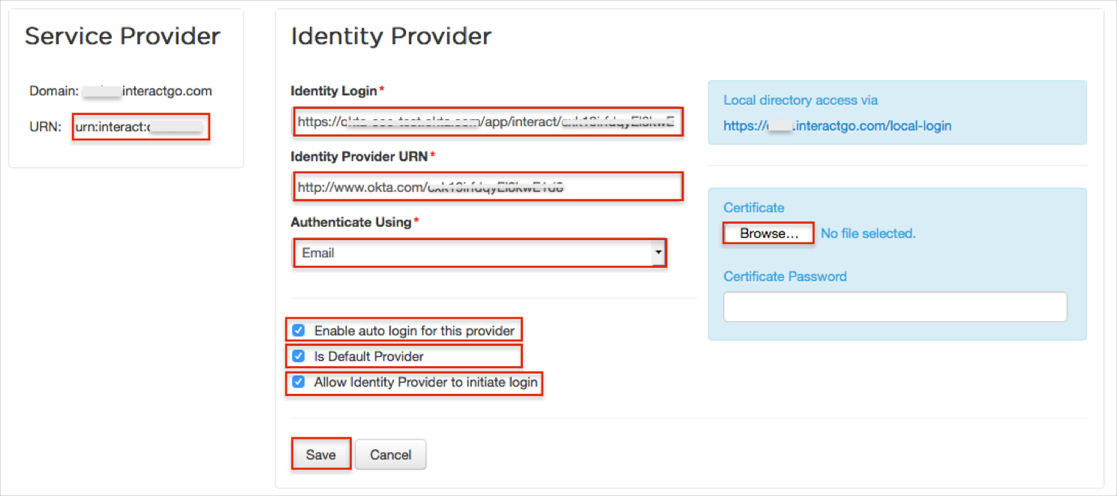
Select Domain Information, then make a copy of the URN value:
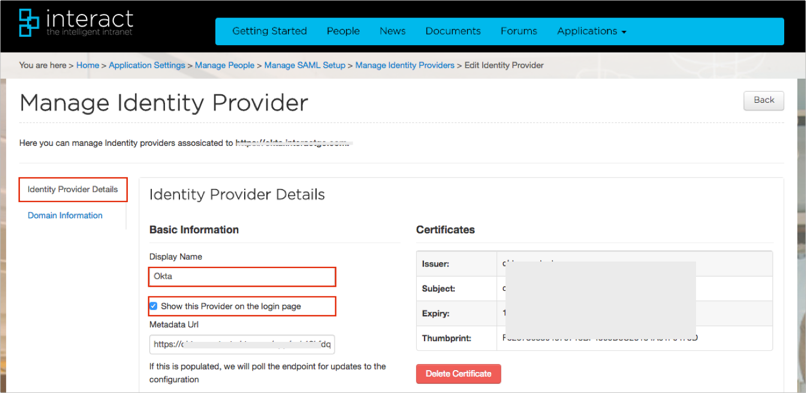
Select Identity Provider Details.
Enter Okta for the Display Name.
Select Show the Provider on the login page option. This adds a Connect with Okta button to the login page:
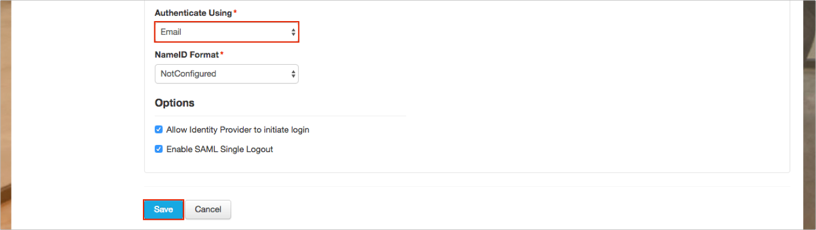
Select a required value for the Authenticate Using option. In our example, we used Email.
Leave the default values for the rest of the fields.
Click Save:
Optional: If you want to disable Username/Password login, do the following:
Click Back:
Select Enable auto login:
Note: You still can login with Username and Password using the following URL: [yourBaseUrl]/local-login.
In Okta, select the General tab for the Interact app, then click Edit.
Enter the URN value you made a copy of in step 13 into the corresponding field.
Click Save.
Done!
Notes:
SP-initiated flows and IdP-initiated flows are supported.
Just In Time (JIT) provisioning is not supported.
If you selected Enable auto login (step 20): Open your base URL.
If you did not did select Enable auto login (step 20):
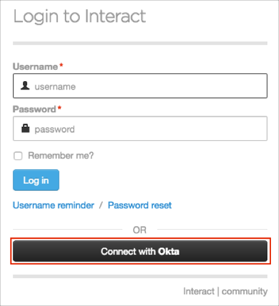
Open the following URL: [yourBaseUrl]/login.
Click Connect with Okta:
Log in to Interact as an administrator.
Navigate to Settings > Manage People > Manage SAML Authentication.
Click Add, then enter the following (see screen shot at end of step for reference):
Identity Login: Copy and paste the following:
Sign into the Okta Admin Dashboard to generate this variable.Identity Provider URN: Copy and paste the following value:
Sign in to the Okta Admin app to have this variable generated for you.Authenticate Using: Use the dropdown menu to select either Email or Username.
Certificate: Download and save the following as okta.cer, then use the Browse button to locate then upload it.
Sign into the Okta Admin Dashboard to generate this variable.Optional: Check the Enable auto login for this provider box. If this is checked, Interact will attempt to automatically try to login all users with this identity provider in the first instance.
After you have completed SAML configuration in Interact:
Navigate to Application Settings > Control Panel > Manage Application Variables > Interact Tool Bar.
Uncheck Enable Log Off.
Check the Is Default Provider box.
Check the Allow Identity Provider to initiate login box.
Save the Service Provider URN value.
Click Save.
In Okta, select the General tab for the Interact app, then click Edit:
Enter the Service Provider URN value into the corresponding field.
Click Save.
Done!
Notes:
SP-initiated flows and IdP-initiated flows are supported.
Just In Time (JIT) provisioning is not supported.
If you selected Enable auto login for this provider: Open your base URL.
If you did not select Enable auto login for this provider: Open this URL: [yourBaseUrl]/saml.