The Okta/IntelligenceBank SAML integration currently supports the following features:
For more information on the listed features, visit the Okta Glossary.
Sign in to your IntelligenceBank instance as an administrator.
Select the AUTHENTICATOR tab, then click Add New:

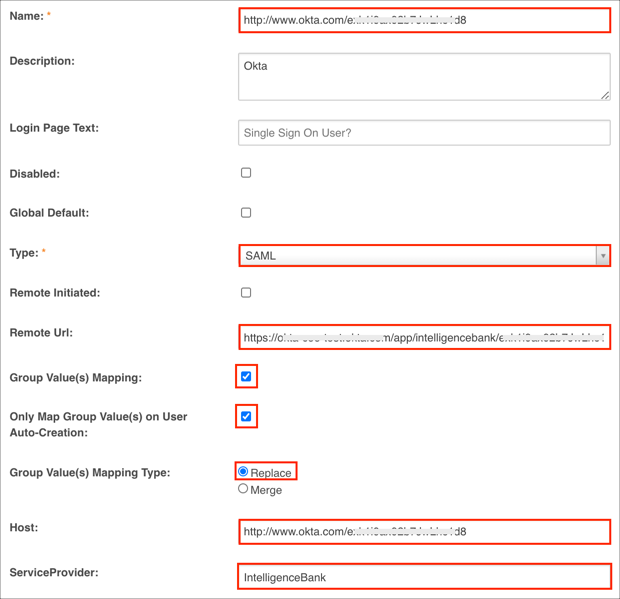
Enter the following:
Name and Host: Copy and paste the following into both these fields:
Sign into the Okta Admin Dashboard to generate this variable.
Disabled: When you are ready to turn the Authenticator on, update this to Disabled: Off. All users will be enabled as SSO Users by default.
Note: To disable SSO authentication for select users, go to their user profile under Admin > Users, and enable the IntelligenceBank Login option.
Type: Select SAML.
RemoteURL: Copy and paste the following:
Sign into the Okta Admin Dashboard to generate this variable.
[OPTIONAL: GROUPS] Group Value(s) Mapping: Check this if you want to pass Okta groups as part of SAML response. See step 7 in order to configure groups attribute in Okta.
Select values for Only Map Group Value(s) on User Auto-Creation and Group Value(s) Mapping Type options.
ServiceProvider: Enter a custom name value for this integration, for example: IntelligenceBank.
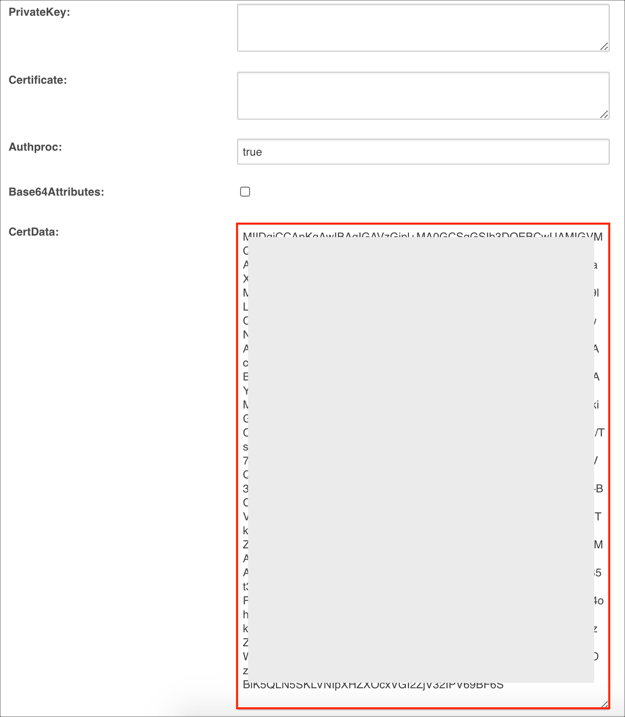
CertData: Copy and paste the following:
Sign into the Okta Admin Dashboard to generate this variable.
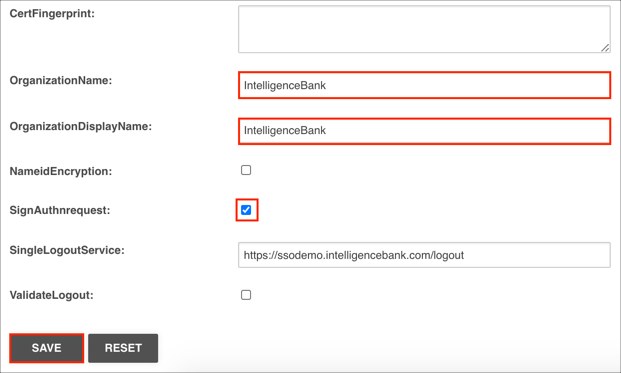
OPTIONAL: You can enter your Organization name into the OrganizationName and OrganizationDisplayName fields.
SignAuthnrequest: Check this box.
OPTIONAL: Enter a logout action destination URL into the SingleLogoutService field, for example: https://ssodemo.intelligencebank.com/logout.
Click SAVE:
In Okta, select the Sign On tab for the IntelligenceBank app, then click Edit.
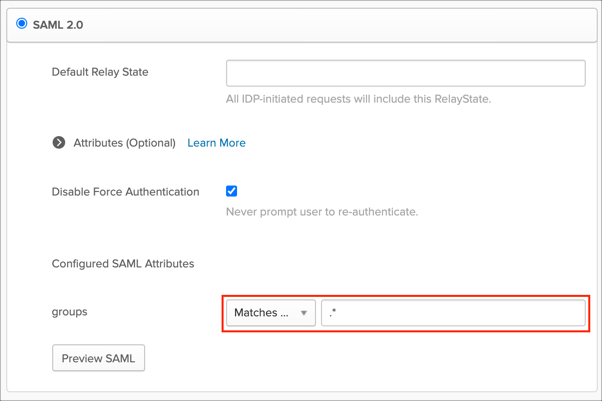
[OPTIONAL: GROUPS] Select your preferred groups filter from the dropdown list.
The Regex rule with the value .* in order to send all Okta groups to the IntelligenceBank instance we used in our example shown below.
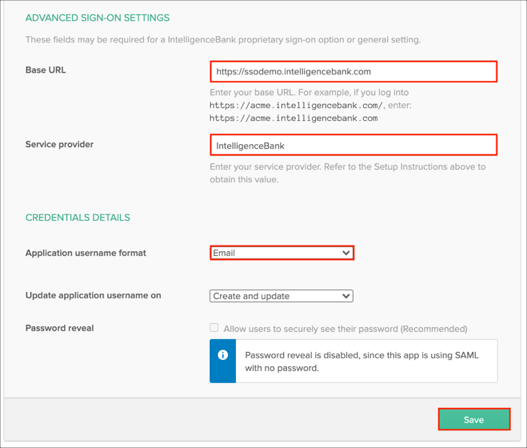
Scroll down to the ADVANCED SIGN-ON SETTINGS section.
Enter your Base URL value. For example, if you log into https://acme.intelligencebank.com/, enter: https://acme.intelligencebank.com
Service provider: Enter the value from step 3.
Application username format: select Email.
Click Save:
Done!
The following SAML attributes are supported:
| Name | Value |
|---|---|
| firstname | user.firstName |
| lastname | user.lastName |
| userid | user.id |
| groups | Configured in the app UI; see groups attribute instructions above (steps 3 and 4). |
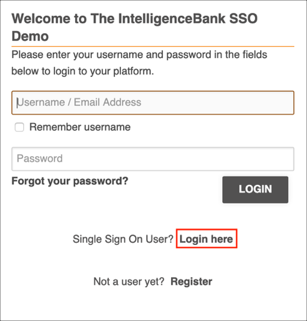
Go to the IntelligenceBank login URL.
Click the Login here link for Single Sign On Users: