The Okta/InspiredLMS SAML integration currently supports the following features:
Sign in to InspiredLMS as an administrator.
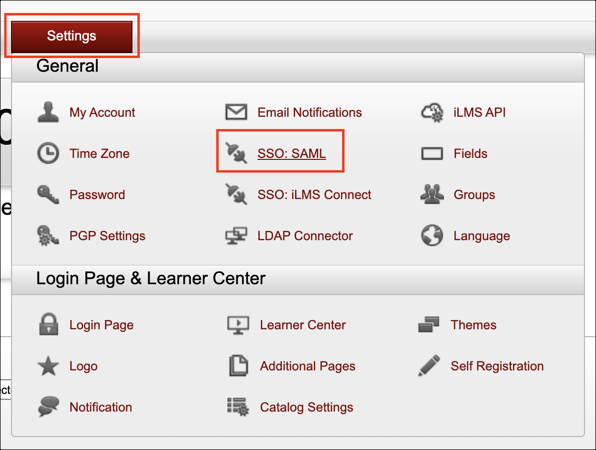
Go to Settings > SSO: SAML:
Enter the following:
Check Enable Single Sign-on using SAML (v2.0).
Make a copy of the Identifier and Endpoint (URL) values in the Service Provider section.
Issuer: Copy and paste the following:
Sign in to the Okta Admin dashboard to generate this value.Sign-in page URL: Copy and paste the following:
Sign into the Okta Admin dashboard to generate this value.Verification Certificate: Download and save the following certificate, then click Choose File to locate and upload it.
Sign in to the Okta Admin dashboard to generate this value.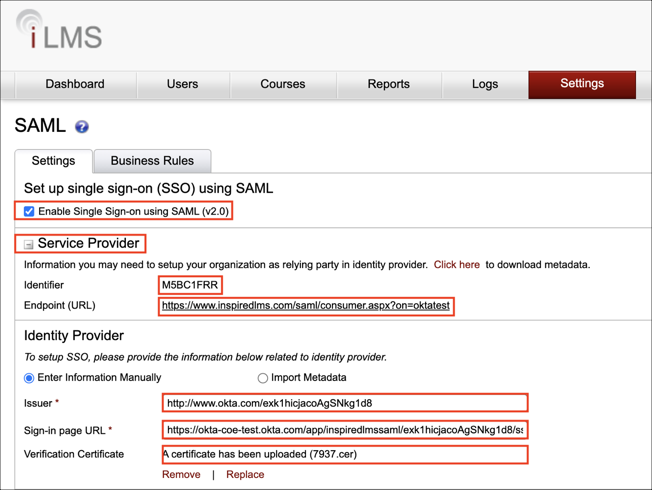
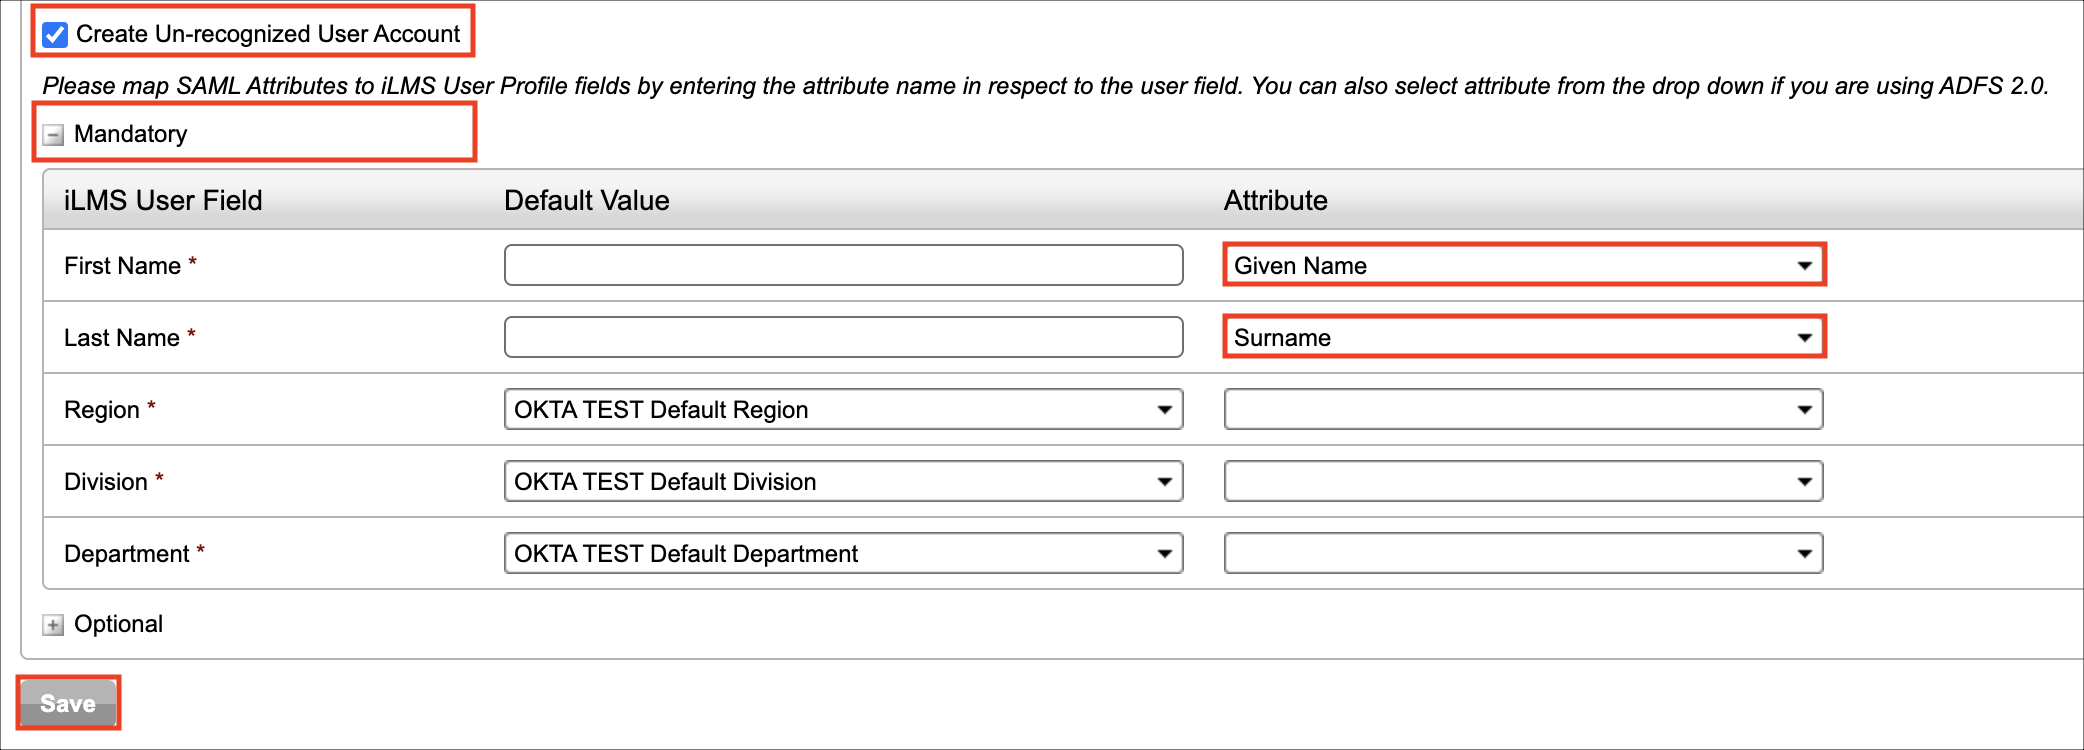
Optional: Check Create Un-recognized User Account to enable JIT (Just In Time) Provisioning. Then in the Mandatory section, do the following:
First Name: Select Given Name from the Attribute drop-down menu.
Last Name: Select Surname from the Attribute drop-down menu.
Click Save:
In Okta, select the Sign On tab for the InspiredLMS SAML app and scroll down to Advanced Sign-on Settings.
Audience Restriction: Enter the Identifier value you made a copy of in step 3.
Enter your Company Name into the corresponding field.
Click Save.
Done!
The following SAML attributes are supported:
| Name | Value |
|---|---|
| http://schemas.xmlsoap.org/ws/2005/05/identity/claims/nameidentifier | user.userName |
| http://schemas.xmlsoap.org/ws/2005/05/identity/claims/GivenName | user.firstName |
| http://schemas.xmlsoap.org/ws/2005/05/identity/claims/surname | user.lastName |
Go to the Endpoint (URL) you made a copy of in step 3.