The Okta/Image Relay SAML integration currently supports the following features:
For more information on the listed features, visit the Okta Glossary.
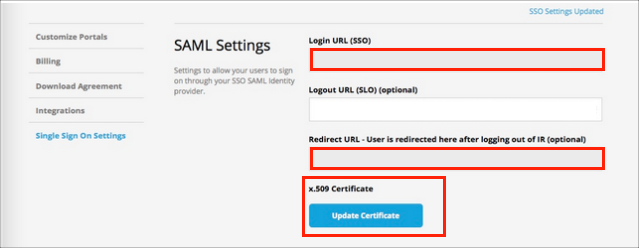
Sign in to Image Relay.
Go to Single Sign On Settings on the left navigation bar, then follow the steps below:
Login URL (SSO): Copy and paste the following:
Sign into the Okta Admin dashboard to generate this value.
Redirect URL - User is redirected here after logging out of IR (optional): Copy and paste the following:
Sign into the Okta Admin Dashboard to generate this variable.
x.509 Certificate: Copy and paste the following:
Sign into the Okta Admin dashboard to generate this value.
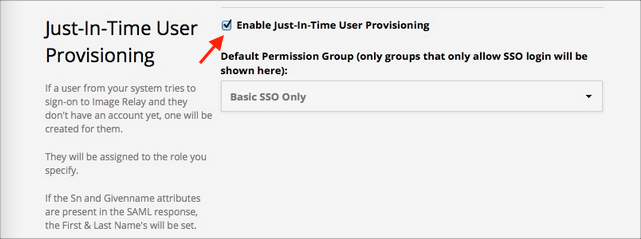
Enable Just-in-Time Provisioning: Select this to enable JIT.
Click Save:
Make sure that you entered the correct value in the Base URL field under the General tab in Okta. Using the wrong value will prevent you from authenticating via SAML to ImageRelay.
The following SAML attributes are supported:
| Name | Value |
|---|---|
| Givenname | user.firstName |
| Sn | user.lastName |
Go to your Base URL.