
Enabling SAML will affect all users who use this application, which means that users will not be able to sign in through their regular log in page. They will only be able to access the app through the Okta service. Only administrators can sign in with their username/password once SAML is enabled.
The Okta/Guru SAML integration currently supports the following features:
For more information on the listed features, visit the Okta Glossary.
Sign in to your Guru account as an administrator.
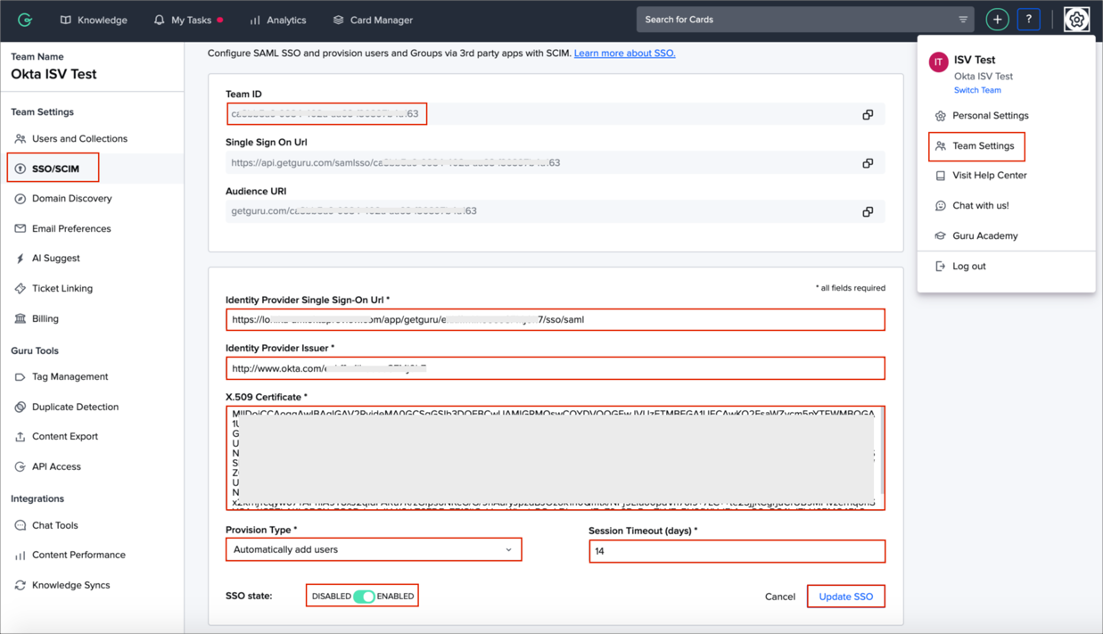
Go to your profile, then Team Settings > SSO/SCIM.
Do the following:
Team ID: Make a note of this value.
Identity Provider Single Sign-On Url: Copy and paste the following:
Sign into the Okta Admin Dashboard to generate this variable.
Identity Provider Issuer: Copy and paste the following:
Sign into the Okta Admin Dashboard to generate this variable.
X.509 Certificate: Copy and paste the following:
Sign into the Okta Admin Dashboard to generate this variable.
Provision Type: Select a required option.
Session Timeout: Select the number of days you want your users to be logged in before their session times out.
SSO State: Toggle this to ENABLED.
Click Update SSO:

In Okta, select the Sign On tab for the Guru SAML app, then click Edit.
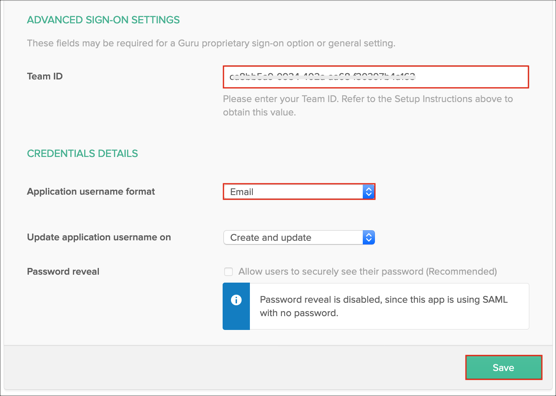
Scroll down to the ADVANCED SIGN-ON SETTINGS section.
Enter your Team ID (step 3) into the corresponding field.
Application username format: Select Email.
Click Save:

Done!
The following SAML attributes are supported:
| Name | Value |
|---|---|
| firstName | user.firstName |
| lastName | user.lastName |