The Okta/Five9 Plus Adapter for Salesforce SAML integration currently supports the following features:
For more information on the listed features, visit the Okta Glossary.
Make a copy of the following Sign On URL value, you will need it several times during the configuration steps:
Sign into the Okta Admin Dashboard to generate this variable.
Install the Five9 Managed Package from https://appexchange.salesforce.com/appxListingDetail?listingId=a0N30000001gGgIEAU.
Refer to the Installing the Five9 Managed Package section of the Administrator’s Guide.
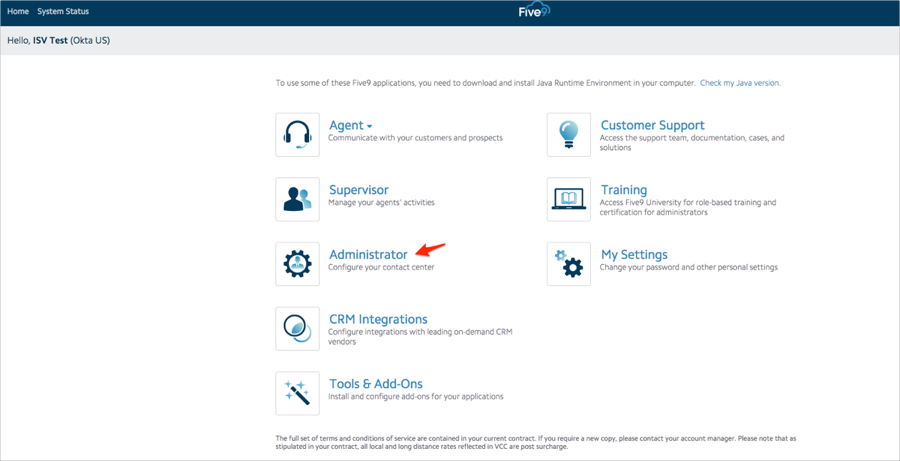
Login to your Five9 portal.
Click Administrator, then open the Virtual Contact Center Administrator application:
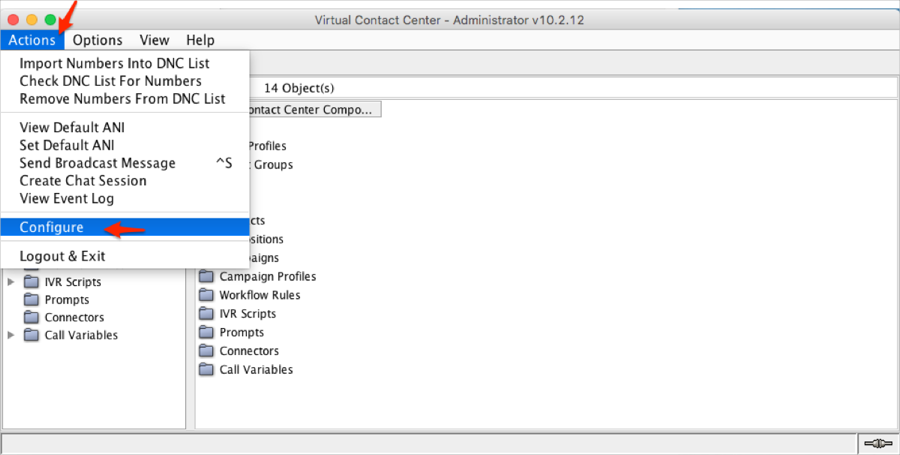
In the VCC Administrator application navigate to Actions > Configure:
Follow the steps below:
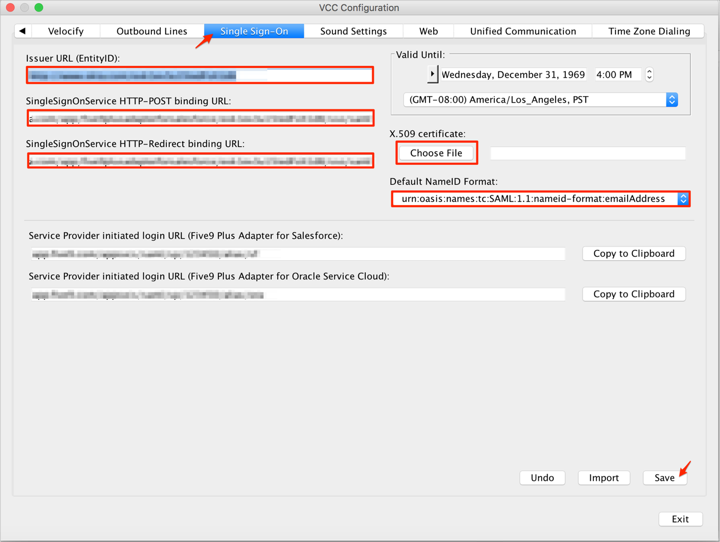
Select the Single Sign-On tab.
Issuer URL (Entity ID): Copy and paste the following:
Sign into the Okta Admin Dashboard to generate this variable.
SingleSignOnService HTTP-POST binding URL: Copy and paste the Sign On URL value you made a copy of in step 1.
SingleSignOnService HTTP-Redirect binding URL: Copy and paste the Sign On URL value you made a copy of in step 1.
X.509 Certificate: Save the following as okta.cert, then click Choose File to locate then update it:
Sign into the Okta Admin Dashboard to generate this variable.Default NameID Format: Make sure this is set to urn:oasis:names:tc:SAML:1.1:nameid-format:emailAddress
Click Save, then Exit:
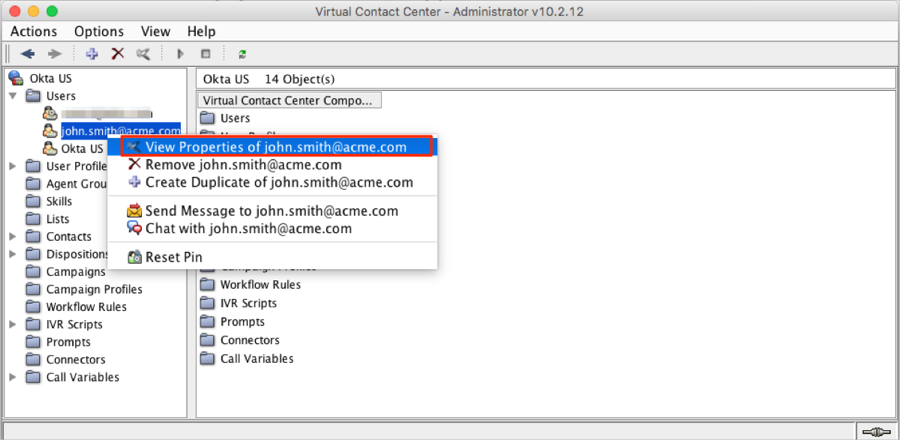
Still in the VCC Administrator application, select Users then right-click on the user you want to configure SSO Federation ID. Click View Properties of [username] (john.smith@acme.com in our example):
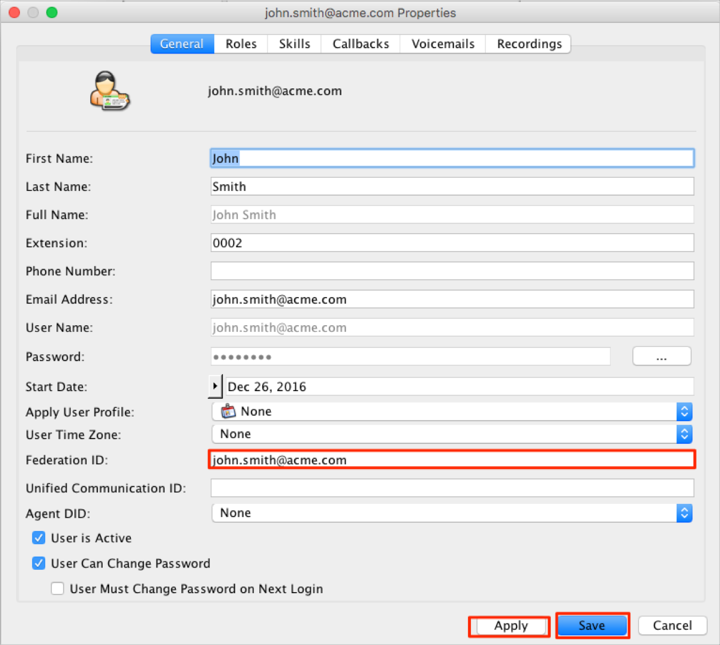
In the Properties dialog:
In the Federation ID field under the General tab, enter a name for the agent. You can use the agent's Five9 username, or another name reserved for single sign-on.
Click Apply, then Save:
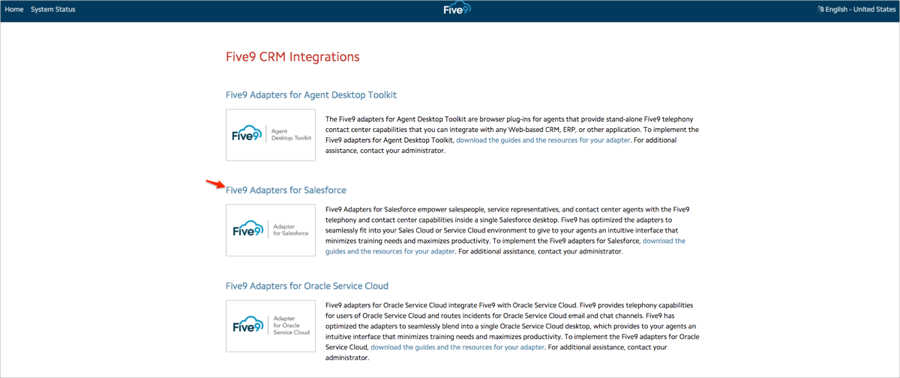
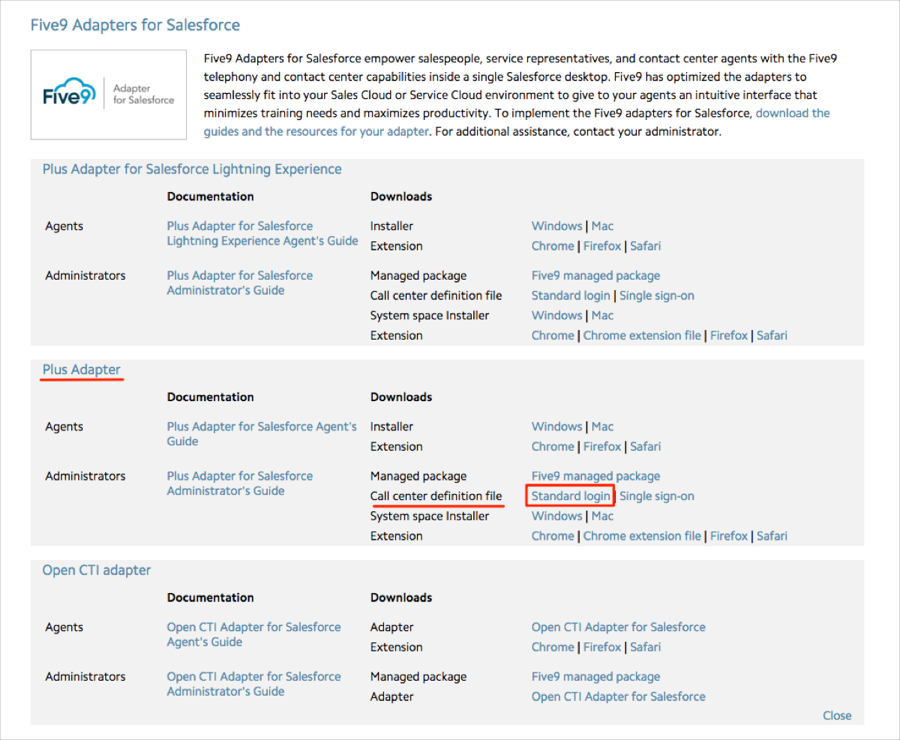
Go back to your Five 9 portal and select CRM Integrations:

Click Five9 Adapters for Salesforce:
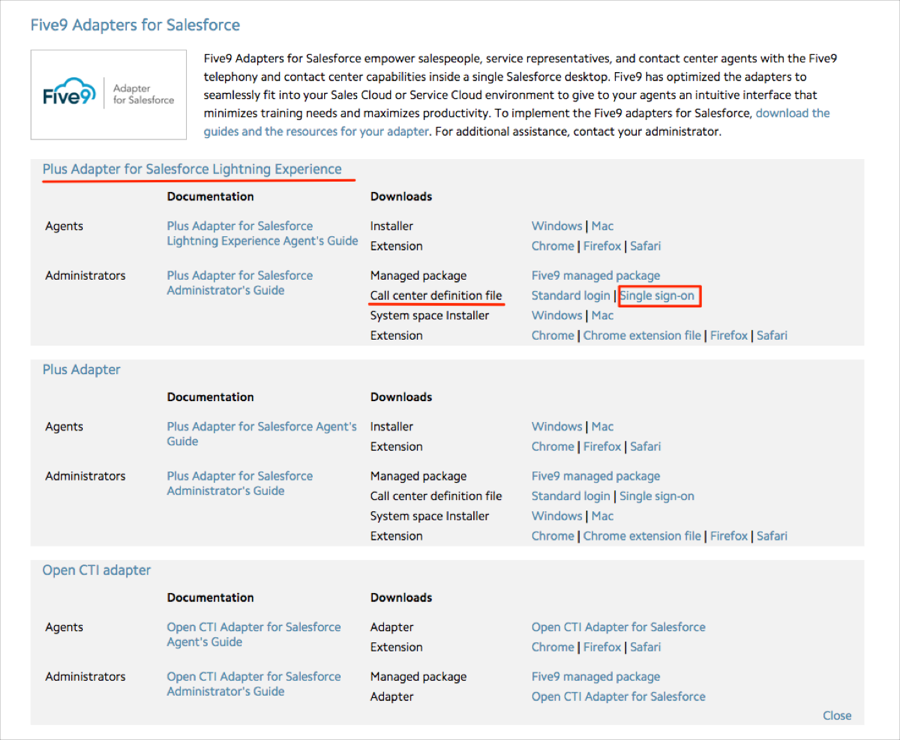
For Salesforce Lightening Experience:
From Plus Adapter for Salesforce Lightning Experience click Single sign-on of Call center definition file section to download the
For Salesforce Classic UI:
From Plus Adapter click Standard login of Call center definition file section to download the Five9VirtualCallCenterFreedom.xml file.
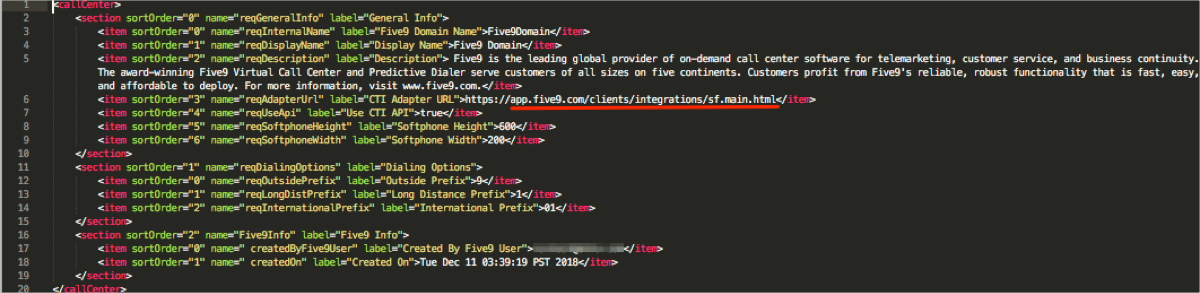
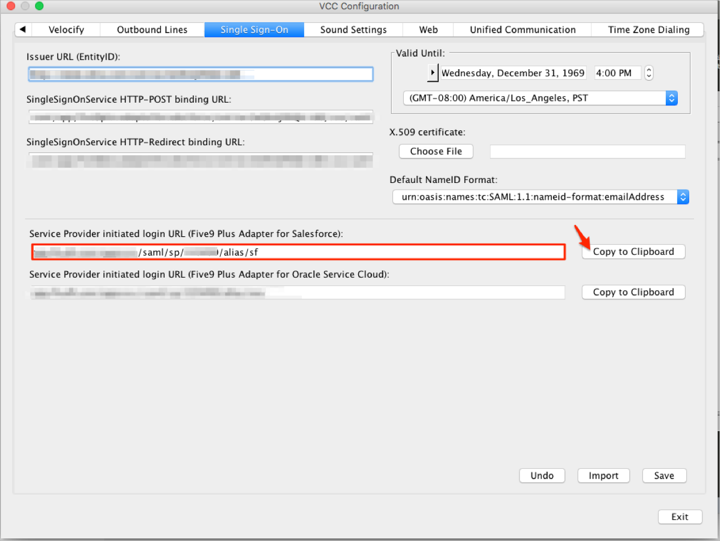
Open the file in text editor and replace reqAdapterUrl property value (app.five9.com/clients/integrations/sf.main.html) with Service Provider initiated URL link from Five9 VCC Administrator > Configure > Single Sign-On -> Service Provider Initiated URL (Five9 Plus Adapter for Salesforce) > Copy to Clipboard.
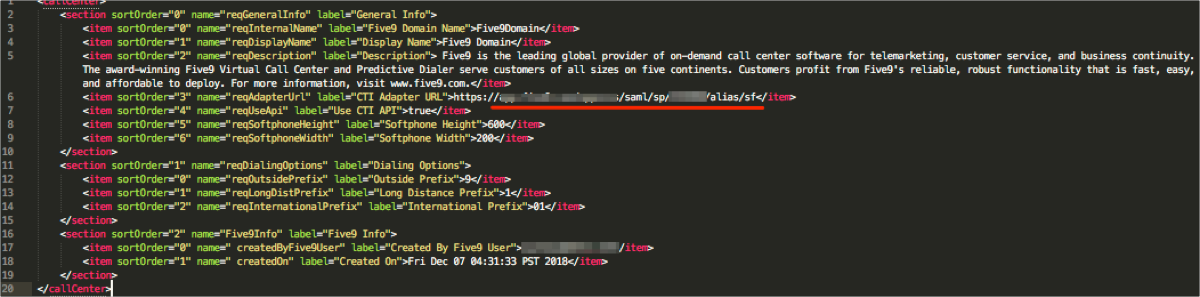
Save the changes to the Five9VirtualCallCenterFreedom.xml file:
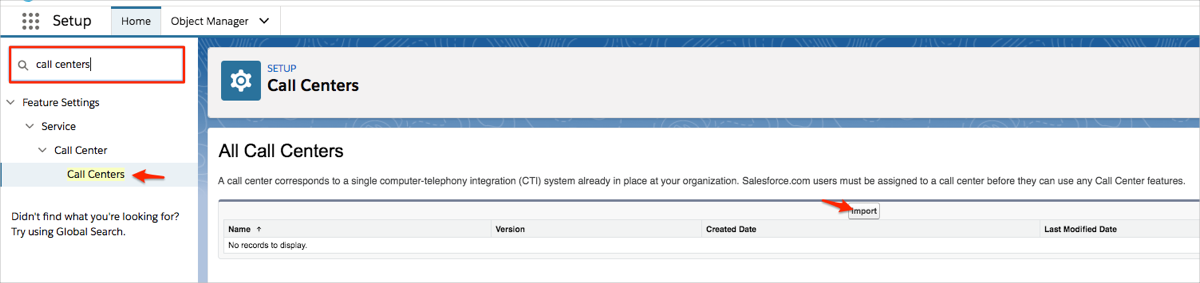
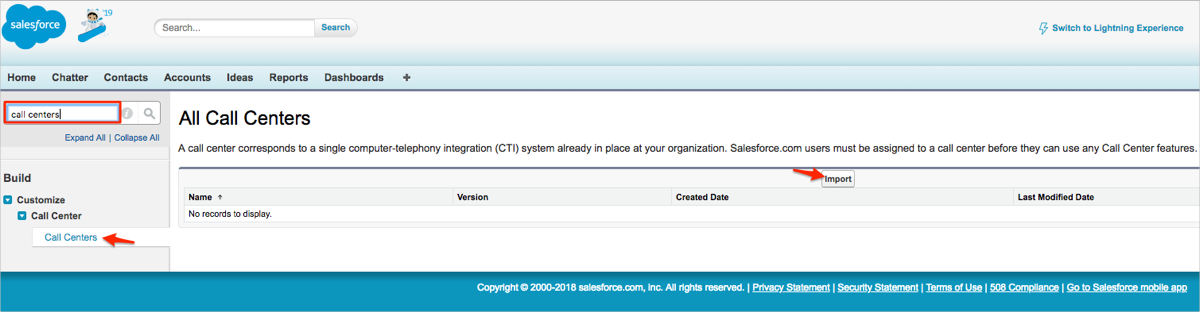
In Salesforce, navigate to Setup > Call Centers, then click Import.
Salesforce Lightning Experience:
Salesforce Classic UI: :
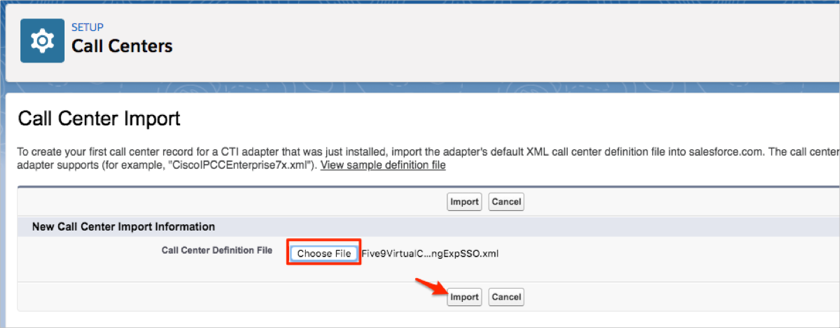
Click Choose File:
Salesforce Lightning Experience:
Locate your Five9VirtualCallCenterFreedomLightingExpSSO.xml file you downloaded in step 10, then click Import:
Salesforce Classic UI: :
Locate your Five9VirtualCallCenterFreedom.xml file you downloaded in step 10, then click Import:

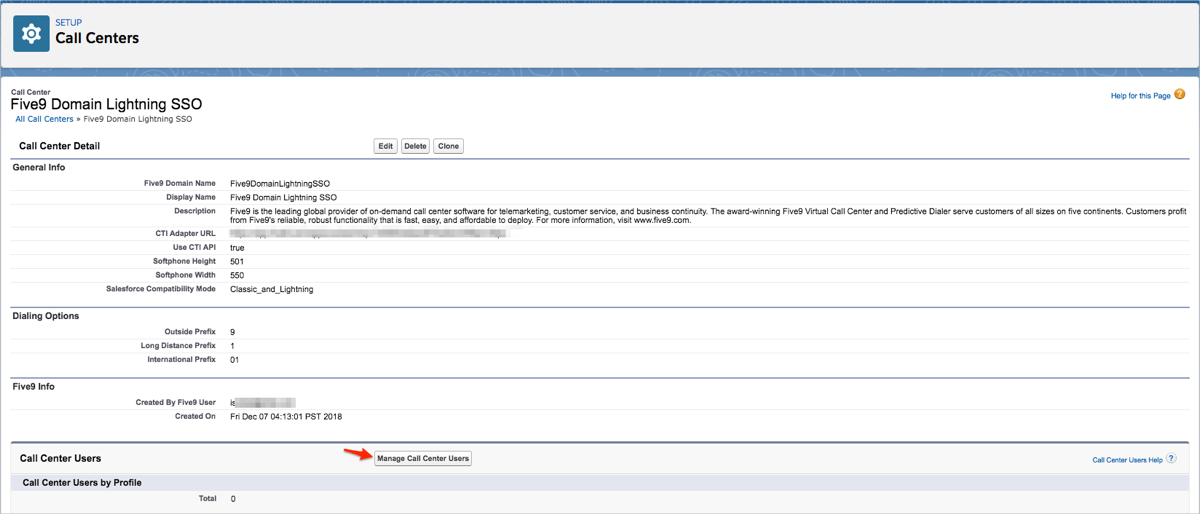
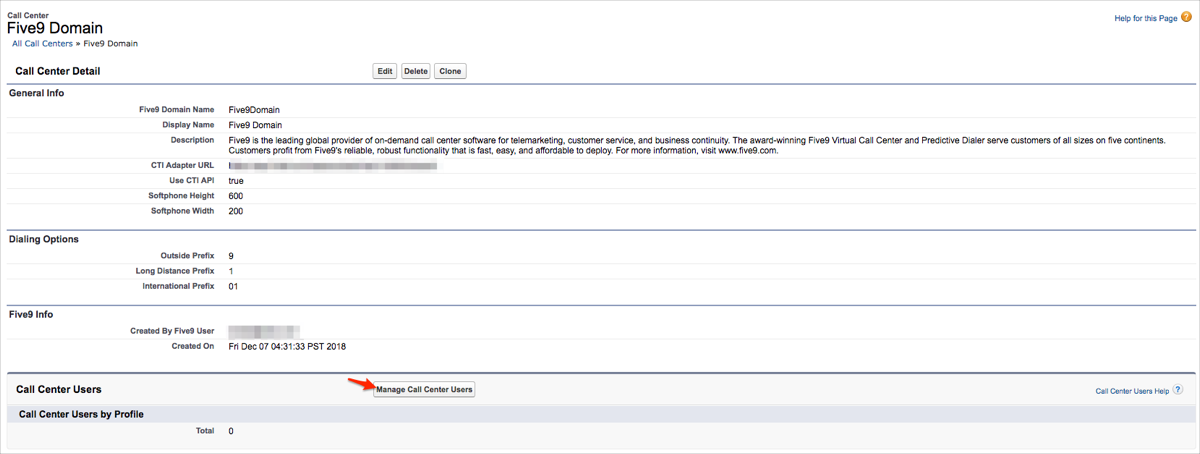
Click Manage Call Center Users:
Salesforce Lightning Experience:
Salesforce Classic UI: :
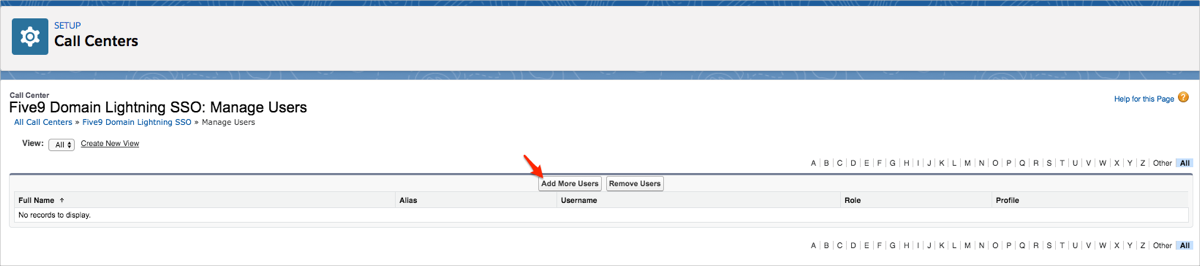
Click Add More users, then assign your Salesforce user to a call center:
Salesforce Lightning Experience:
Salesforce Classic UI: :

For Salesforce Lightning Experience only:
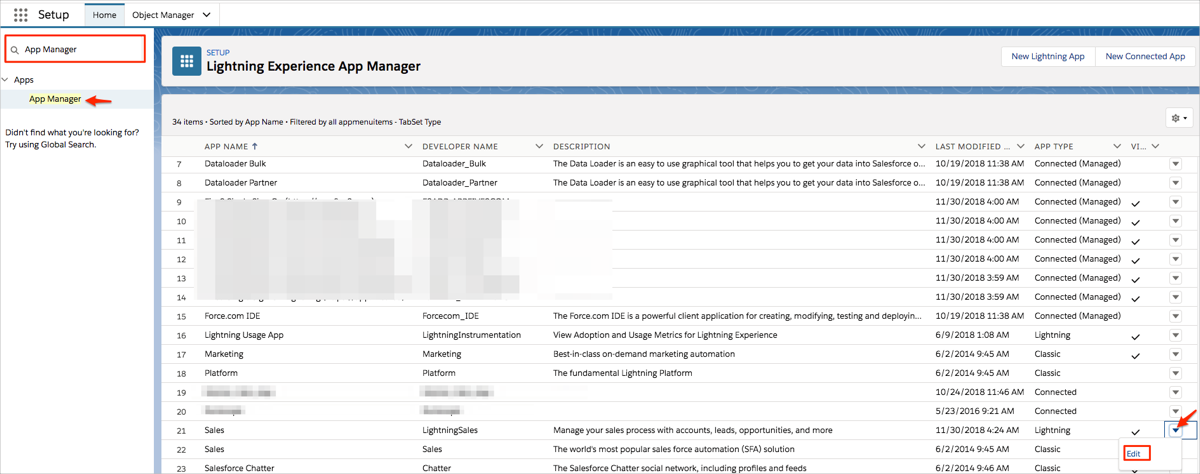
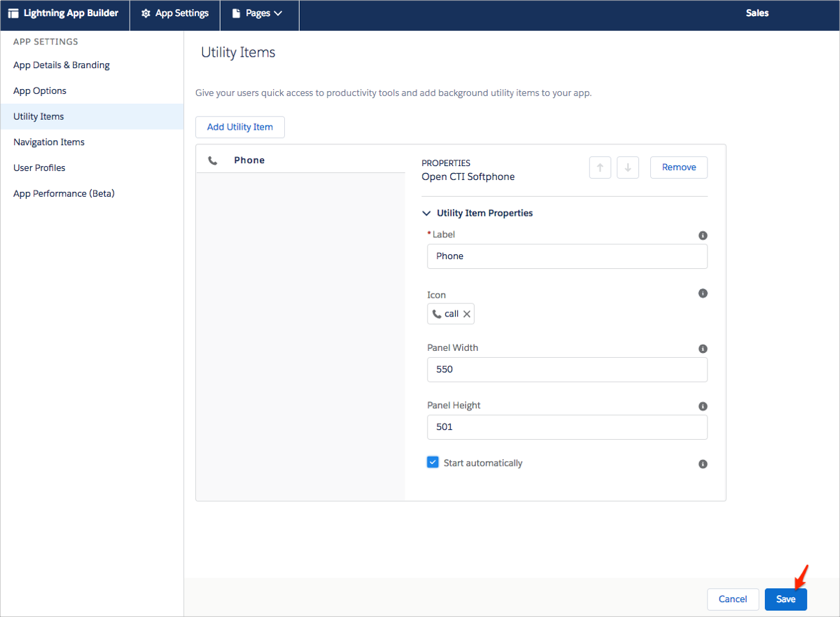
You need to add a CTI widget (we have used the app Sales as example). Navigate to App Manager, choose your Lightning app, then click Edit:
Navigate to Utility Items > Add Utility Item > Open CTI Softphone:
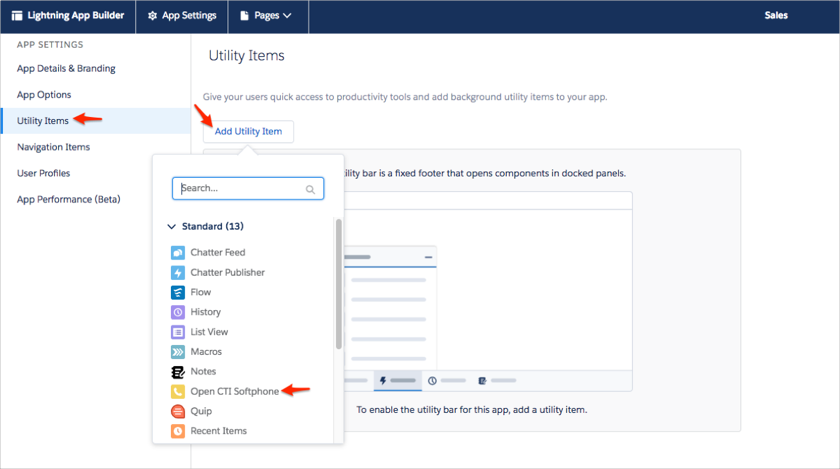
Set the Panel Width to 550, set Panel Height to 501, then click Save:
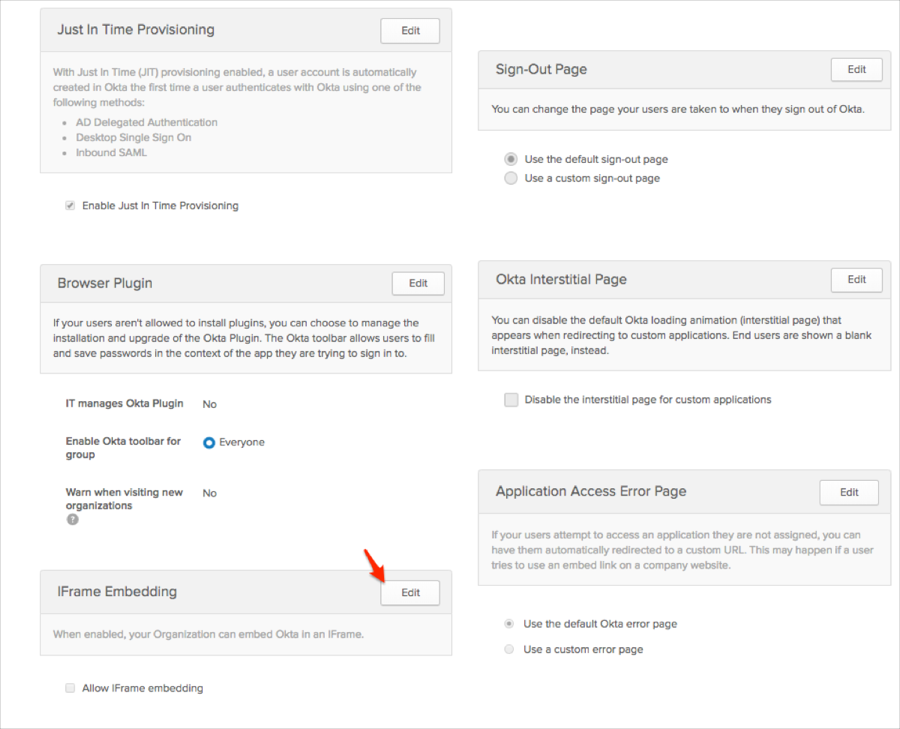
In Okta, navigate to Settings > Customization.
Scroll down to IFrame Embedding and click Edit:
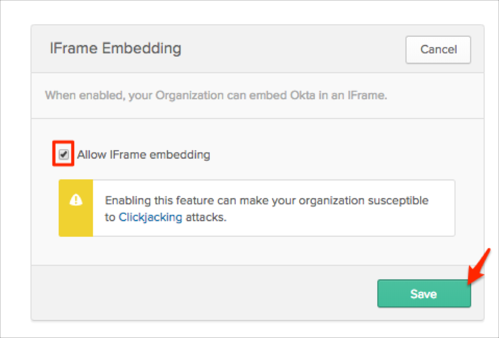
Check Allow IFrame embedding.
Click Save:
Go to the Sales app:
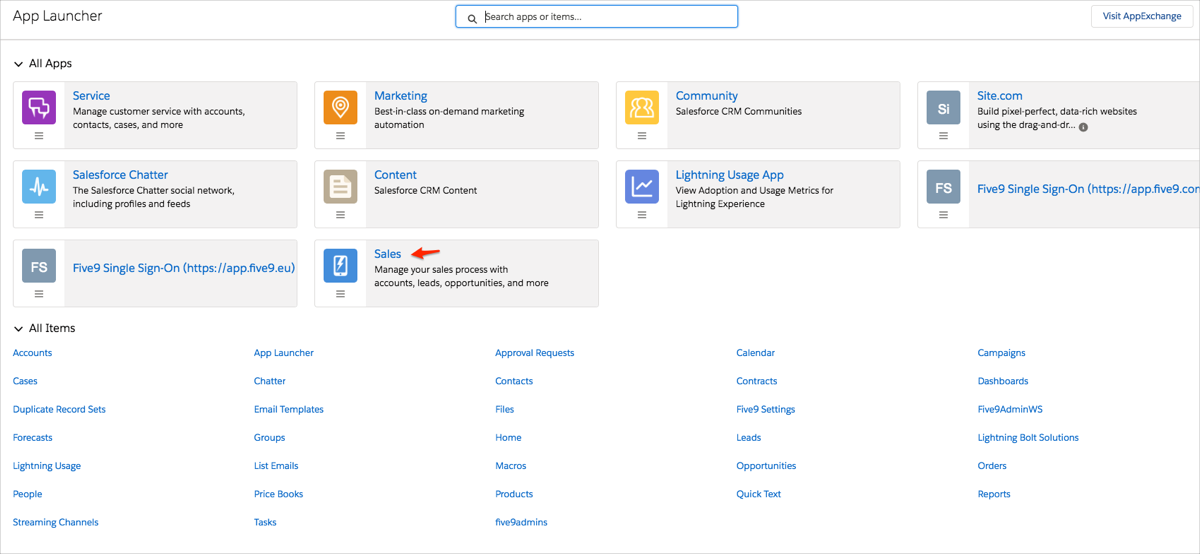
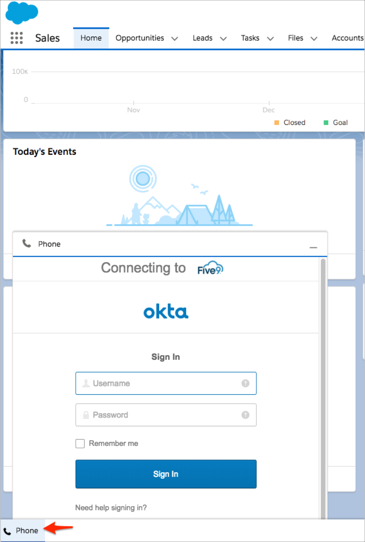
Click Phone from the Salesforce utility bar:
Go to Home: