The Okta/Figma SAML integration currently supports the following features:
For more information on the listed features, visit the Okta Glossary.
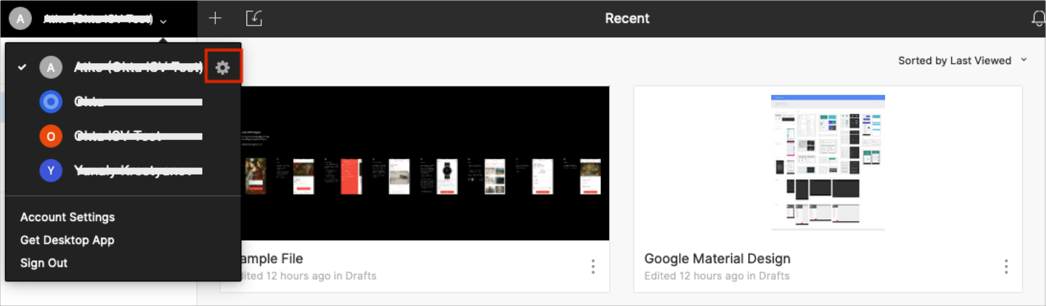
Login to your Figma instance as an administrator.
Click the gear icon to open organization settings:
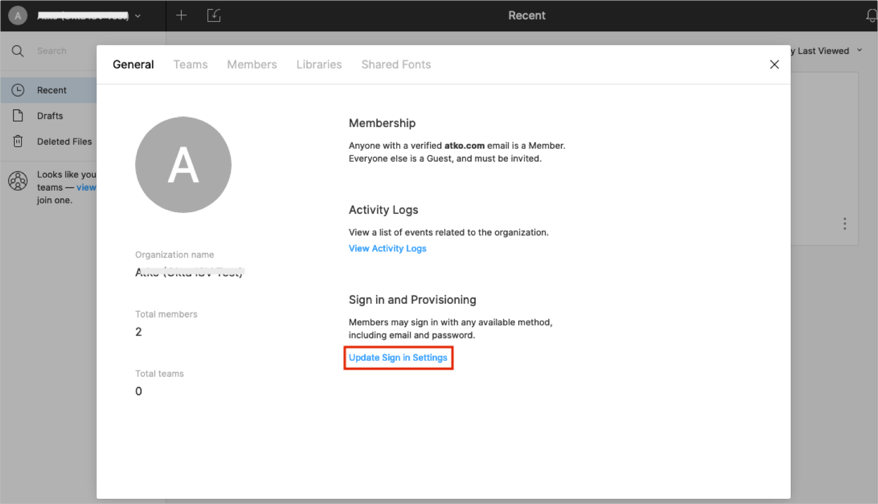
On the General tab, click the Update Sign in Settings link:
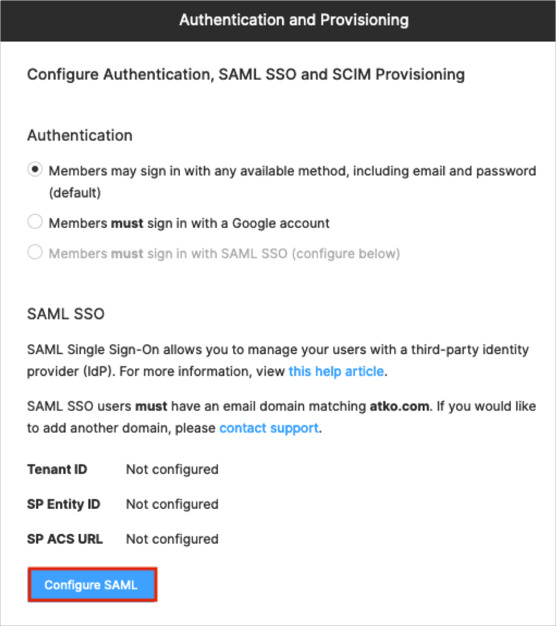
In the SAML SSO section click Configure SAML:
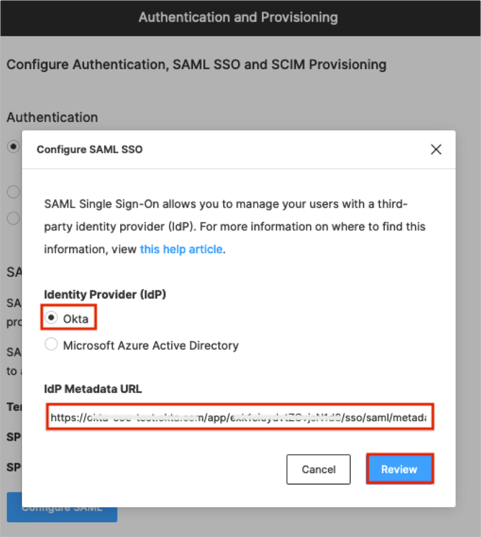
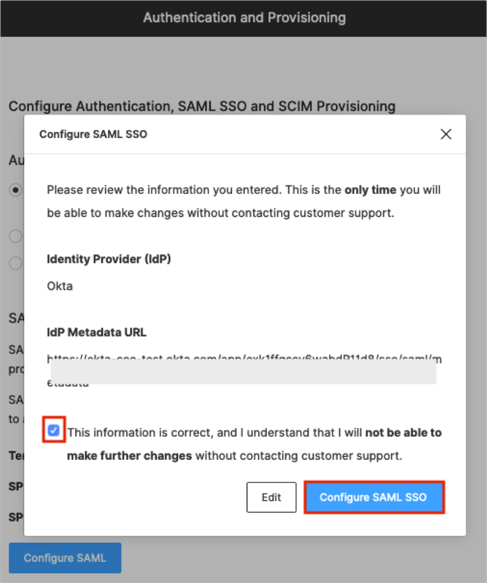
Select the Okta radio button.
IdP Metadata URL: Copy and paste the following:
Sign into the Okta Admin dashboard to generate this value.
Click Review:
Check the confirmation box and click Configure SAML SSO:
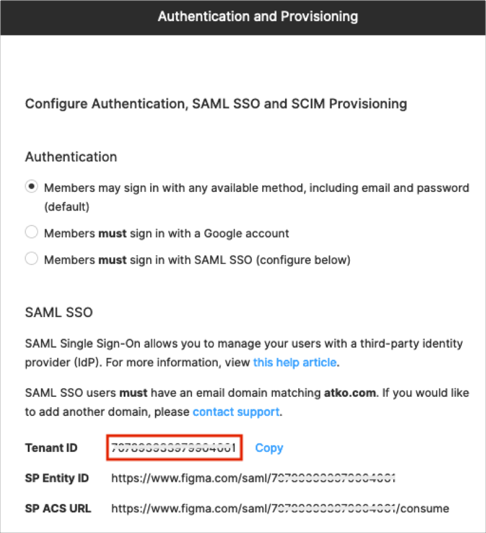
Maker a copy of your Tenant ID value:
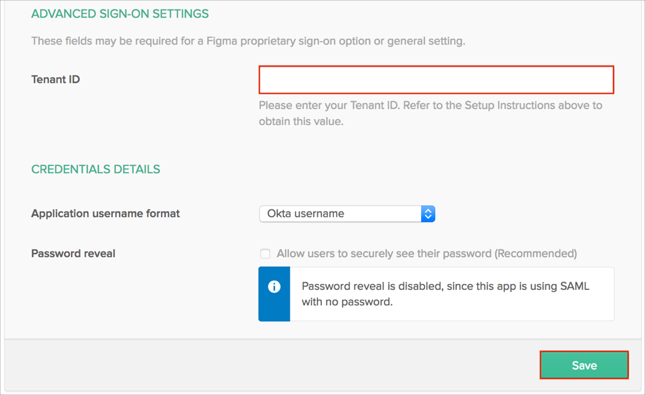
In Okta, select the Sign On tab for the Figma app, then click Edit.
Scroll down to the ADVANCED SIGN-ON SETTINGS section.
Enter the Tenant ID from step 9 into the corresponding field.
Click Save:
Done!
The following SAML attributes are supported:
| Name | Value |
|---|---|
| givenName | user.firstName |
| familyName | user.lastName |
| displayName | user.displayName |
| title | user.title |
Open the following URL: https://www.figma.com/saml/[tenantID]/start
Where: [tenantID] is the value from step 9.