The Okta/F5 BIG IP SAML integration currently supports the following features:
For more information on the listed features, visit the Okta Glossary.
Log into your F5 server as an administrator.
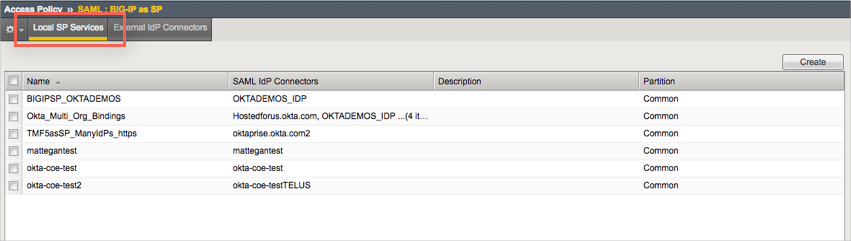
From the Main tab, navigate to Access Policy BIG-IP as SP:
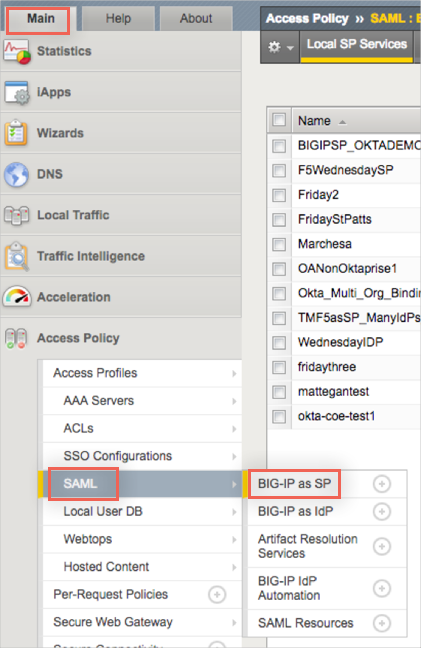
Click on the External IdP Connectors tab. This is where we will add your Okta org as an external IDP connector:

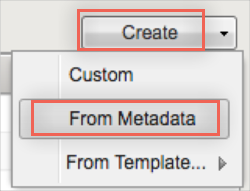
Select From Metadata from the Create dropdown menu in the upper right:
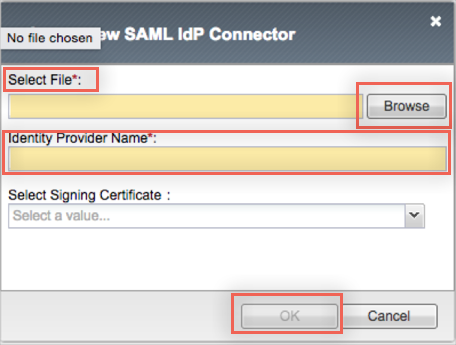
The New SAML IdP Connector window opens. Do the following:
Select File: The file being requested is the F5 application's metadata from your Okta org. Click on the following URL to download and save that metadata:
Sign into the Okta Admin dashboard to generate this value.
Click Browse to locate, then upload the metadata you just saved to F5:
Identity Provider Name: Enter a name for the new IdP Connector.
Click OK.
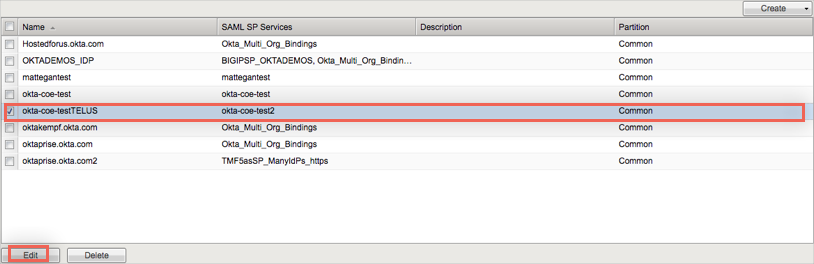
The Identity Provider you just created should now appear in the list under the External IdP Connectors tab. Select the IdP you added and click Edit:
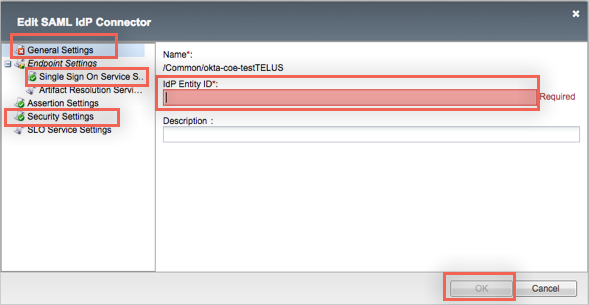
The Edit SAML IdP Connector window opens. Do the following:
Note: Because you uploaded the metadata from Okta, some of the fields should be pre-populated.
Click General Settings and make sure the IdP Entity ID field is pre-populated.
Click Single Sign On Services and make sure the Single Sign On Service URL is pre-populated and the Single Sign On Service Binding is set to POST.
Click Security Settings. Under Authentication Request sent by this device to IdP, check the Must be signed option and choose RSA-SHA256 as the Signing Algorithm.
Under Certificate Settings, select the certificate for your External IdP. One should have been created automatically and should be formatted similar to this: /Common/{IdentityProvider Name}__saml_idp_metadata_cert.crt.
Click OK to save your changes.
Select the Local SP Services tab, then click Create:
The Create New SAML SP Service window opens.
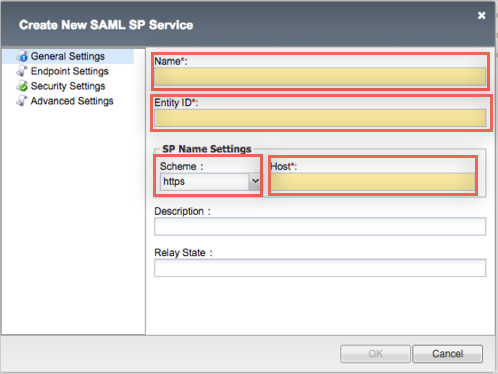
In the Create New SAML SP Service window, under General Settings, enter the following:
Name: Enter a name for the SAML SP Service you are creating.
Entity ID: Enter the following value:
[your_f5_baseURL}/[appid]
For example: https://tmf5.acme.com:2443/exk1av0mrdr2l1KvK1d8
To obtain your app ID value, take the last part of the following value:
Sign into the Okta Admin dashboard to generate this value.
For example, if the generated value above is http://www.acme.com/exka13a2400bKQhdt0h7, your app ID is the portion in bold.
Under SP Name Settings: For Scheme, select https. For Host, enter your F5 baseURL.
In the Create New SAML SP Service window, under Security Settings, enter the following:
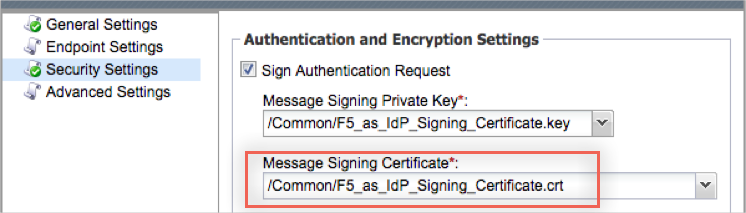
Under Authentication and Encryption Settings, check Sign Authentication Request and Want Signed Assertion.
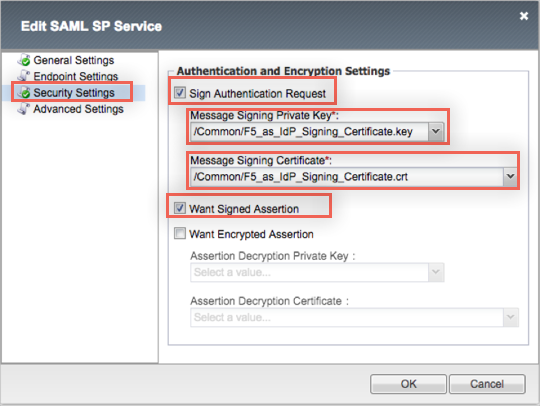
You will be asked to select a Message Signing Private Key and a Message Signing Certificate. To generate these, please follow the steps below:
In the BIG-IP Configuration Utility, navigate to System > File Management > SSL Certificate List:

Click Create.
Enter a appropriate and unique Name, and use the settings shown in the screen shot below:
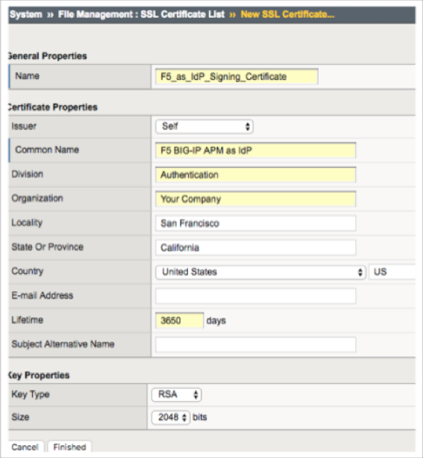
Enter relevant values for the remaining fields, then click Finish.
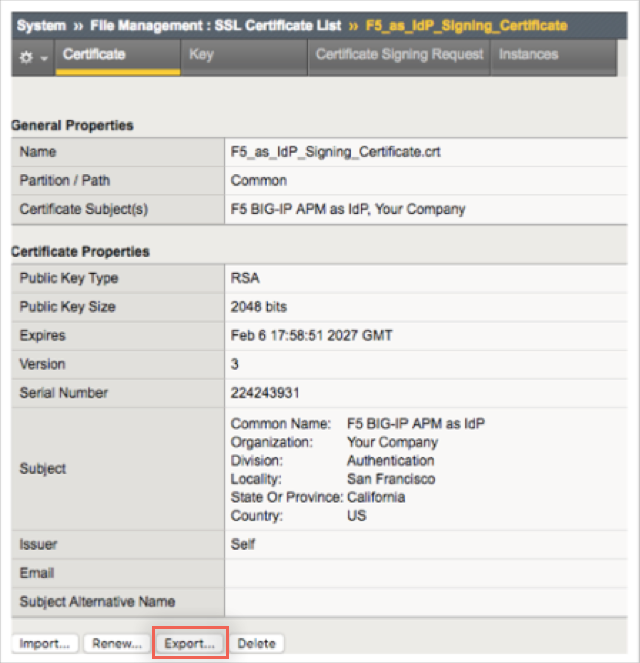
Select the SSL Certificate List tab and click on the newly created certificate name. In the resulting page, click Export.

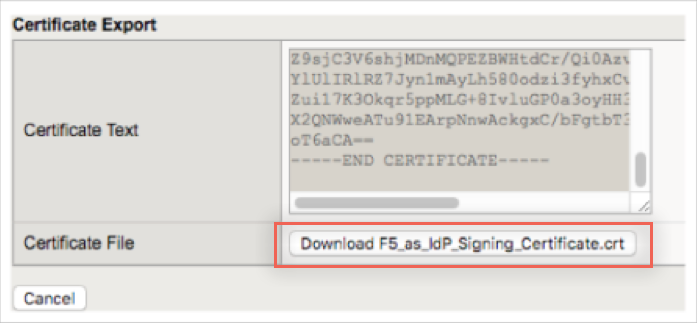
Click Download [name of certificate].crt to save a copy of the certificate locally.
Once you have created a valid cert, you will use it when editing you SP SAML Service. Go back to step 11 and choose the correct cert and key from the dropdown.
Back in the Create New SAML SP Service window, under Advanced Settings, enter the following:
For Name-Identifier Policy Format, select urn:oasis:names:tc:SAML:1.1:nameid-format:unspecified.
Check Requested Authentication Context, then click Add. Select the following value: urn:oasis:names:tc:SAML:2.0:ac:classes:PasswordProtectedTransport.
Click Update and then OK to finish updating your SAML SP Service.

Select the SP Service you just created from the Local SP Services list, then Click Bind/Unbind IdP Connectors.
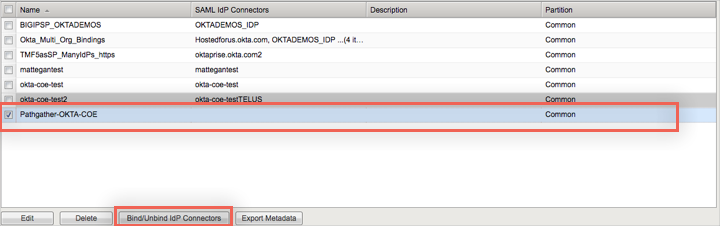
In the next window, click Create New IdP Connector. Choose the name of the External IdP Connector you created in step 5 from the SAML IdP Connectors dropdown menu.
Under Matching Source, choose [%{session.server.landinguri}].
For Matching Value, enter /{unique_identifier}*. For example: /mySite*.
Note: The Matching Value will be appended to the baseURL and will be used to access your F5 server using SP-initiated SAML flow. This will be described at a later step.
Click Update, then click Ok.
After you’ve finished setting up your Local SP Service and External IdP Connector, you can now associate your Access Profile with your Local SP service.
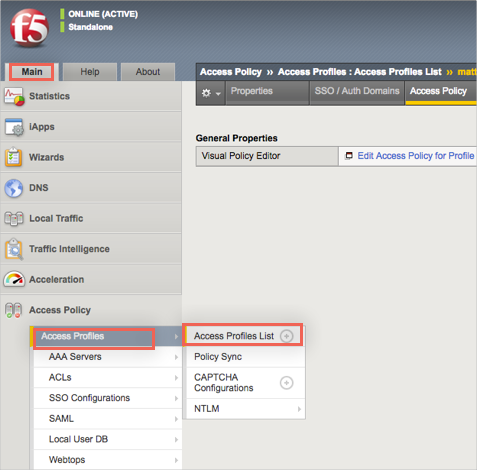
Back in the Main menu, navigate to Access Profiles > Access Profiles List:
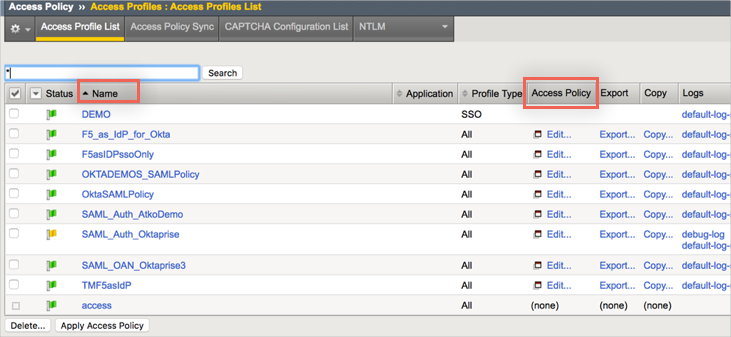
Look for your Access Profile, select it, then click Edit under the Access Policy column:
A new window containing the Access Policy settings for your Access Profile will open:
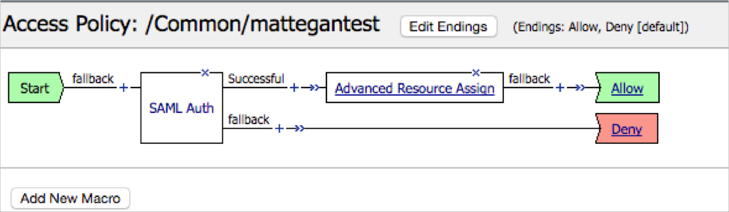
Click SAML Auth. Select the Local SP Service you created starting from step 8 from the AAA Server dropdown Menu. Click Save:

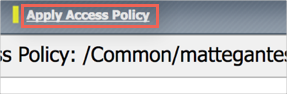
You should see a new Apply Access Policy link. Click this link to save your changes:
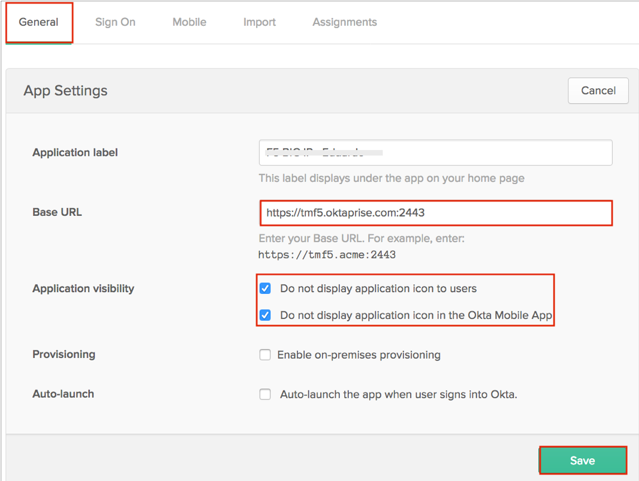
In Okta, select the General tab for the F5 app, then click Edit.
Enter your F5 Base URL into the corresponding field.
Check both options in the Application Visibility section. This will hide the app from users.
Click Save.
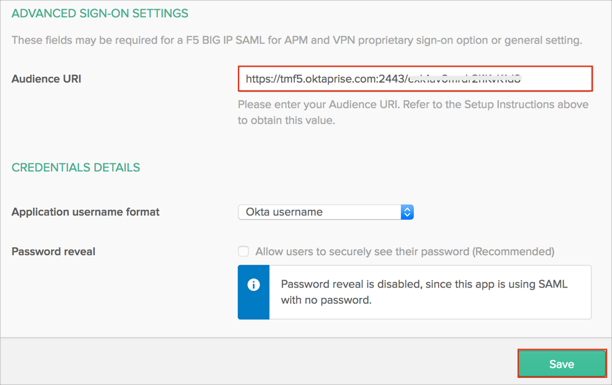
Still in Okta, select the Sign On tab, then click Edit.
Scroll down to the ADVANCED SIGN-ON SETTINGS section.
Enter your Audience URI (Entity ID from step 10, above) into the corresponding field.
Click Save.
Since the current F5 SAML integration only supports SP-initiated flows, we need to create a bookmark app to simulate an IdP-initiated flow (clicking on an app from your Okta homepage to login to F5). This bookmark application will the only app visible to users. We hid the other F5 app (step 25) to stop users clicking on the wrong app.
Follow the instructions in Simulating an IDP-initiated Flow with the Bookmark App to create and configure a bookmark application.
As Bookmark URL use your F5 Base URL followed by the matching value you used in step 17. Don’t include the * (asterisk) character.
Your URL value should follow this format: [your_F5_baseURL]/{matching_value} (without the * character).
For Example: https://tmf5.acme:2443/mySite.
Done!
Open the Bookmark URL (step 27).