The Okta/EpicCareLink SAML integration currently supports the following features:
For more information on the listed features, visit the Okta Glossary.
Note: You can successfully integrate Okta with EpicCare Link by configuring OIOSAML-Based SSO. Details on the steps that need to be taken can be found in C8308900. Epic recommends that you work with your Epic representatives to setup OIOSAML-based SSO.
Contact your Epic representative to set up OIOSAML-based SSO and mention parent SLG 2587692.
Insert the following values into the appropriate sections of the EpicCare Link web.config file as described in the Galaxy web.config Setup guide:
Download and save the following IdP (Okta) metadata file to be used as described in the Galaxy Exchange metadata guide:
Sign into the Okta Admin dashboard to generate this value.
Open the Metadata SP (EpicCare Link) metadata file and locate the SAML ACS URL.
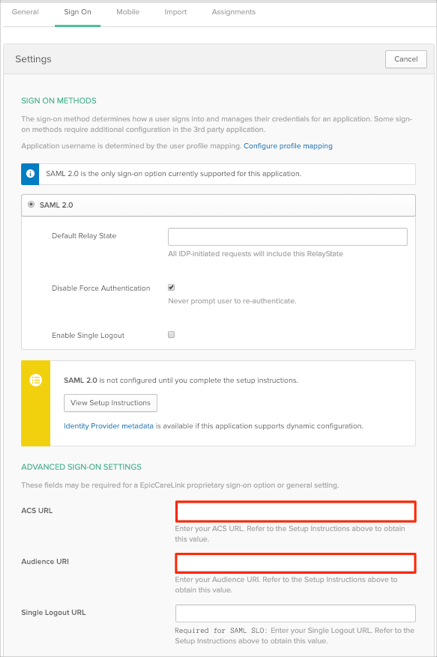
In Okta, select the Sign On tab for the EpicCareLink SAML app, then click Edit:
Enter the ACS URL and Audience URI values provided to you by Epic or extracted from the SP metadata file into the corresponding fields.
Click Save:
Now you have to add the EpicCareLinkID custom attribute, this is required to populate the SAML assertion from Okta with the appropriate values for EpicCare Link.
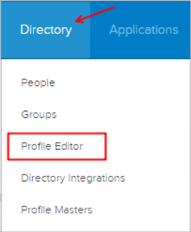
Still in Okta, from the Admin console, navigate to Directory > Profile Editor:
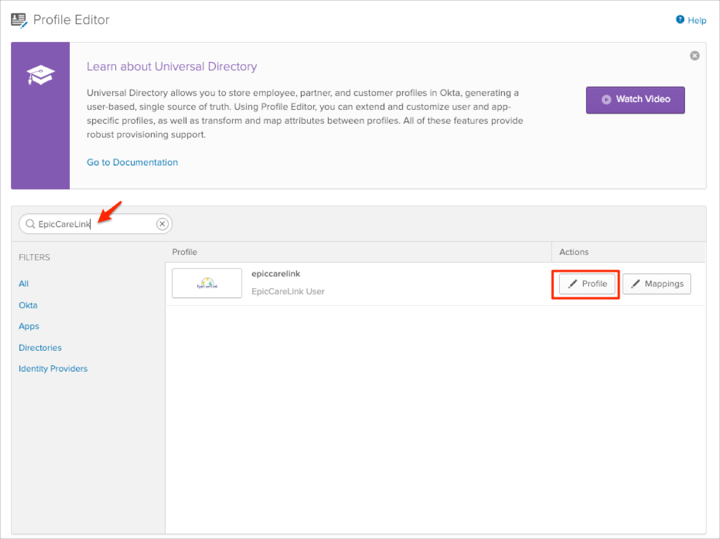
Search for your EpicCareLink app, then click the Profile edit button:
Click Add Attribute, then enter the following information:
Display Name: Enter EpicCareLinkID.
Variable Name: Enter EpicCareLinkID.
Click Save:

NOTE
Scope: If you check user personal, the current attribute will be available once you assign a single user to the EpicCareLink app and will not be available once you assign a group to the EpicCareLink app.
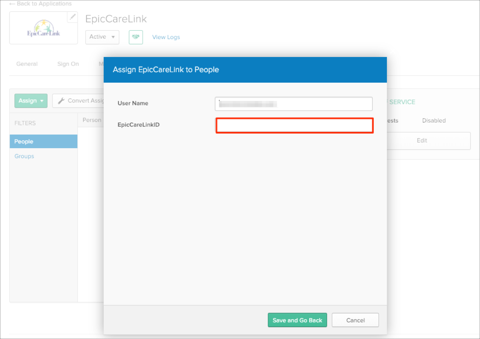
Go back to EpicCareLink app, assign the user and either enter your EpicCareLinkID value or apply the mapping rules:
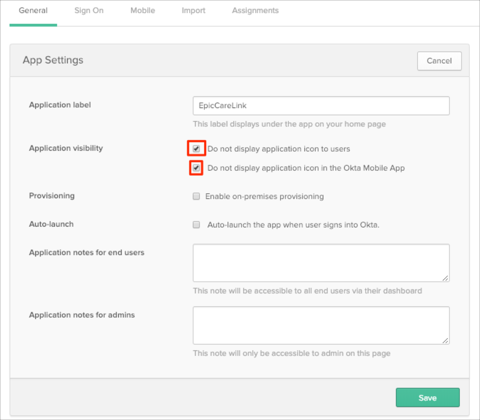
EpicCare Link only supports SP-Initated SAML Flows. As such you need to hide the SAML application created in Okta and create a Bookmark app that will trigger the SP-Initated flow (for more information see Simulating an IDP-initiated Flow with the Bookmark App). Go to the General tab, then click Edit:
Check the Do not display application icon to users and Do not display application icon in the Okta Mobile App options.
Click Save:
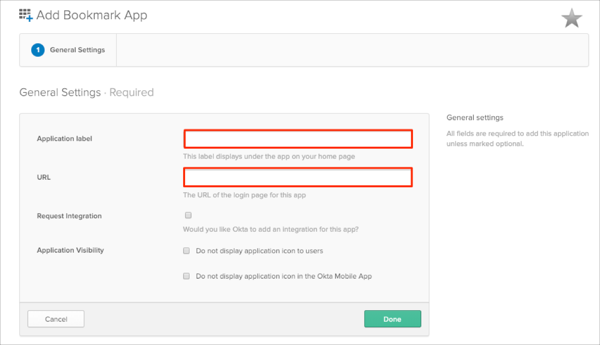
Add a Bookmark app:
Application label: Enter the preferred name
URL: Enter your Web application SSO URL value provided to you by Epic. The URL must follow this pattern: http://[servername]/[alias]/common/epic_check.asp?mode=[SSOAuthMethodName]
Click Done:
Assign people to the application.
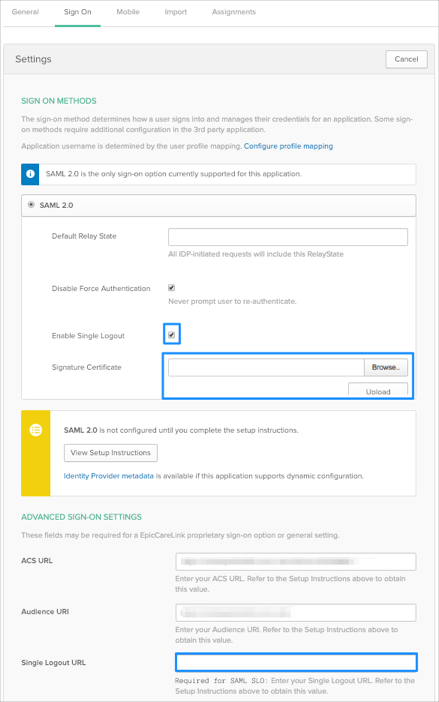
(Optional SLO): To enable SLO for EpicCareLink in Okta, select the Sign On tab for the EpicCareLink SAML app, then click Edit:
Check Enable Single Logout.
Upload the certificate file provided to you by Epic or extracted from the SP metadata file.
Enter the Single Logout URL value provided to you by Epic or extracted from the SP metadata file into the corresponding field.
Click Save:
(Optional SLO): Locate and extract the SingleLogoutService URL value from the following Metadata file (this will be used to setup SLO on Epic's side):

Metadata:
Sign in to Okta Admin app to have this variable generated for you.
(Optional SLO): Edit the epic.ini file as described in the Galaxy epic.ini Setup guide.
Note: You will have to set CustomLogOutPage in epic.ini.
The value looks like: http://[servername]/[alias]/common/epic_check.asp?mode=[SSOAuthMethodName]
The following SAML attributes are supported:
| Name | Value |
|---|---|
| http://epic.com/EpicWeb/empuser | appuser.EpicCareLinkID |