
This OAN application supports CyberArk Password Vault Web Access version 9.7 and higher.
Previous (9.6 and older) CyberArk Password Vault Web Access versions are not supported.
Use the Application Wizard (see Application Wizard Help for details) to create custom CyberArk Password Vault Web Access implementations.
The Okta/CyberArk Password Vault Web Access SAML integration currently supports the following features:
For more information on the listed features, visit the Okta Glossary.
You will need the following variables throughout the configuration steps:
Sign into the Okta Admin Dashboard to generate this variable.
Sign into the Okta Admin Dashboard to generate this variable.
Sign into the Okta Admin Dashboard to generate this variable.
Sign into the Okta Admin Dashboard to generate this variable.
CyberArk Private Cloud customers: Contact your Support team with the Certificate (IdentityProviderCertificate) and ACS URL (IdentityProviderLoginURL) values. You can obtain these values by clicking the Identity Provider metadata link on the Sign On page for the CyberArk SAML app in Okta. Then continue with step 16 of these instructions.
Open the c:\inetpub\wwwroot\PasswordVault\web.config file from the server hosting the CyberArk Password Vault Web Access (PVWA).
Search for the <appSettings> section.
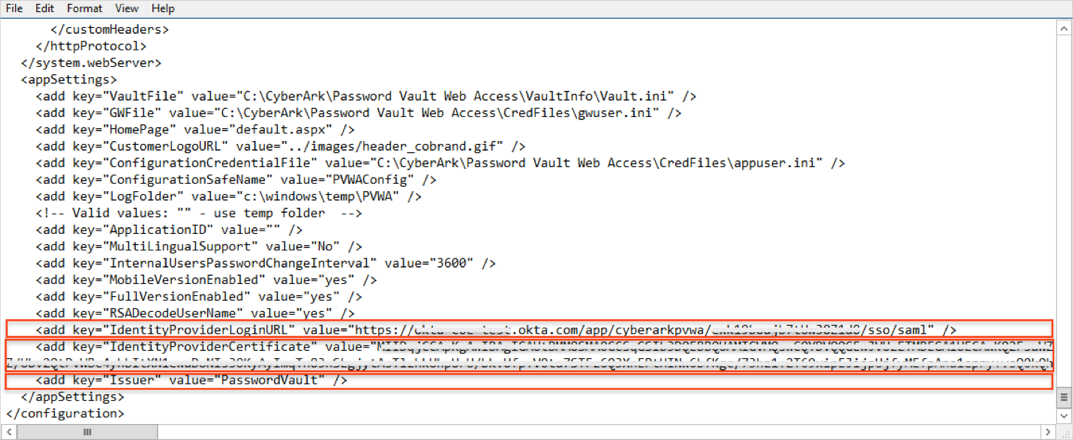
Add the following lines:
<add key="IdentityProviderLoginURL" value="<value1>" />
For <value1>: Use the IdentityProviderLoginURL value provided in URL Variables above.
<add key="IdentityProviderCertificate" value="<value2>" />
For <value2>: Use the IdentityProviderLoginURL value provided in URL Variables above.
<add key="Issuer" value="PasswordVault" />
Note: The value of the Issuer must be identical to the Audience defined in the IdP. The default value for this parameter is PasswordVault.
Save the web.config file.
Restart Internet Information Services (IIS).
Login to CyberArk PVWA as an administrator.
Navigate to Administration > Options > Access Restrictions.
Add a new AllowedReferrer: Use BaseUrl value from URL Variables above.
Click Apply.

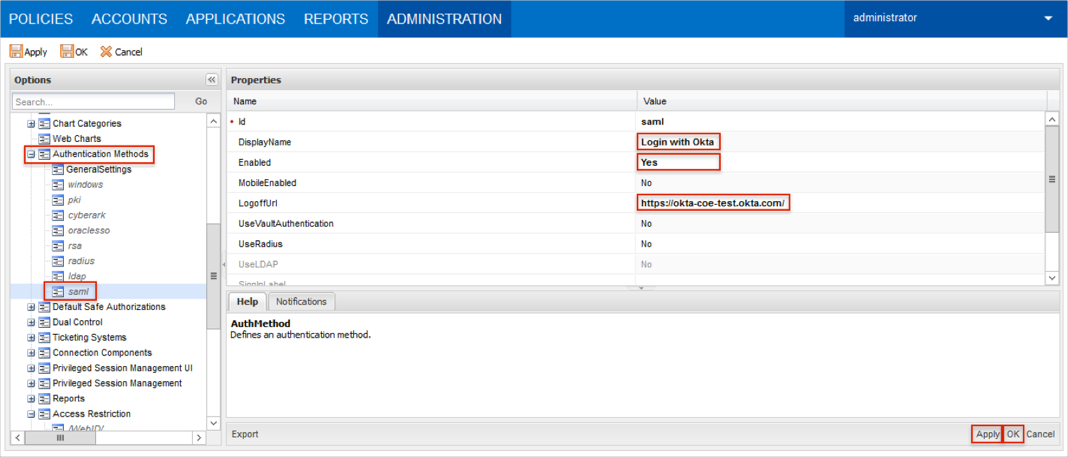
Select Authentication Methods > saml.
Display Name: Enter Login with Okta.
Enabled: Set to Yes.
LogoffUrl: Use the LogoffUrl value from URL Variables above.
Click Apply.
Click OK.
In Okta select the Sign On tab for the CyberArk Password Vault Web Access SAML app, then click Edit:
Audience URI: Enter your Issuer.
Click Save:
Done!
Note: If you are already working with SAML authentication, and you are upgrading to 11.3, we recommend that you upgrade to the 11.3 configuration file:
Open the saml.config file located in the installation folder (the default location is \Inetpub\wwwroot\PasswordVault), and configure the PartnerIdentityProvider Name. The rest of the parameters are configured during the upgrade process.
Only for versions 11.3-11.5: Open the web.config file located in the installation folder, and in the appSettings tag, set the UseNewSAMLSolution parameter to Yes.
Follow this guide. Use the values of LogoffUrl, BaseUrl, SingleSignOnServiceUrl, Certificate, and PartnerIdentityProvider Name values from URL Variables above.
In Okta select the Sign On tab for the CyberArk Password Vault Web Access SAML app, then click Edit:
Audience URI: Enter your ServiceProvider Name
Click Save.
Done!
Make sure that you entered the correct value in the Base URL field under the General tab in Okta. Using the wrong value will prevent you from authenticating via SAML to CyberArk Password Vault Web Access.
Open your CyberArk PVWA Login URL: [yourBaseUrl]/PasswordVault/.
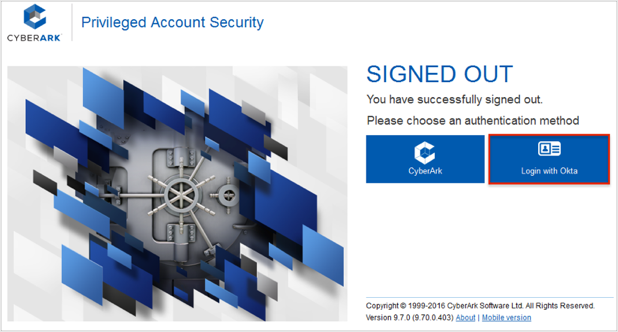
For V9:
Click the back arrow:
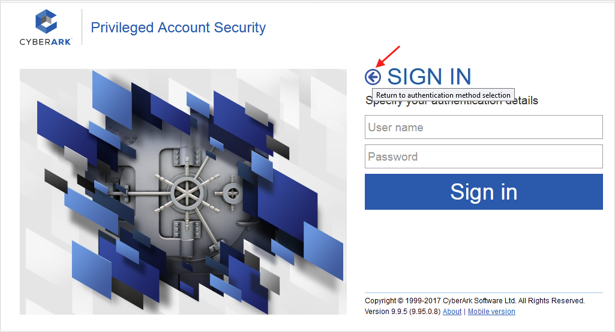
Click Login with Okta:
For V10+:
Click Change authentication method:
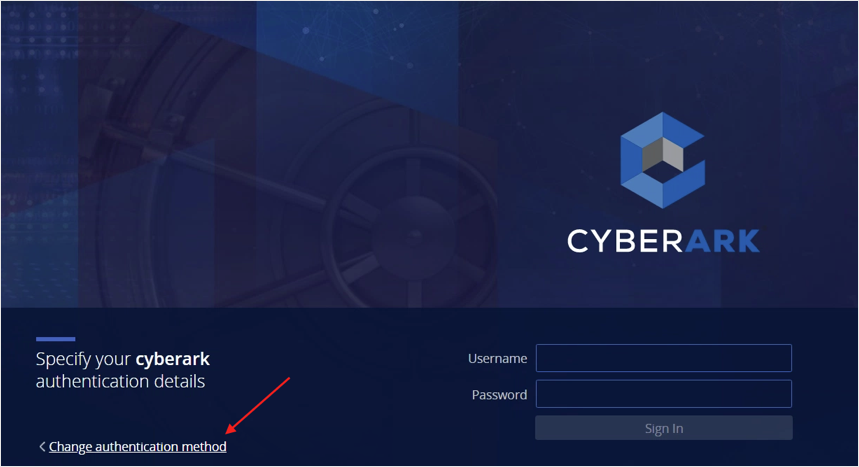
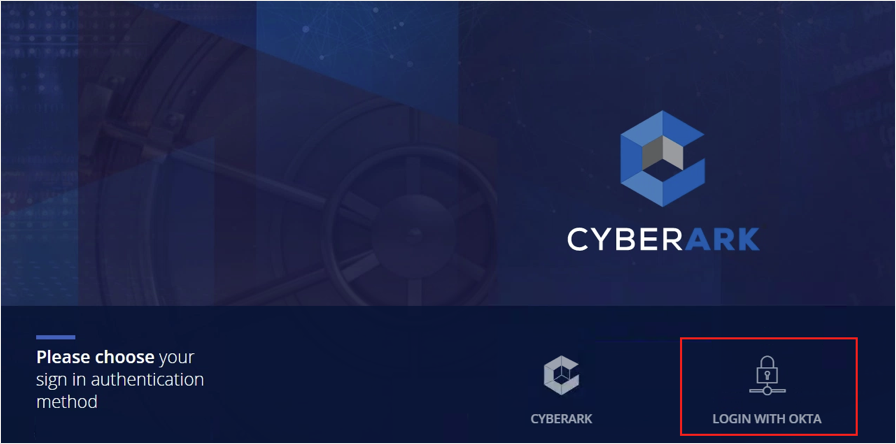
Click LOGIN WITH OKTA:
