Enabling SAML will affect all users who use this application, which means that users will not be able to sign-in through their regular log-in page. They will only be able to access the app through the Okta service.
Backup URL
CloudBees does not provide backup log-in URL where users can sign-in using their normal username and password. You can email CloudBees support (support@cloudbees.com) to turn off SAML, if necessary.
The Okta/CloudBees SAML integration currently supports the following features:
For more information on the listed features, visit the Okta Glossary.
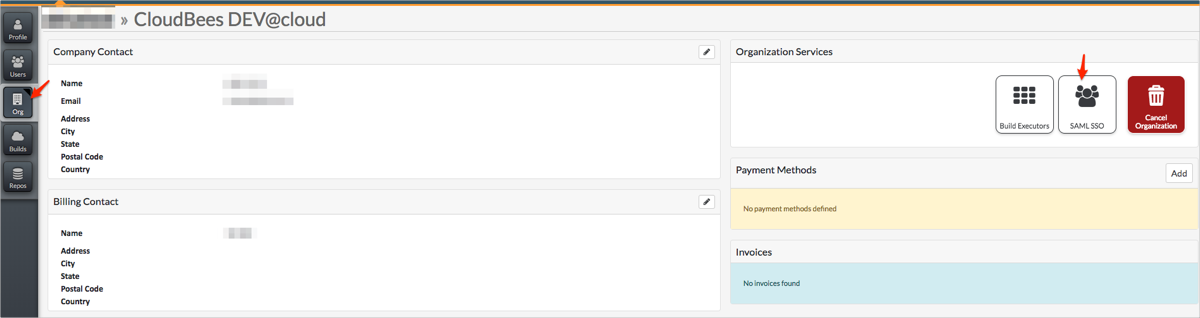
Sign into CloudBees as an admin at https://grandcentral.cloudbees.com/login.
Navigate to Org > SAML SSO, then click New Service:
Follow these steps:
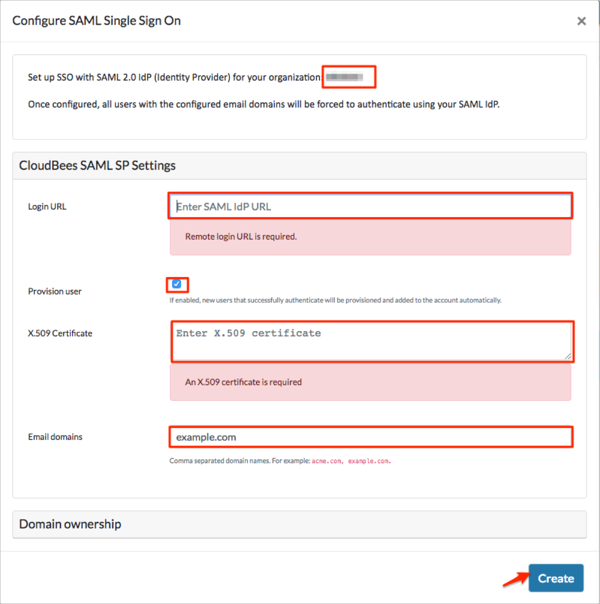
In the Set up SSO with SAML 2.0 IdP (Identity Provider) for your organization section, make a copy of your Organization Name marked in red in the screenshot below.
Login URL: Copy and paste the following:
Sign into the Okta Admin dashboard to generate this value.
Provision user (optional): Check this checkbox to enable Just In Time Provisioning.
X.509 Certificate Copy and paste the following:
Sign in to the Okta Admin app to have this variable generated for you.
Email domains: Specify the comma separated list of domains for which SAML login process should be triggered.
Click Create:
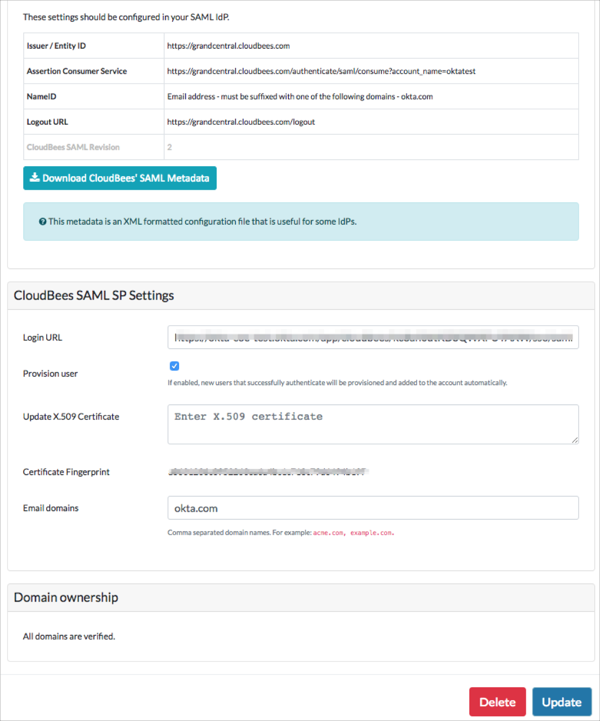
If all goes well you will see a Verify button showing the validation key in the following format:
cloudbees-domain-verification:0123456789abcdef0123456789abcdef01234567
This key will need to be added as DNS TXT record.

After the DNS TXT record with above mentioned key has been added, click Verify, this will validate the domain ownership.
Note: There may be an up to 24 hour delay between your record being created and it validating with CloudBees.
If domain ownership has been validated you are all set to use SAML Login process and your SAML configuration should show Certificate Fingerprint instead of the actual X509 certificate.
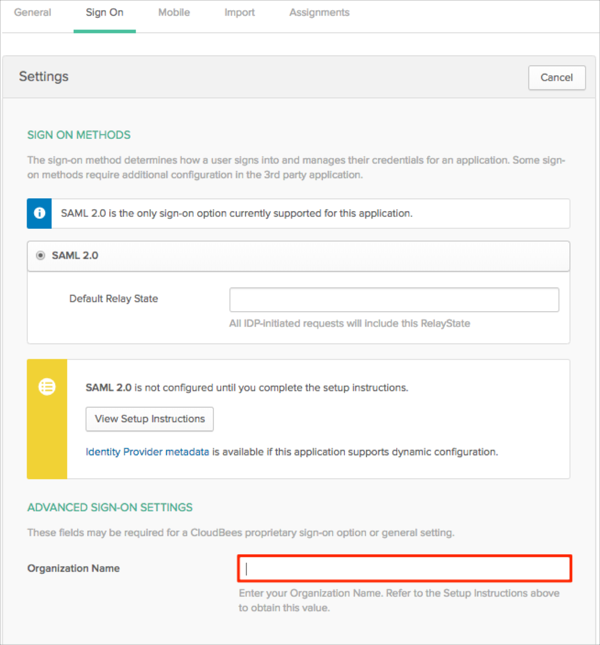
In Okta, select the Sign On tab for the CloudBees SAML app, then click Edit:
Enter your Organization Name you made a copy of in step 3 into the corresponding field.
Click Save:
The following SAML attributes are supported:
| Name | Value |
|---|---|
| first_name | user.firstName |
| last_name | user.lastName |
| user.email | |
| username | user.userName |
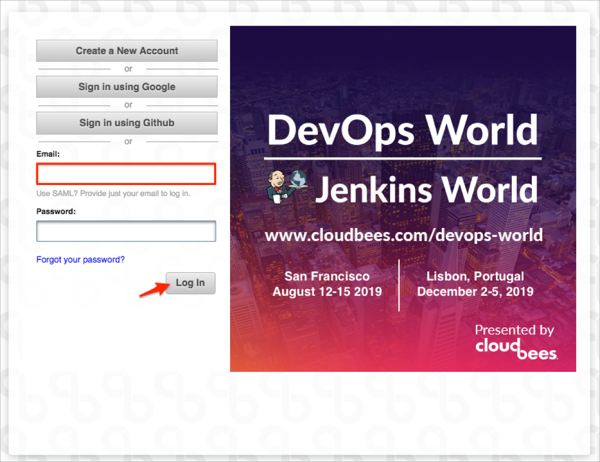
Go to: https://grandcentral.cloudbees.com/login URL
Enter your email, then click Log in: