The Cisco Meraki Dashboard SAML application does not support adding different IDPs with the same certificate fingerprint value. Users need to follow the the instructions here: https://developer.okta.com/docs/api/resources/apps#generate-new-application-key-credential to generate a different certificate for each new application instance.
The Okta/Cisco Meraki Dashboard SAML integration currently supports the following features:
For more information on the listed features, visit the Okta Glossary.
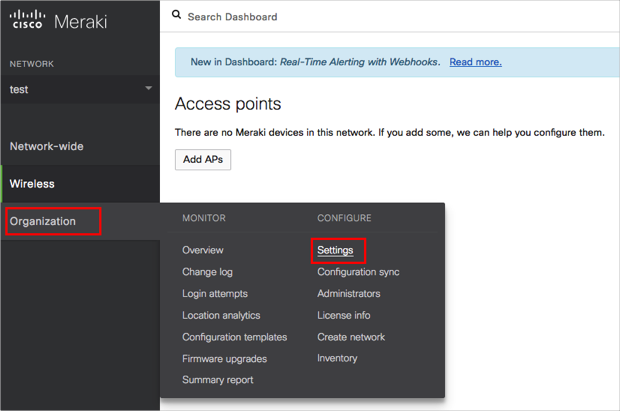
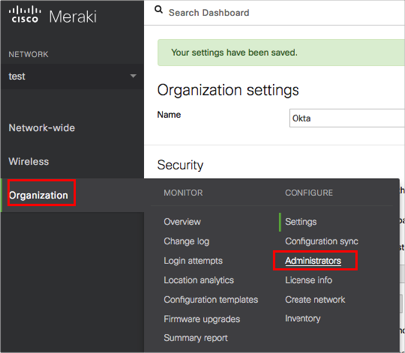
Sign in to Cisco Meraki Dashboard as an administrator.
Navigate to Organization > Settings:
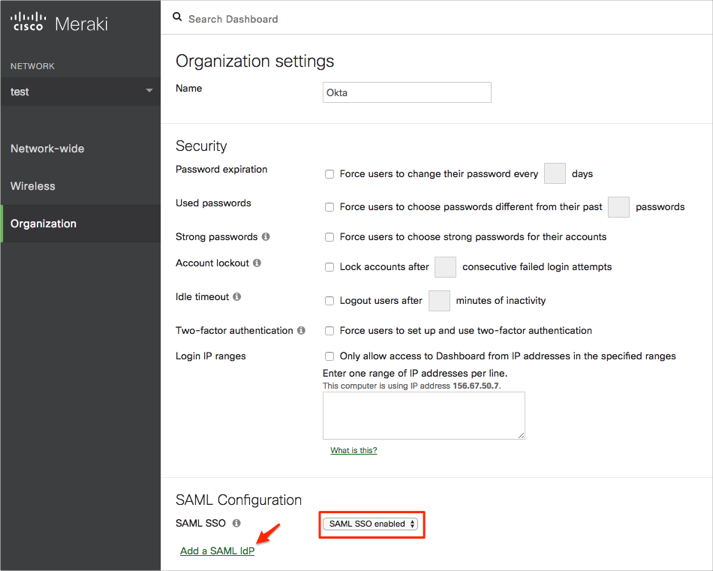
Enter the following (see screen shot at end of step for reference):
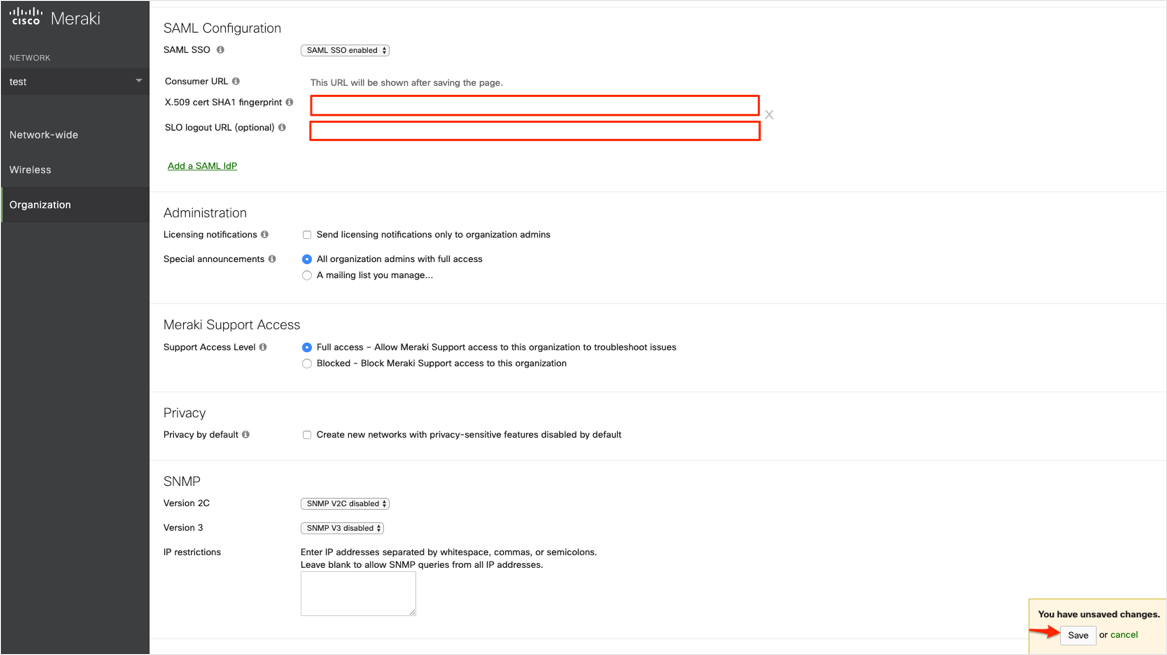
X.509 cert SHA1 fingerprint: Copy and paste the following:
Sign into the Okta Admin dashboard to generate this value.SLO logout URL (optional): Copy and paste the following:
Sign into the Okta Admin dashboard to generate this value.
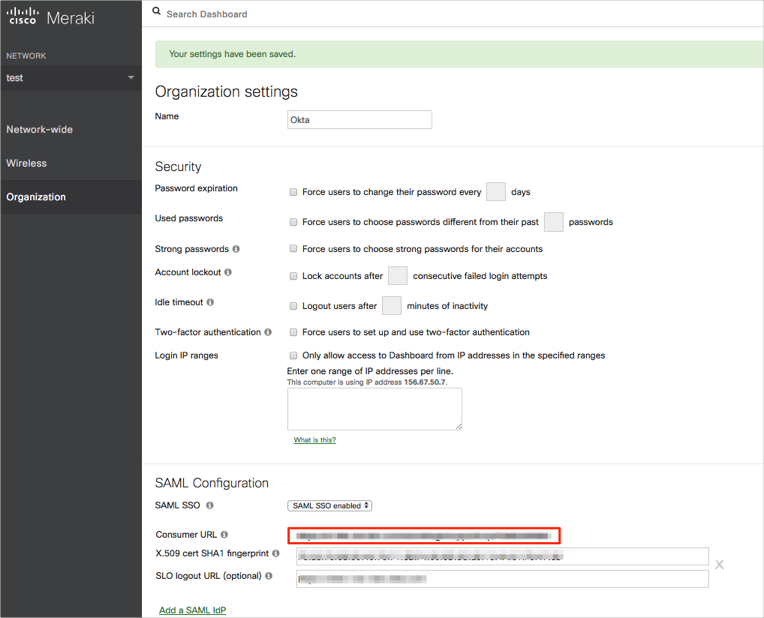
Click Save:
Still on the Organization settings page, make a copy of the Consumer URL value that is now displayed:
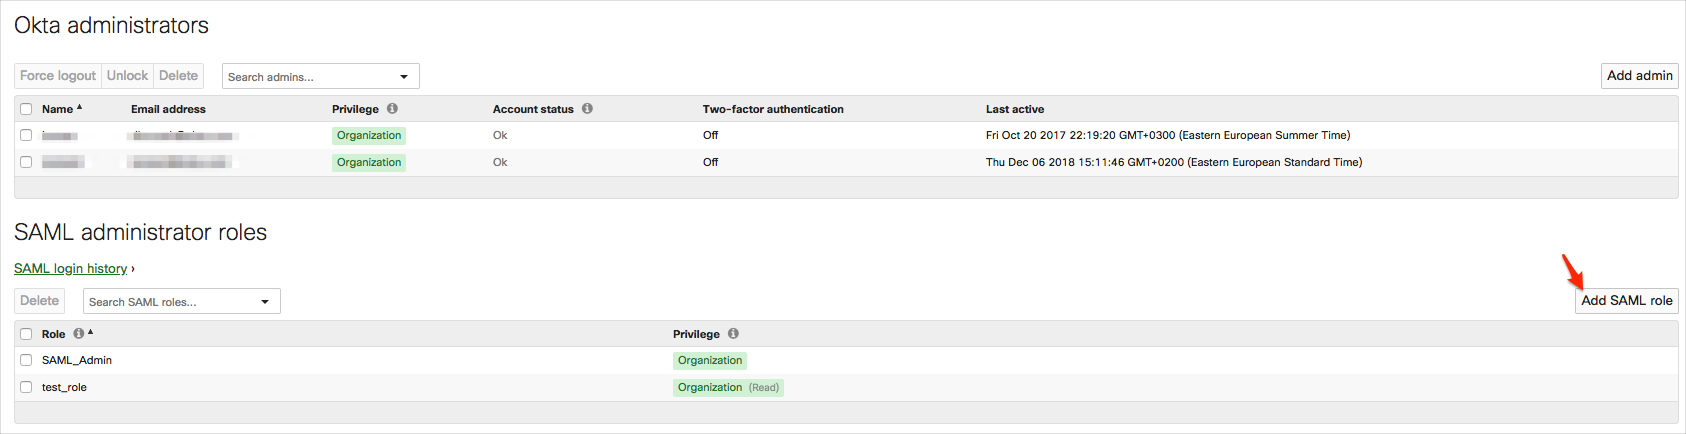
Navigate to Organization > Administrators:
Click Add SAML role:
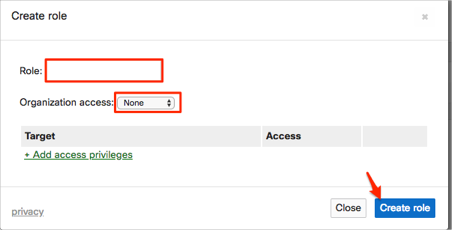
Enter a Role name, and select the appropriate Organization access and privileges, then click Create role:
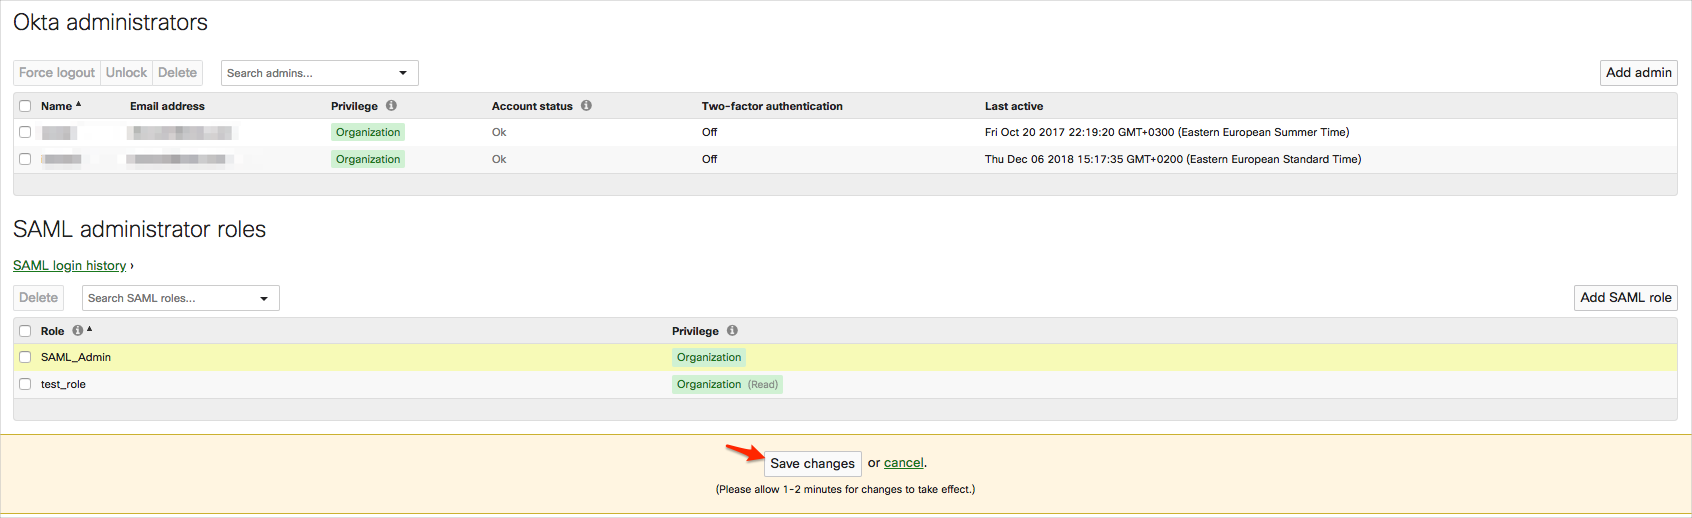
Click Save changes:
In Okta, select the Sign On tab for the Cisco Meraki Dashboard SAML app, then click Edit:
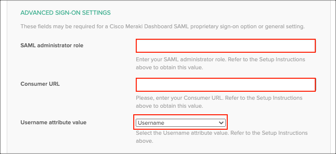
SAML administrator role: Enter the Role name you specified in step 8.
Consumer URL: Enter the value you made a copy of in step 5.
Username attribute value: Select the value that will be used for the username attribute (specifically https://dashboard.meraki.com/saml/attributes/username) in the SAML assertion (either Email or Username).
Click Save:
Done!
The following SAML attributes are supported:
| Name | Value |
|---|---|
| https://dashboard.meraki.com/saml/attributes/username | user.email or user.userName |
| https://dashboard.meraki.com/saml/attributes/role | Comes from SAML administrator role field (step 10) |