The Okta/Cisco ASA VPN SAML integration currently supports the following features:
For more information on the listed features, visit the Okta Glossary.
Access your Cisco ASA using SSH.
Type the following commands in order to access config terminal:
ciscoasa> enable
ciscoasa# config t
Import the OKTA’s signing certificate into a trustpoint:
ciscoasa(config)# crypto ca trustpoint okta
ciscoasa(config-ca-trustpoint)# enrollment terminal
ciscoasa(config-ca-trustpoint)# no ca-check
ciscoasa(config-ca-trustpoint)# crypto ca authenticate okta
Enter the base 64 encoded CA certificate:
End with the word quit on a line by itself:
Sign into the Okta Admin Dashboard to generate this variable.
quit
INFO: Certificate has the following attributes:
Fingerprint: *************
Do you accept this certificate? [yes/no]: yes
Trustpoint CA certificate accepted.
% Certificate successfully imported
If you do not have signing PKCS12 certificate, you need to generate it using the following openssl commands:
openssl req -newkey rsa:2048 -nodes -keyout key.pem -x509 -days 365 -out certificate.crt
openssl pkcs12 -inkey key.pem -in certificate.crt -export -out certificate.p12
openssl base64 -in certificate.p12 -out certificate.base64
Import the ASA signing PKCS12 into a trustpoint:
ciscoasa(config)# crypto ca import asa_saml_sp pkcs12 [yourPassword]
Enter the base 64 encoded pkcs12. [it should be the content of the certificate.base64 file from step 4]
End with the word quit on a line by itself:
quit
INFO: Import PKCS12 operation completed successfully
Add Okta as SAML IdP:
ciscoasa(config-webvpn)# saml idp [issuer]
Where [issuer]: Copy and paste the following:
Sign into the Okta Admin Dashboard to generate this variable.
Note: Make a copy of this value, you will need it again in step 10g.
Configure the IdP sign-in URL and sign-out URL:
ciscoasa(config-webvpn-saml-idp)# url sign-in [sign-on url]
Where [sign-on url]: Copy and paste the following:
Sign into the Okta Admin Dashboard to generate this variable.
[OPTIONAL: SLO]
ciscoasa(config-webvpn-saml-idp)# url sign-out [sign-out url]
Where [sign-out url]: Copy and paste the following:
Sign into the Okta Admin Dashboard to generate this variable.
Configure the Okta trustpoint and the ASA trustpoint:
ciscoasa(config-webvpn-saml-idp)# trustpoint idp okta
ciscoasa(config-webvpn-saml-idp)# trustpoint sp asa_saml_sp
Configure the Clientless VPN base URL, SAML request signature SAML assertion timeout and Force Authentication:
ciscoasa(config-webvpn-saml-idp)# base-url https://[yourASAbaseURL]
(for example: https://asahost.com)
ciscoasa(config-webvpn-saml-idp)# signature
ciscoasa(config-webvpn-saml-idp)# timeout assertion 7200
[OPTIONAL: Force Authentication]:
ciscoasa(config-webvpn-saml-idp)# force re-authentication
Configure an IdP for a tunnel group and enable SAML authentication:
ciscoasa(config)# webvpn
ciscoasa(config-webvpn)# tunnel-group-list enable
ciscoasa(config)# tunnel-group cloud_idp_okta type remote-access
ciscoasa(config)# tunnel-group cloud_idp_okta webvpn-attributes
ciscoasa(config-tunnel-webvpn)# authentication saml
ciscoasa(config-tunnel-webvpn)# group-alias cloud_idp enable
ciscoasa(config-tunnel-webvpn)# saml identity-provider [issuer]
Where [issuer] is the same value generated in step 6a.
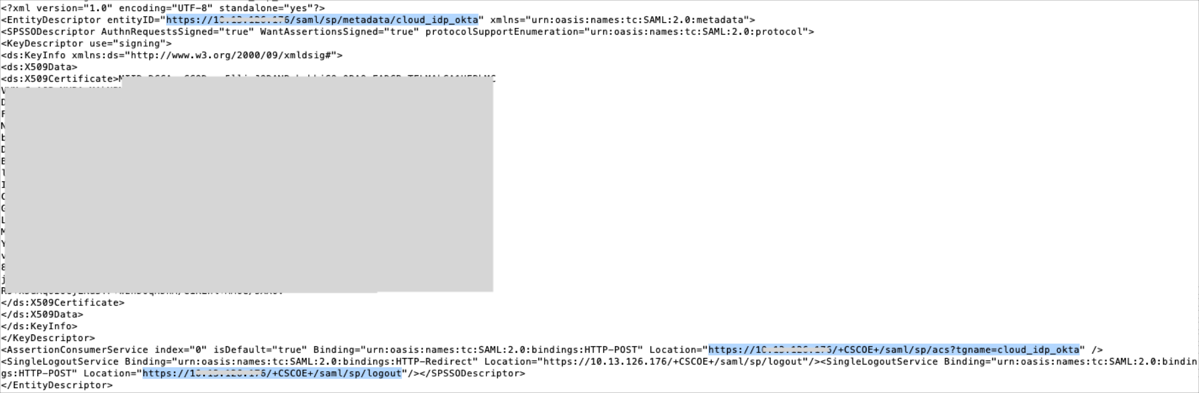
Get the Assertion Consumer Service URL, SP Entity ID and Single Logout Service URL values:
Get the ASA's SAML SP metadata:
ciscoasa(config)# show saml metadata cloud_idp_okta
Copy the entityID, AssertionConsumerService and SingleLogoutService attributes values:
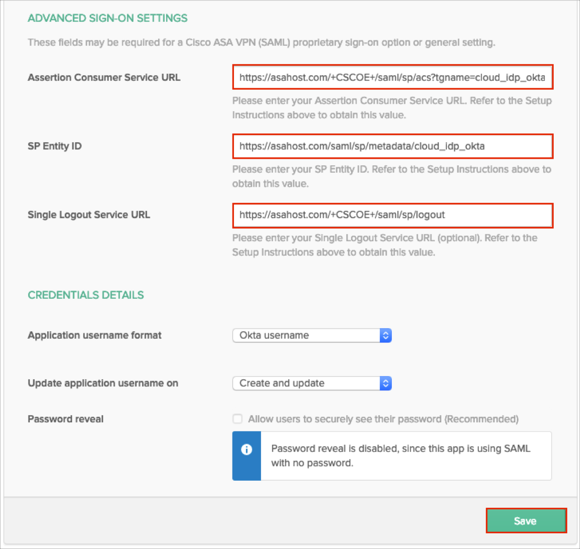
In Okta, select the Sign On tab for the Cisco ASA VPN (SAML) app, then click Edit.
[OPTIONAL: Force Authentication]: Uncheck Disable Force Authentication: box.
[OPTIONAL: SLO]: : Check Enable Single Logout box and upload the certificate.crt file (step 4) as Signature Certificate:

Scroll down to the :ADVANCED SIGN-ON SETTINGS: section.
Enter the ACS URL, SP Entity ID and Single Logout URL (optional) values from step 11 into the corresponding fields.
Click Save:
Done!
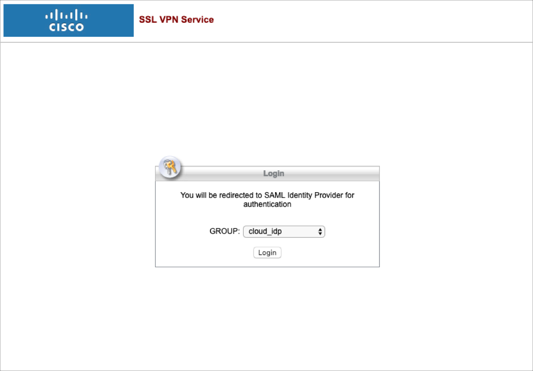
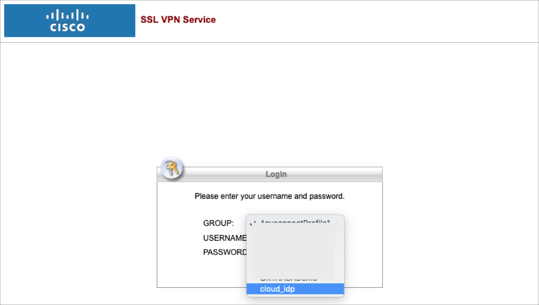
Open your Cisco ASA VPN login URL.
Select cloud_idp alias from the GROUP dropdown list:
Click Login: