The Okta/Ceridian SAML integration currently supports the following features:
For more information on the listed features, visit the Okta Glossary.
Sign into your Ceridian account.
Find the single sign on configuration section and enter the following information:
Identity Provider Issuer/Entity Id: Copy and paste the following:
Sign in to the Okta Admin app to have this variable generated for you.Identity Provider HTTP POST URL: Copy and paste the following:
Sign in to the Okta Admin app to have this variable generated for youCertificate: Download and save, then upload the following certificate:
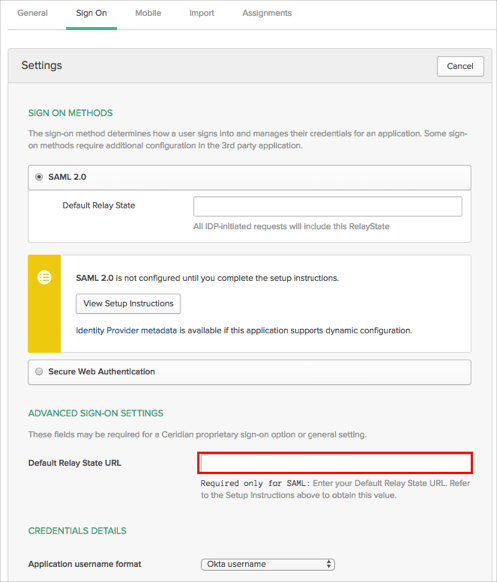
Sign in to the Okta Admin app to have this variable generated for youIn Okta, select the Sign On tab for the Ceridian SAML app, then click Edit.
Enter your Default Relay State URL into the corresponding field.
For example: https://sss2.ceridian.com/ClassicSelfServiceWIF/Default.aspx
Click Save:
Done!
The following SAML attributes are supported:
| Name | Value |
|---|---|
| http://claims.ceridian.com/InView/2010/version1.0/Name | user.userName |