The Okta/Celonis SAML integration currently supports the following features:
For more information on the listed features, visit the Okta Glossary.
Login to Celonis.
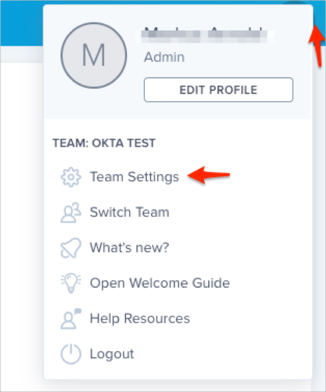
Click on your icon, then select Team Settings:
Navigate to Single Sign-On, then click Add SSO Provider:

Select SAML:

Follow the steps below:
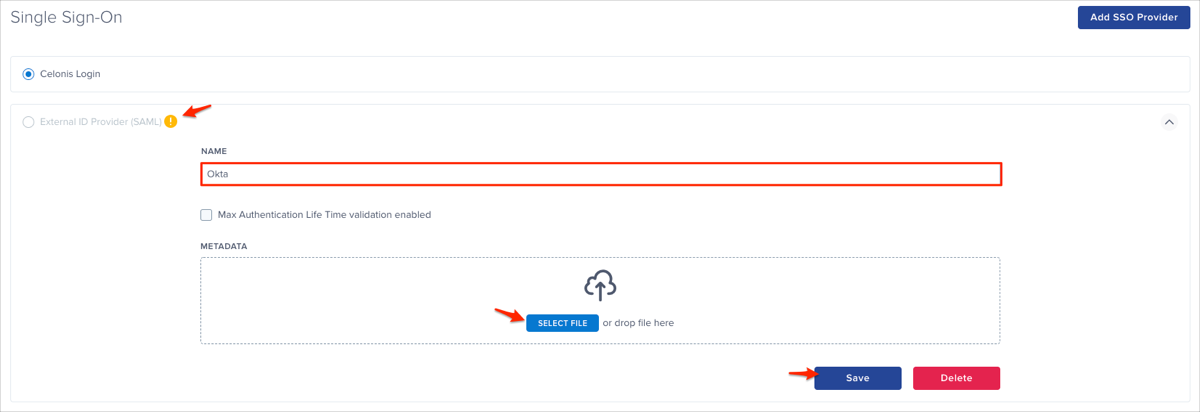
Expand the External ID Provider (SAML) section.
NAME: Enter Okta.
METADATA: Download and save, then locate and upload the following metadata file:
Sign into the Okta Admin dashboard to generate this value.
Click Save:
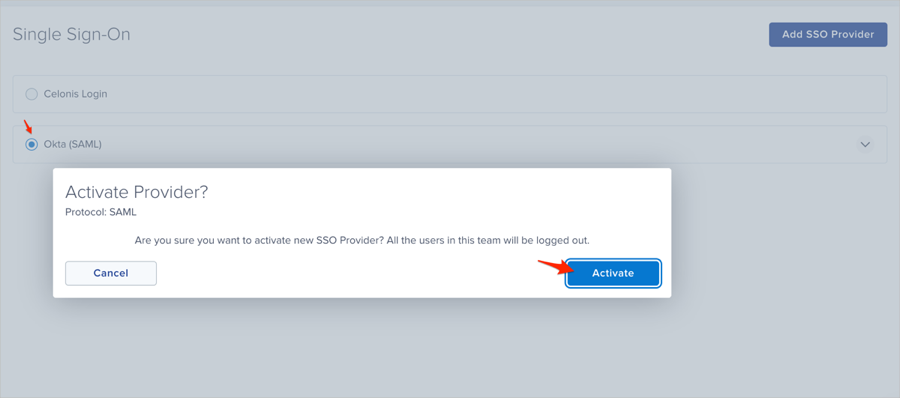
Select Okta (SAML), then click Activate:
Done!
Make sure that you entered the correct value in the Subdomain field under the General tab in Okta. Using the wrong value will prevent you from authenticating via SAML to Celonis.
The following SAML attributes are supported:
| Name | Value |
|---|---|
| user.userName |
Go to: https://[your-subdomain].celonis.cloud/ URL.