The Okta/Buildkite SAML integration currently supports the following features:
For more information on the listed features, visit the Okta Glossary.
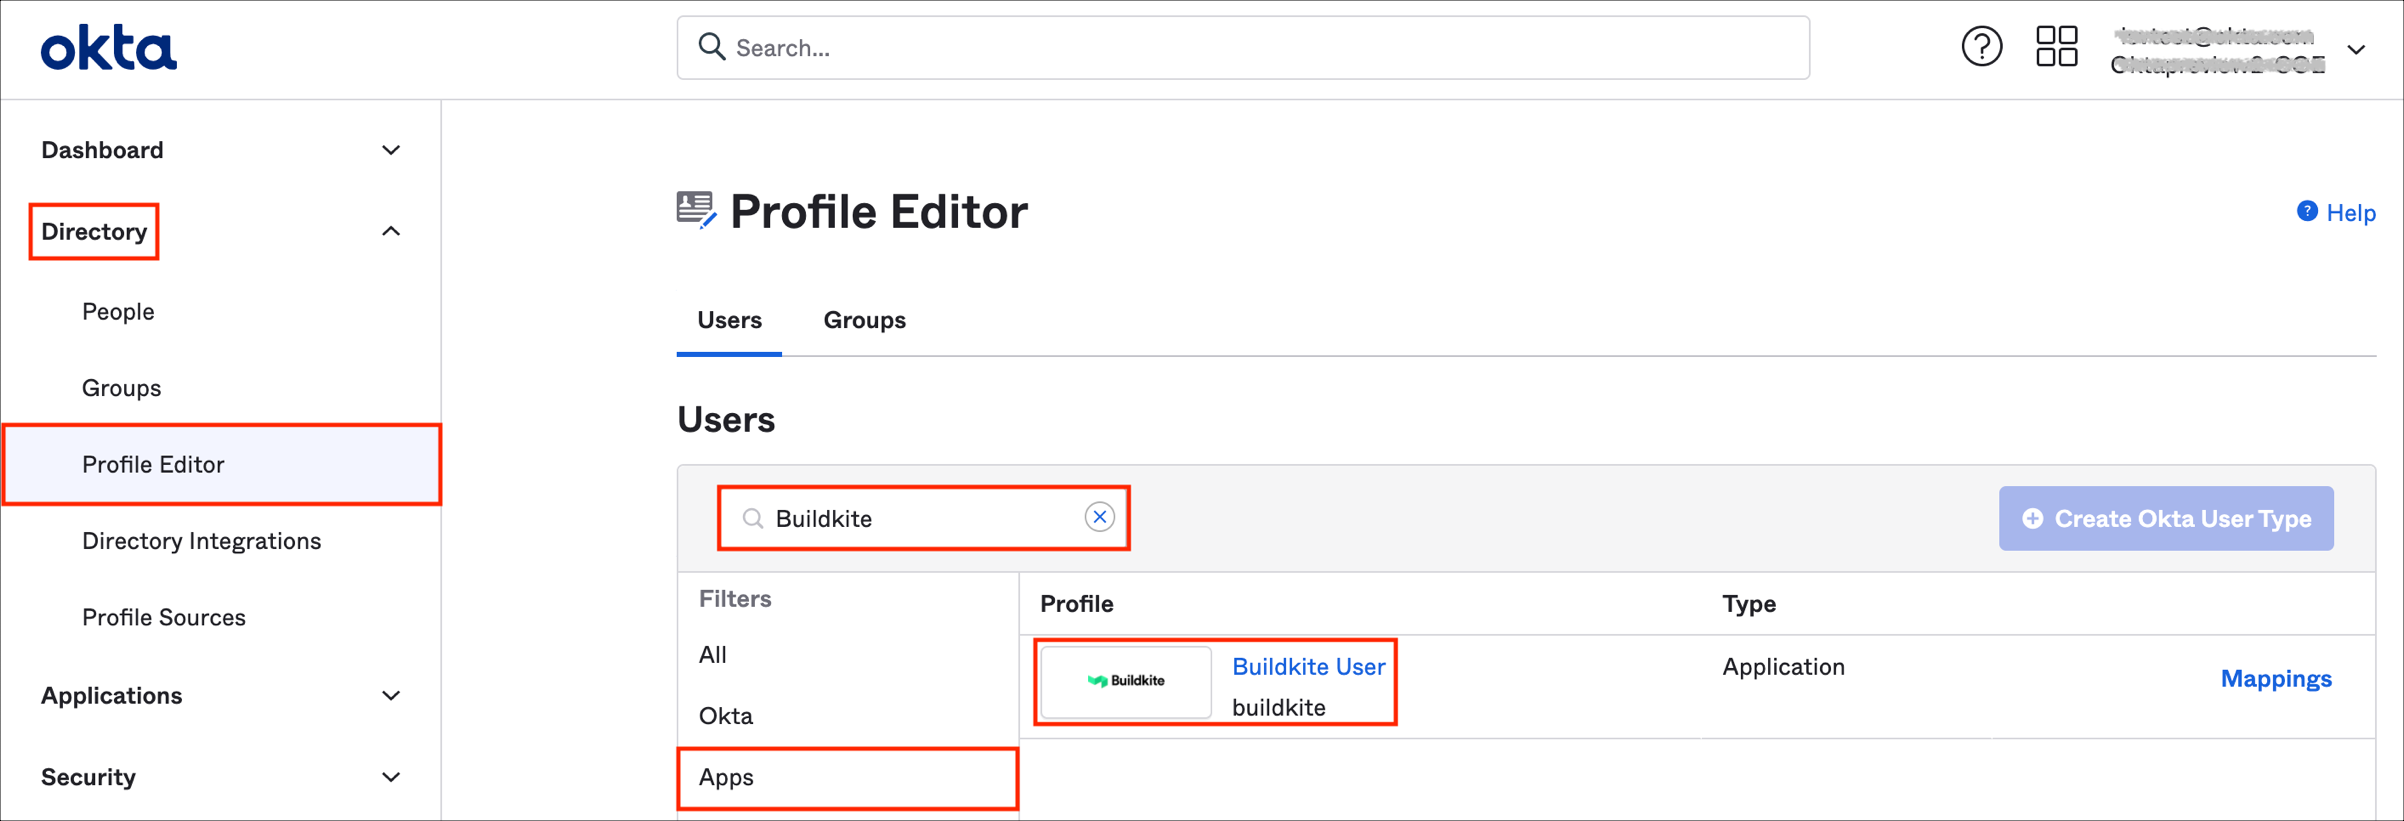
Add the custom attributes admin and teams to the Buidkite application. In Okta, go to Directory > Profile Editor.
Search for your Buildkite app, then click the application icon:
Click Add Attribute, then enter the following:
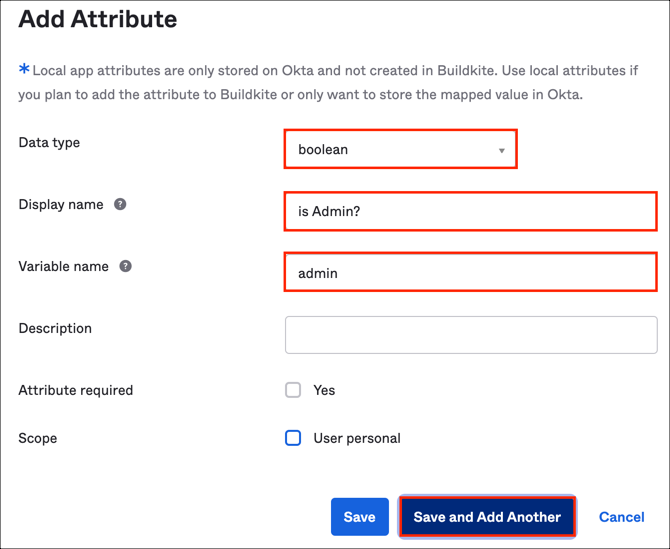
Note:
Scope: If you check user personal, the current attribute will be available once you assign a single user to the Buildkite app and will not be available once you assign a group to the Buildkite app.
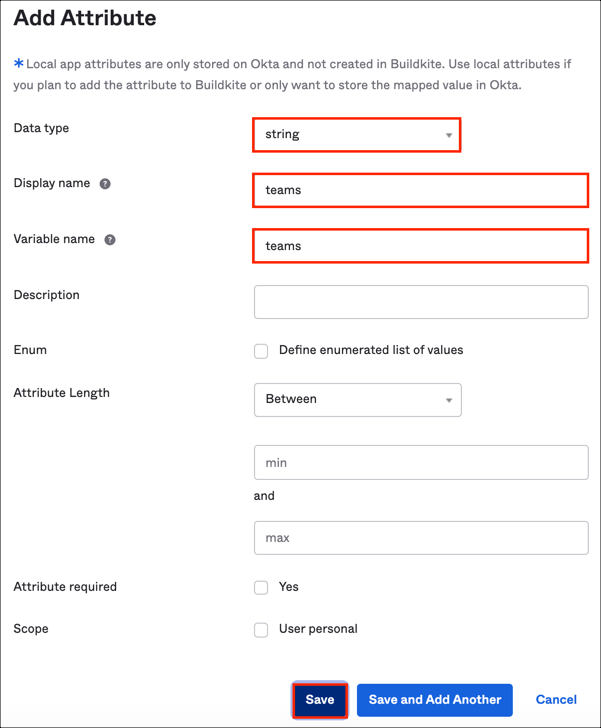
Enter the following:
Go to the Buildkite application configuration and assign the user on the Assignments tab.
Now you need to specify the admin and teams attributes:
Log in to your Buildkite organisation as an administrator.
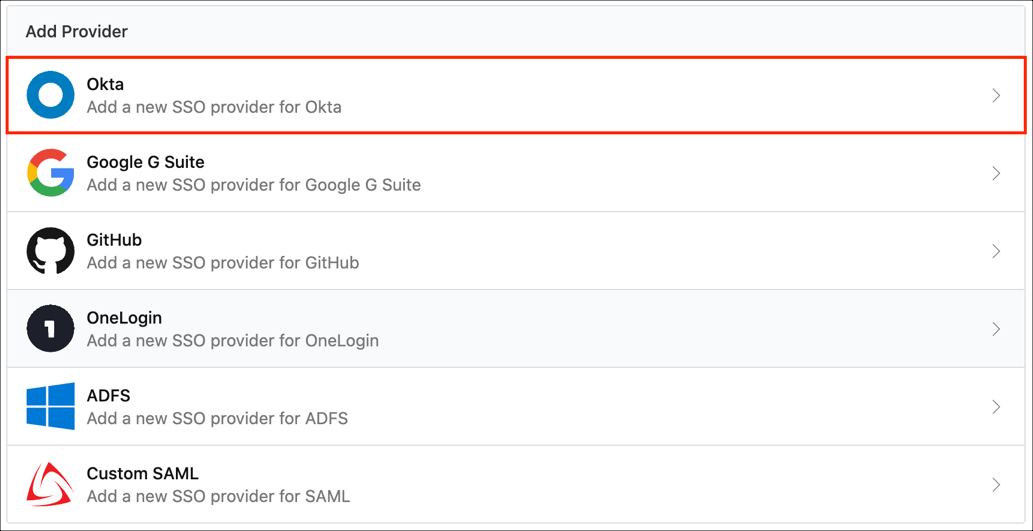
Go to Settings > Single Sign On.
Choose the Okta provider.
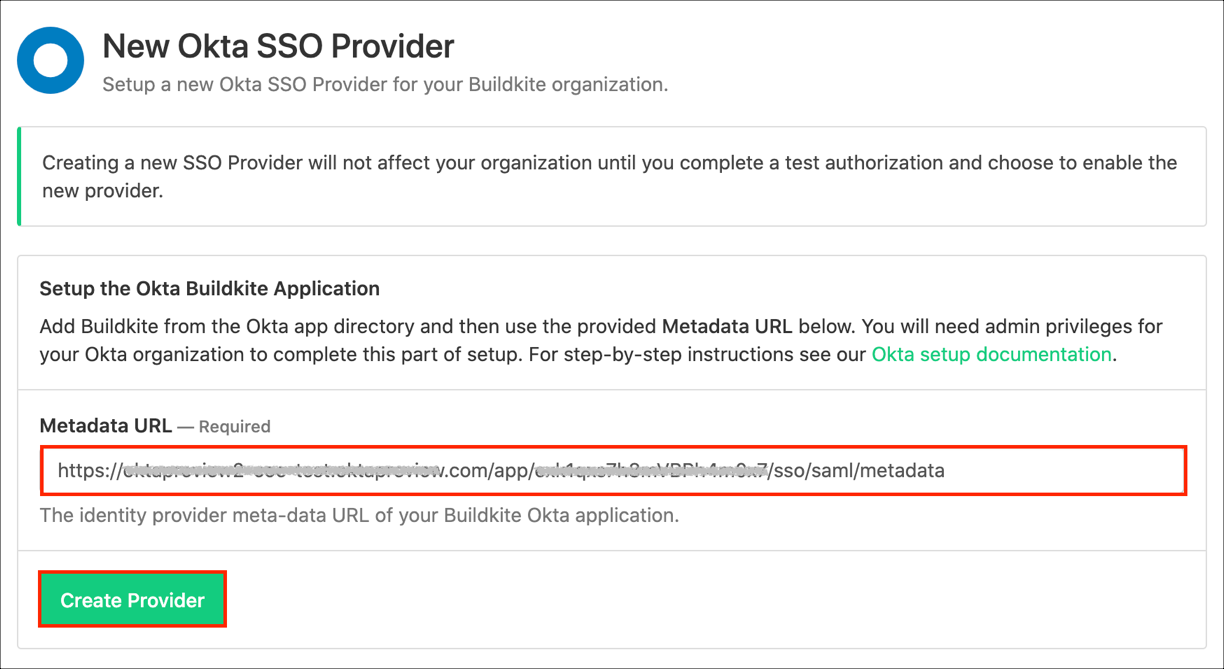
In the New Okta SSO Provider configuration, copy and paste the following into the Metadata URL field:
Sign into the Okta Admin dashboard to generate this value.
Click Create Provider.
Done!
The following SAML attributes are supported:
| Name | Value |
|---|---|
| name | user.firstName user.lastName |
| admin | appuser.admin |
| teams | appuser.teams |
Go to https://buildkite.com/sso/[yourOrganizationName]
Note: You can get your organization name from the Buildkite URL.
For example: If you log into https://buildkite.com/organizations/acme/welcome/repository-provider
Your organization name is acme and your SP-initiated SSO URL is https://buildkite.com/sso/acme
Click Sign in to Okta.